



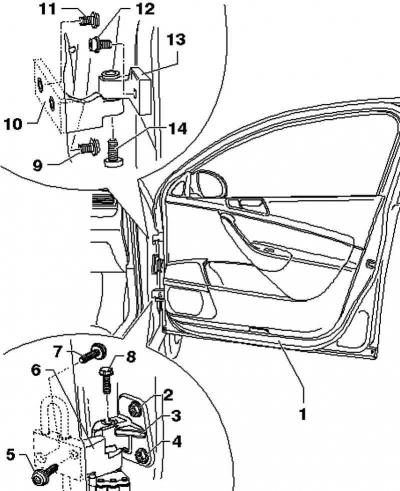
Fig. 8.31. Door adjustment diagram
Note: The vehicle must be on its wheels to adjust the front door.
Note: The door is adjusted correctly if, when closed, there are equal gaps on all sides, the door does not protrude outward, is not recessed inward, and is flush with other body parts.
To adjust or check clearances
After installation or adjustment, take measures to protect the hinge and screws from corrosion.
To properly adjust the door, you must loosen the door hinge on the rack. Other measures, such as pulling the door up, are ineffective. The door will sag again under subsequent load.
In this case, use a special tool - a key to adjust the doors.
Adjust the lock bracket:
Adjusting the lock bracket
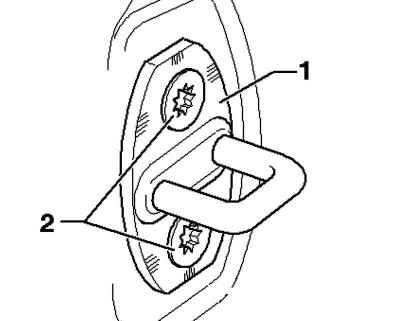
Fig. 8.32. Lock loop
Loosen the lock loop 1 by unscrewing the screws 2 on the pillar B (Fig. 8.32).
Note: The adjustment description is given only for the right front door. The adjustment of the left front door is performed in the same way.
Note: The front door should close completely without any additional effort and should not have any play.
Note: After adjusting the lock bracket, the front door should not be pushed up or down.
Note: The lock hinge can be adjusted if the front door is not flush with the rear door.
Adjust the front door by adjusting the lock hinge 1 so that the front door is flush with the rear door when closed (the noise at speed will disappear).
Tighten screws 2 of lock bracket 1.
Tightening torques: bolts 2: 20 Nm.
Visitor comments