
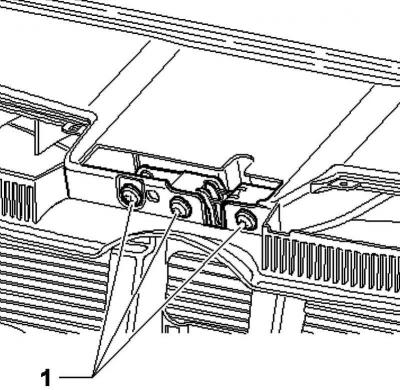
Pic. 8.25. Bonnet lock bolts
If you now loosen bolts 1, you can change and adjust the gaps of the hood (pic. 8.25).
Tightening torques: bolts 1 - 12 Nm.
Adjust the latch hook.
Stop adjustment
Loosen clamping screw 1 until the rubber stop is visible.
Note: The adjustment description is for the left stop. The right stop is adjusted in the same way.
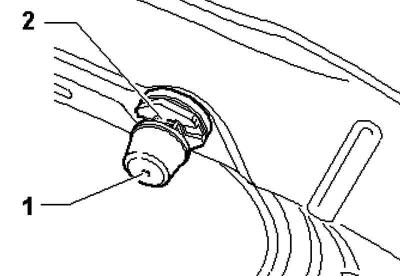
Pic. 8.26. Locking pusher and clamping screw
After that, remove the fixing pusher 2 from the adjustable stop (pic. 8.26).
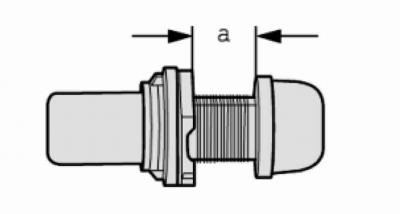
Pic. 8.27. Setting the gap between the clamping screw and the pusher
Install on the pusher dimension a - 12.5 mm (pic. 8.27).
Close the hood by pressing it lightly in the middle, but do not latch the lock.
Open the hood again.

Pic. 8.28. Clamp screw adjustment diagram
Screw in the clamping screw 1 of the adjustable stop to a depth of a – 25 mm (pic. 8.28).
Check for correct adjustment.
Visitor comments