



If the drive shaft is to be replaced with a new one, the vibration damper must be moved from the old drive shaft to the new one and must be reinstalled in its original position.
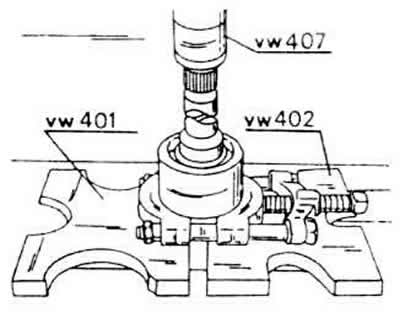
To remove the vibration damper, the drive shaft is placed under a press, the ball bushing is placed well underneath, and the drive shaft is pressed through the vibration damper.
The vibration damper is pressed onto the new drive shaft, with the latter being mounted on the other end. This should be done very carefully, as a certain dimension must be maintained between the end surface of the vibration damper and the end face of the constant velocity joint. This dimension is the same for all models described in this book and should be 541±1 mm.
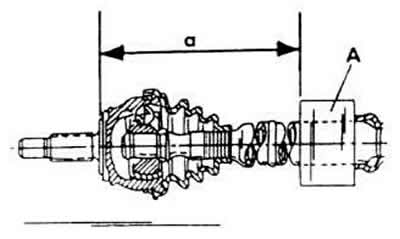
Therefore, measurements must be taken as the work progresses to ensure dimension (a). Only a vibration damper mounted in this manner functions correctly, i.e. the drive shaft vibration damper. It is best to first press the vibration damper in "shortly" and then continue pressing.
After installing the vibration damper, the inner constant velocity joint is pressed onto the shaft again and secured, and, accordingly, lubricated. The rubber cuffs are put back on the fastening strip.
View the original on this resource: VWmanual.ru
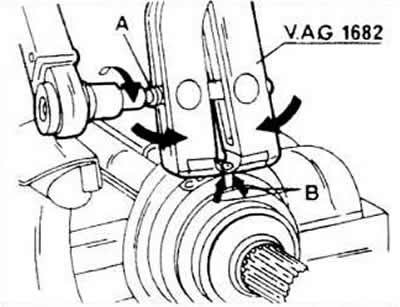
Volkswagen workshops use special clamping pliers to secure the cuff strips. If such pliers are not available, proceed in a similar manner. The pliers-type tool grips both ends of the strip at (B). By tightening the clamping device (A) with a torque wrench, the strip is pulled together until a tightening torque of 25 Nm is reached.
Visitor comments