
Removing
1. Pull up the hood opening handle 1, located in the footwell of the driver's side (see arrow in illustration).
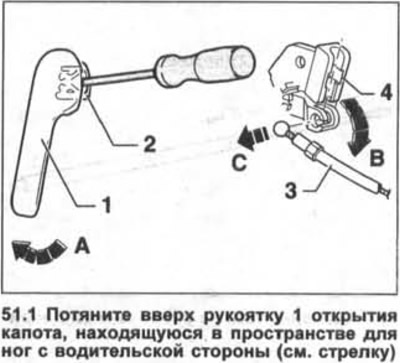
2. Pry with a screwdriver, pull out clip 2 a little and remove the handle (see illustration 51.1).
3. Disconnect the tip of the cable 3 of the drive from the bracket 4, on which the handle is mounted (see arrows B and C in illustration 51.1).
4 Disconnect the cable from the hood latch.
5. Release the cable connector 1 above the left headlight from the mount on the cross member 2 front (see illustration).
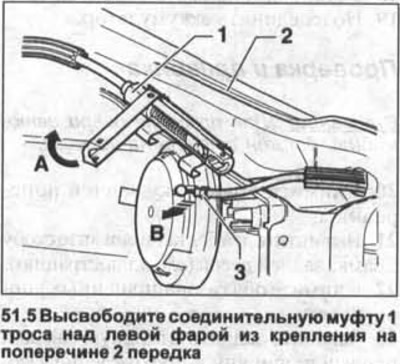
6. Open the coupling cover (see arrow A in illustration 51.5) and disconnect cable 3 (see arrow B).
7. Release the drive cable from the holders on the front cross member and on the wheel arch.
8. Fasten a twine to the tip of the drive cable and remove the cable from the passenger compartment, acting from the side of the engine compartment.
Attention! The twine remains in the cable hole on the bulkhead for ease of installation later.
Installation
9. Fix a cable in holders in a motor compartment.
10. Insert the end of the cable into the coupling, close it and fix it. When installing the end of the cable into the coupling, watch the position of the cable sheath. Further installation of the hood lock cable is carried out in the reverse order of removal.
Lastly, slide the handle clip on the bracket into place and slide the handle on.
11. Check the operation of the hood release mechanism before closing the hood.
Visitor comments