
Attention! Removal and installation of the power window motor are shown using the front door as an example. On the rear side door, the motor is removed and installed identically.
Removing
1. Remove the door upholstery.
2. Raise the door glass up and fix it in this position, for example, with adhesive tape or a plastic wedge.
3. Disconnect the battery.
4. Disconnect the plugs from the electric motor 1 of the power window by pressing their leashes (see arrows A) screwdriver while pushing it in the direction of arrow B.
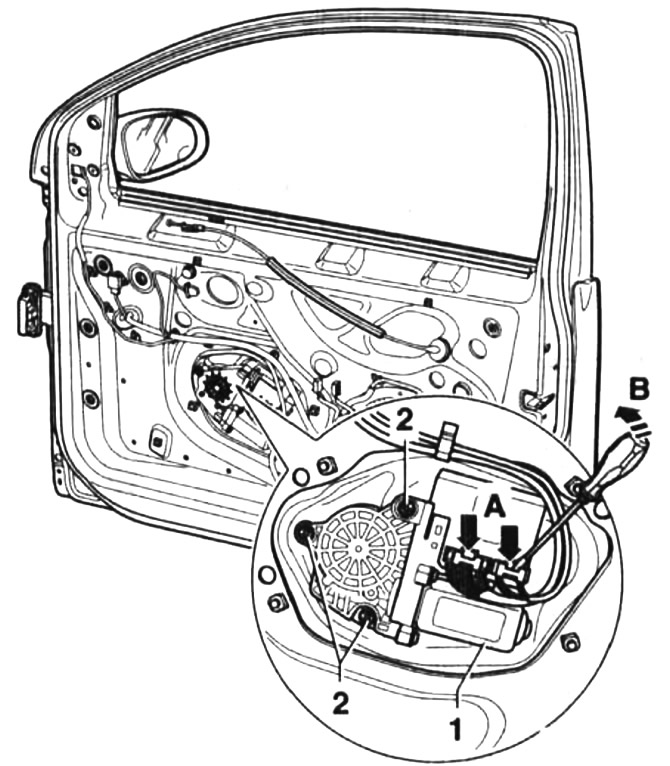
65.4. Disconnect the plugs from the electric motor 1 of the window lifter by squeezing their leashes (see arrows A) with a screwdriver, while pushing it in the direction of the arrow B
5. Unscrew three bolts 2 and remove the electric motor 1 together with the relay from the bracket (see illustration 65.4).
Attention! If the outer part of the door is removed, the electric motor can be removed together with the bracket, acting from the outside.
Installation
6. Install the power window motor in place, release the fixed glass and raise and then lower it to match the gear on the motor.
7. Tighten the motor mounting bolts to 3.5 Nm.
Attention! It is not necessary to apply more force when tightening, because in this case the plastic bushing will be damaged.
8. Connect the battery.
9. Connect the motor connectors and raise and lower the glass twice.
10. Reinstall the door upholstery.
Visitor comments