
Golf Cars
Removing
1. Open the tailgate 5 (see illustration).
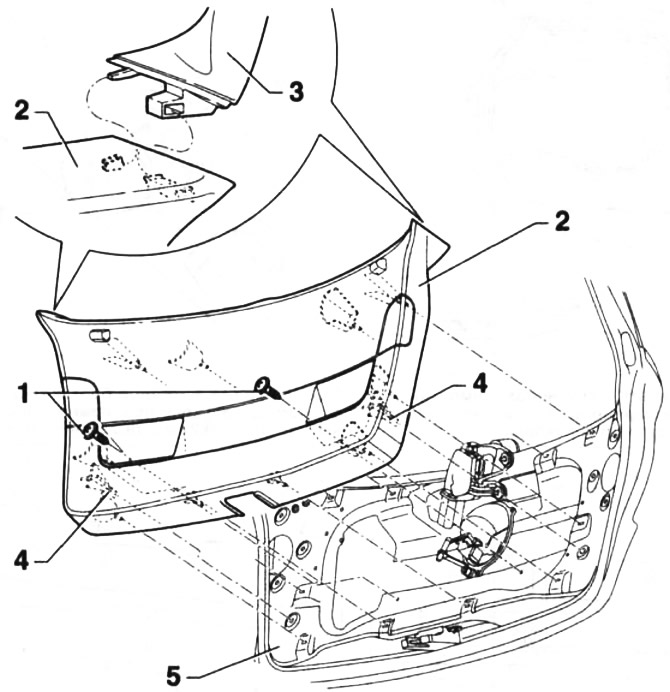
56.1. Upholstery of a back folding door. Golf Cars
1 - bolts
2 - lower part of the upholstery
3 - overlay opening for the rear window
4 - guides
5 - tailgate
2. Unscrew two bolts 1 from the recess on the door to open it (see illustration 56.1).
3. Insert a plastic wedge under the upholstery, eg HAZET 799-4, and release the fasteners that secure it. Detach the upholstery from the bottom.
4. Release the upholstery on both sides from under the lining 3 of the window opening (see illustration 56.1).
5. Remove the guides 4 from the mounting in the rear door (see illustration 56.1).
6. Remove upholstery 5 doors (see illustration 56.1).
Installation
7. Inspect the upholstery clips and, if necessary, replace damaged ones with new ones, and install them correctly.
Installation of an upholstery is carried out in sequence, return to removal. Make sure the upholstery clips are firmly seated in the holes in the door.
Window trim
Removing
8. Remove the bottom part of an upholstery of a door.
9. Insert a plastic wedge under the upholstery, e.g. HAZET 799-4 and release the fasteners 4 that secure it (see illustration).
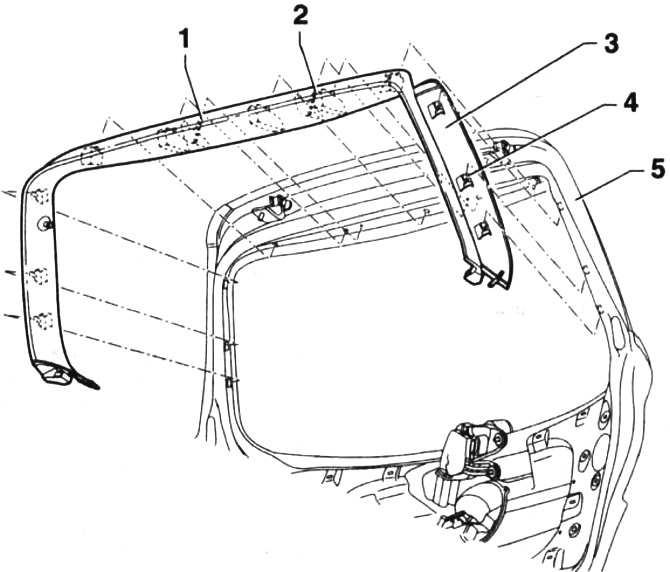
56.9. Rear window trim
1 - guide
2 - guide
3 - opening overlay
4 - clamps
5 - tailgate
10. Remove guides 1 and 2 from the mounting on the window frame (see illustration 56.9).
11. Remove the window opening trim from the tailgate 5 (see illustration 56.9).
Installation
12. Inspect the upholstery retainers and, if necessary, replace damaged ones with new ones, and install them correctly.
Installation of an upholstery is carried out in sequence, return to removal. Make sure that the fasteners fit snugly into the holes on the door.
Touran cars
Removing
13. Open the tailgate 5 (see illustration).
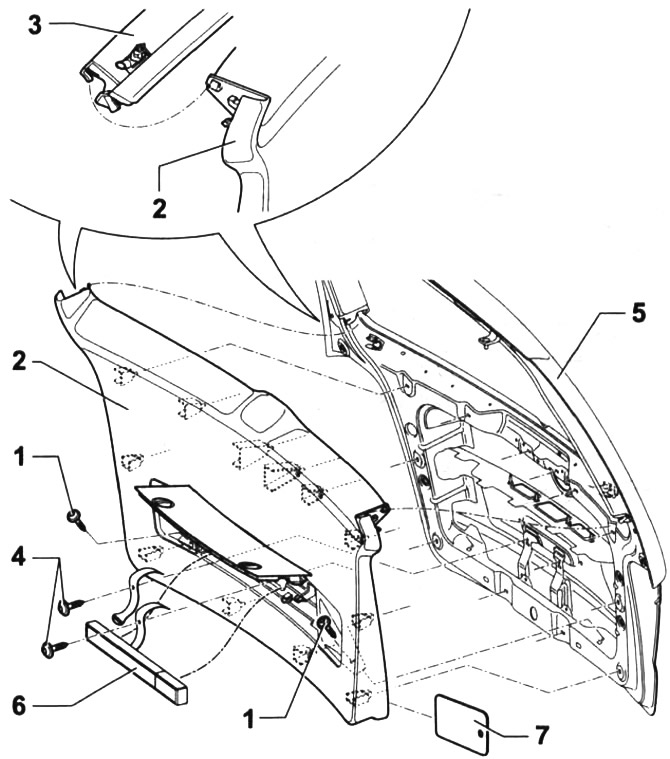
56.13. Upholstery of a back folding door. Touran cars
1 - bolts
2 - lower part of the upholstery
3 - overlay opening for the rear window
4 - bolts
5 - tailgate
6 - emergency triangle
7 - flat plastic wedge
14. Unscrew two bolts 1 from the recess on the door to open it (see illustration 56.13).
15. Open the cover on the upholstery and remove the emergency triangle 6 (see illustration 56.13).
16. Unscrew the two bolts 4 (see illustration 56.13).
17. Slide the plastic wedge 7 under the upholstery and release the clips that secure it. Detach the upholstery from the bottom.
18. Release the upholstery on both sides from under the lining 3 of the window opening (see illustration 56.13).
19. Remove guides 4 from the mount in the rear door (see illustration 56.13).
20. Remove upholstery from door 5 (see illustration 56.13).
Installation
21. Inspect the upholstery clips and, if necessary, replace damaged ones with new ones, and install them correctly.
Installation of an upholstery is carried out in sequence, return to removal. Make sure the upholstery clips are firmly seated in the holes in the door.
Window trim
Removing
22. Remove the bottom part of an upholstery of a door.
23. Insert a plastic wedge 4 under the upholstery and release the clamps 2 that secure it (see illustration).
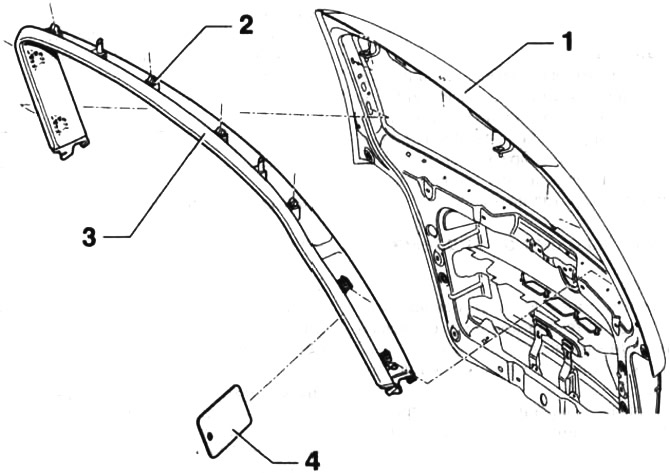
56.23. Rear window trim
1 - tailgate
2 - clamps
3 - opening overlay
4 - flat plastic wedge
24. Remove the window opening trim from the tailgate 1 (see illustration 56.23).
Installation
25. Inspect the upholstery clips and, if necessary, replace damaged ones with new ones, and also install them correctly.
Installation of an upholstery is carried out in sequence, return to removal.
Make sure that the fasteners fit snugly into the holes on the door.
Visitor comments