
Removing
1. Disconnect the battery.
2. Open the trunk lid and remove the trunk lock cover.
3. Remove the cover from the handle 3 emergency trunk opening (see illustration).
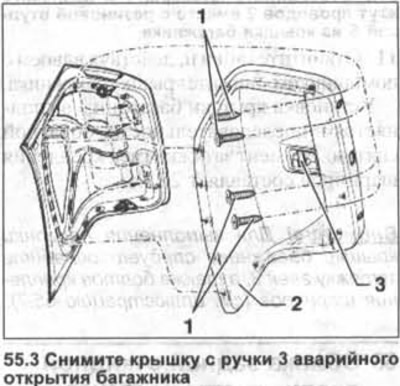
4. Remove the four screws 1 (see illustration 55.3).
5. Release upholstery 2 from the clips, under the virgin screwdriver (see illustration 55.3).
6. Disconnect the lock drive cable from the handle 3 of the trunk emergency opening and remove the upholstery 2 from the trunk lid (see illustration 55.3).
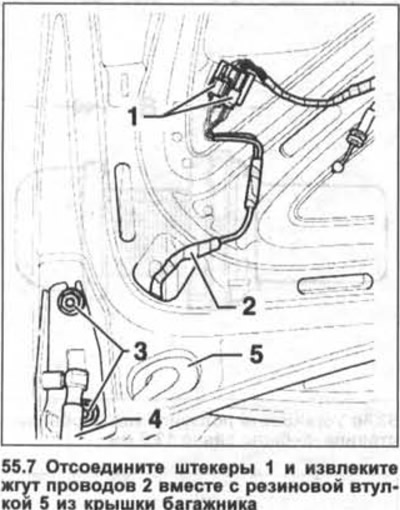
7. Disconnect the plugs 1 and remove the wiring harness 2 together with the rubber bushing 5 from the trunk lid (see illustration).
8. Mark with a marker to facilitate subsequent installation the mounting position of the hinges on the trunk lid.
9. Loosen two nuts on both sides of the trunk lid 3 (see illustration 55.7). Do not unscrew nuts completely.
10. Ask an assistant to support the trunk lid and disconnect both gas-filled stops 4 from the upper mounting supports (see illustration 55.7).
11. Unscrew the nuts and, working together with an assistant, remove the trunk lid.
Installation
Installation of a cover of a luggage carrier is carried out in sequence, return to removal. The tightening torque for the hinge nuts is 22 Nm.
Attention! To fit the trunk lid, loosen the nuts 3, as well as the hinge bolts (see illustration 55.7).
Visitor comments