



Removal the outer door handle mounting bracket
1. Remove the switch (cylinder) from the lock.
2. Remove the outside door handle.
3. Remove the outer part of the door.
4. Remove the safety rubber 4 from the guide pin 2 and from the holes 3 for the pins (see illustration).
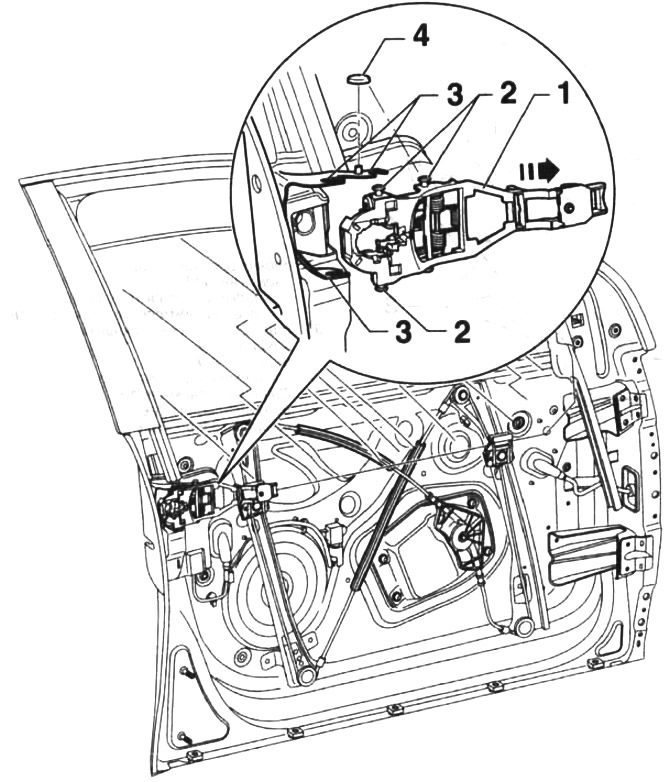
62.4. Front door outer handle mounting bracket
5. Release the fastening bracket 3 from the holders by moving it in the direction of the arrow (see illustration 62.4).
Installation
6. Insert the bracket into the cavity so that the guide pins 2 enter the holes 3 (see illustration 62.4).
7. Put the safety rubber bands 4 on the guide pins (see illustration 62.4).
Further assembly is carried out in the reverse order of removal.
Attention! Removal and installation of the outer door handle bracket on the rear door are performed identically.
Removal the lock
8. Remove the outer lock handle mounting bracket.
9. Disconnect plug 5 (see illustration).
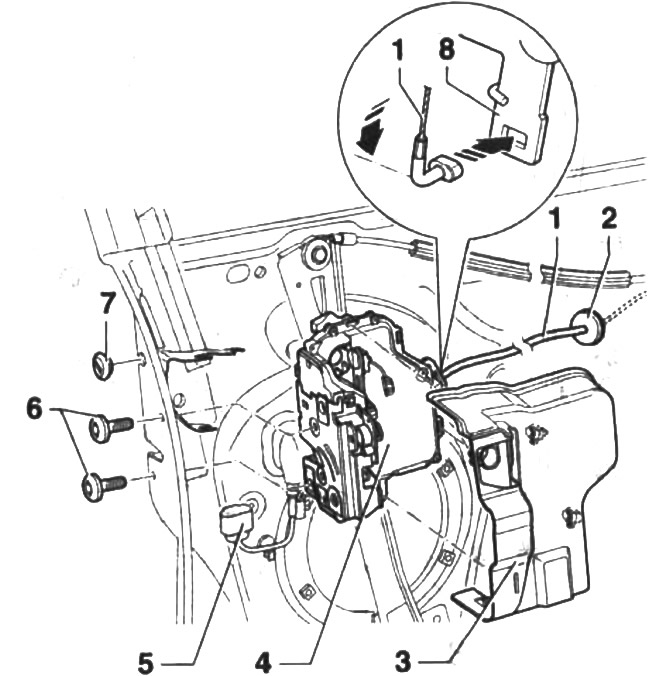
62.9. Removing the front door lock
1 - traction cable
2 - spacer ring
3 - lock mechanism cover
4 - door lock
5 - plug
6 - two mounting bolts. Tightening torque 18 Nm
7 - Lock screw plug
8 - guide lever
10. Unscrew two bolts 6 (see illustration 62.9).
11. Turn the cable 1 of the traction rod by 90° and remove it from the hole on the guide lever 8 (see illustration 62.9).
Caution! The cable is disconnected in the opposite direction. The arrow in the illustration shows the installation.
12. Remove the door lock. The lock is installed in the reverse order of removal.
The bolts that secure it are tightened with a force of 18 Nm.
13. Check the operation of the lock without closing the door.
Attention! Removal and installation of the lock on the rear side door are performed identically.
Visitor comments