



Contents: Removal ↓ Installation ↓
Removal
1. Open the door.
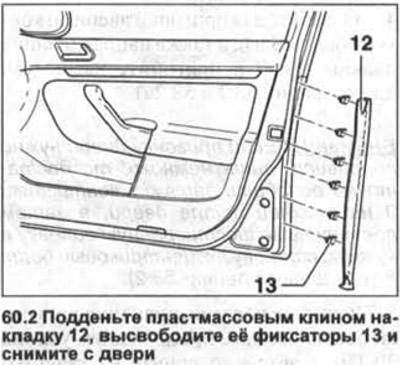
2. Use a plastic wedge to pry up the trim 12, release its fasteners 13 and remove it from the door (see illustration). Start detaching the trim from the bottom.
3. Remove the door lock switch (cylinder) from the outside handle, see the relevant chapter.
4. Remove the outside door opening handle.
5. Unscrew bolt 14 securing support bracket 15 of the outer door handle (see illustration).
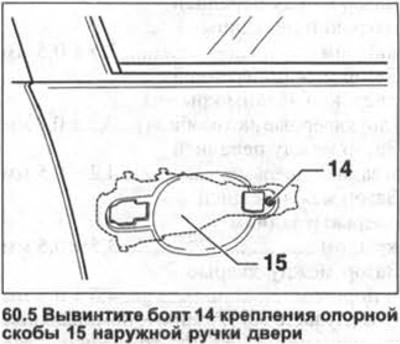
Please note: The support bracket is located under the outside of the door.
6. Unscrew bolts 3.5 and 6 (see illustration 59.0).
Attention! Three types of bolts are used to fasten the outer and inner parts of the door, which are not interchangeable and must be installed only in their mounting locations.
7. Carefully separate the outer 1 and inner 7 parts of the door (see illustration 59.0).
Installation
8. Fasten the outer 1 part of the door to the inner 7. Make sure that the guide pins of the fastening strips 4 and 8 enter the corresponding holes on the inner part of the door (see illustration 59.0).
9. Screw bolts 3, 5 and 6 into the holes provided for them (see illustration 59.0).
10. Tighten bolts 3 and 5 to 10 Nm, and bolts 6 to 14 Nm (see illustration 59.0).
Subsequent assembly is carried out in the reverse order of removal.
Visitor comments