



Front door window lifter
Removal
1. Remove the outer part of the door.
2. Unscrew the mounting bolts and remove the door reinforcement panel.
3. Remove the glass.
4. Unscrew bolts 2 that secure bracket 5 (see illustration).
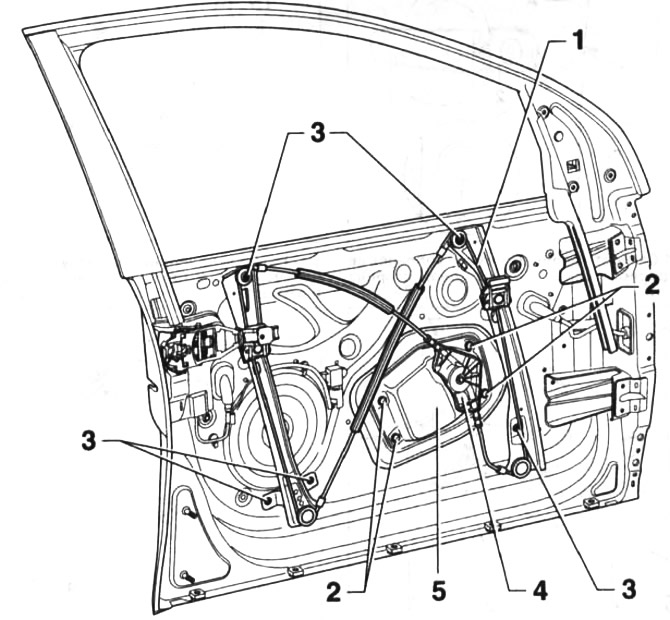
66.4. Front door window lifter
1 - window lifter
2 - 4 mounting bolts. Tightening torque 8 Nm
3 - bolts. Tightening torque 8 Nm. Two-door cars have 4 of them, and four-door cars have 5 of them.
4 - window lifter motor
5 - bracket
5. Unscrew the 3 window regulator mounting bolts (see illustration 66.4).
6. Remove the window regulator together with the bracket and electric motor from the inside of the door.
7. Disconnect the power connectors of the electric motor 4 of the window lifter (see illustration 66.4).
Installation is performed in the reverse order of removal.
Before installing the outer part of the door, check the functionality of the window lift.
Rear door window lifter
Removal
8. Remove the outer part of the door.
9. Unscrew the mounting bolts and remove the door reinforcement panel.
10. Remove the glass.
11. Unscrew bolts 2 that secure bracket 3 (see illustration).
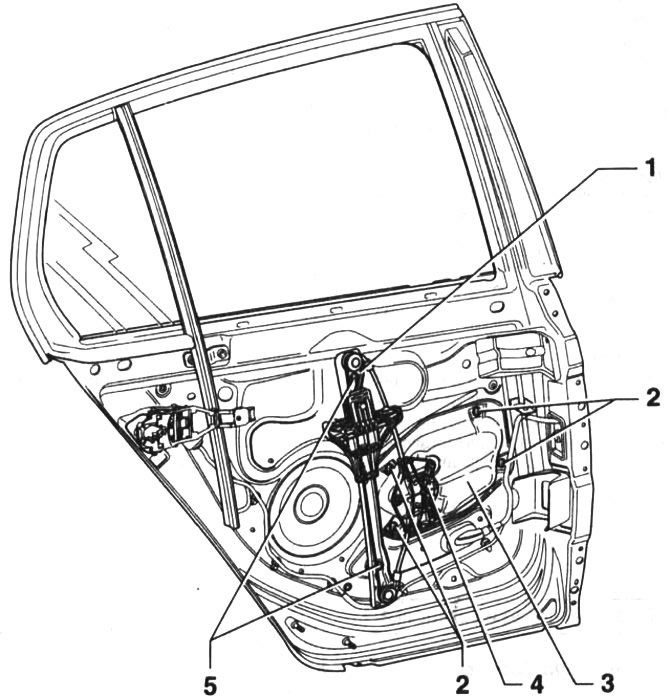
66.11. Front door window lifter
1 - window lifter
2 - 4 mounting bolts. Tightening torque 8 Nm
3 - bracket
4 - window lifter motor
5 - two bolts. Tightening torque 8 Nm
12. Unscrew the 5 window lifter mounting bolts (see illustration 66.11).
13. Remove the window regulator together with the bracket and electric motor from the inside of the door.
14. Disconnect the power connectors of the electric motor 4 of the window lifter (see illustration 66.11).
Installation is performed in the reverse order of removal.
Before installing the outer part of the door, check the functionality of the window lift.
Visitor comments