
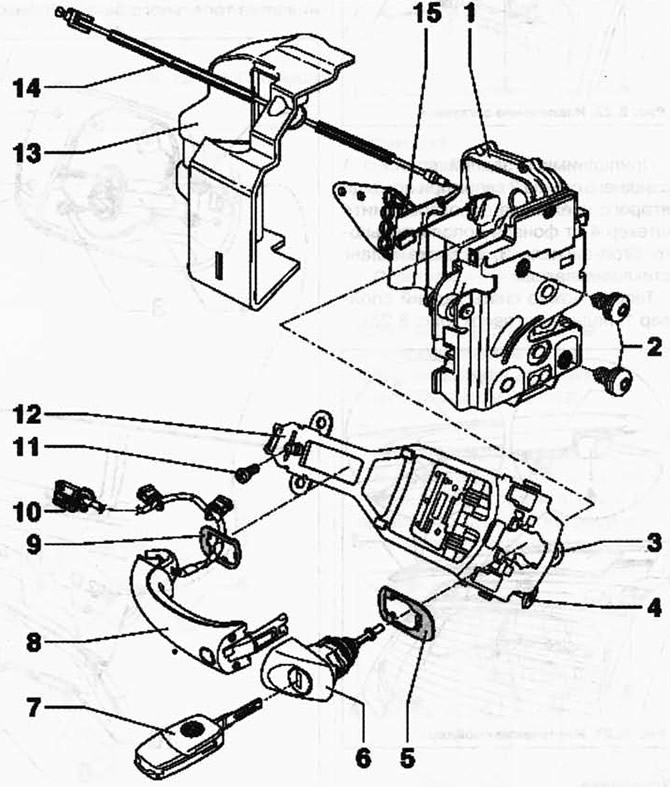
Pic. 8.27. Handle and door lock:
1 - door lock; 2 - screw; 3 - fixing screw; 4 - a bolt with an internal asterisk; 5 - gasket; 6 - body of the lock cylinder; 7 - key; 8 - door handle; 9 - gasket; 10 - touch sensor wire (kessy); 11 - screw; 12 - mount; 13 - plug; 14 - flexible cable; 15 - corner-holder.
Removing
Door handle with wiring for the Kessy system.
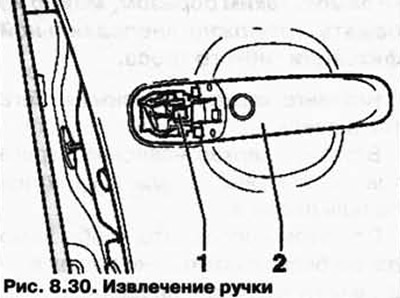
Remove clamp 1 from the door handle.
Turning slightly, remove the door handle 2 from the door (pic. 8.30).
Installation
Insert the assembly tool through the hole in the outer door panel! 10118 at the door (pic. 8.31).

To improve visibility, illuminate the inside of the door with a flashlight.
Hook spring A with a mounting tool.
Pull the installation tool B and hang the spring on the hook of the door lock.
The door release lever will be locked.
Insert the handle into the door.
Put on the clip 1 and fix it in the door handle 2 (pic. 8.30).
NOTE: Door handle 2 must be pressed against the outer skin of the door during installation. Pulling on the handle can break the locking of the opening lever.
Install the lock cylinder housing.
In conclusion, it is necessary to check the operation of the door handle and lock with the door open, since if the flexible cable is incorrectly adjusted and fixed, the door may not open.
Visitor comments