
English Русский
Български
Беларускі
Український
Српски
Hrvatski
Română
Polski
Slovenský
Magyar
  |  Articles  |  Sitemap  |  Contacts  |    |
Car maintenance Ford Car maintenance Hyundai Car maintenance Chevrolet Car maintenance BMW Car maintenance Audi Car maintenance Opel Car maintenance AvtoVAZ
VWmanual.ru


Main   Passat   Golf   Polo   Touareg   Tiguan   Sharan   Transporter   Others  
Golf 1 (1974-1984, diesel) Golf 1 (1974-1984, petrol) Golf 2 (1984-1993, petrol) Golf 2 (1984-1993) Golf 3 (1991-1997) Golf 4 (1997-2004) Golf 5 (2003-2008)

Dismantling and installation of box 02A (VW Golf 3)

  • Main
  • Golf
  • Golf 3
  • Transmission
  • Gearbox and drive shafts
  • Dismantling and installation of box 02A
            0


Contents: Removal ↓ Installation ↓

Removal


The gearbox can be removed from the underside of the car, so the body must be properly supported on jacks. A mobile car jack is required to support the gearbox. It does not matter how the body is supported on jacks, but it must always be taken into account that powerful jack stands must be installed under the frame.

Disconnect the negative terminal cable from the battery. If a radio station is installed, you must know the anti-theft protection system code. Before doing this, turn off the ignition (you need to wait 20 seconds after turning off).

Place a car jack under the transmission. Even better, you can lift the engine out of its mounts using a hoist and cable.

Be sure to disconnect all electrical cables from the transmission.

Disconnect the gear shift cables from the gearbox side and unscrew the bracket on the box wall.

To remove the clutch receiving cylinder, you need to unscrew the shift cable with the handle from the wall of the gearbox.

Disconnect the tachometer coil spring from the gearbox.

Remove the bolts between the engine and gearbox on the top side.
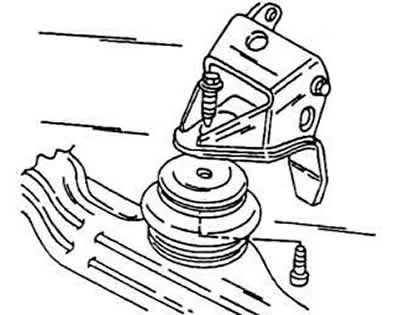
Remove the bolts between the engine and gearbox on the top side.


Unscrew the stand and the rubber-metal support.
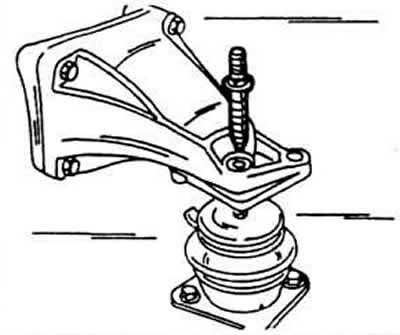


Unscrew the stand and the rubber-metal support.


Unscrew the bolt from the lower rubber-metal support. Since the anti-lock braking system is installed, access to these bolts is quite difficult. If this is still necessary, then it is necessary to remove the expansion tank of the cooling system. After this, carefully, using a replaceable socket head of a wrench with an extension and a joint with a crosspiece, unscrew the bolts.

Remove the front bracket bolt.

Now, using a lifting mechanism, lift the engine out of the suspensions. Make sure that no part remains under mechanical stress or force.

Remove the starter and front bracket.

Move the power steering hoses to the rubber-metal supports of the front bracket and secure them to them.

Unscrew the auxiliary frame counterweight.

If there is a thermal insulation sheet installed for the inner right constant velocity joint, unscrew it from the engine.

Unscrew the left and right drive shafts on the inside. It is essential to use the correct set of wrenches for these bolts, as they have multi-tooth heads with internal slots.

Turn the wheels to the right until they stop. Tie the shafts securely with a cord or wire in an appropriate manner to keep them out of the way.


The original text is available on the portal: VWMANUAL
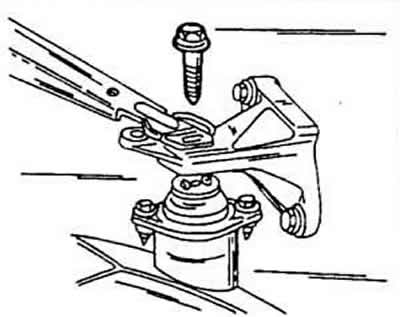
Turn the wheels to the right until they stop. Tie the shafts securely with a cord or wire in an…


Unscrew the gearbox suspension supports and the suspension bracket from the gearbox. Press the engine and gearbox from the front end and unscrew the lower bolt from the suspension bracket.

Unscrew the cover plate under the flywheel housing.

Remove all lower bolts between the engine and transmission.

Using a tire lever, pry the transmission away from the engine and remove the transmission. This requires two people.

Carefully place the gearbox on the floor.

Installation


The gearbox is installed in the reverse order of gearbox removal, observing the following points.

Apply graphite powder to the fine splines of the drive shaft.

Press the clutch release lever towards the gearbox housing and secure it with a 22mm long M8 bolt. After installing the gearbox, remove this bolt and tighten the hole with a plug.

Mount all gearbox and engine mounts without mechanical stress.

Establish a connection.

Tighten the bolts between the engine and gearbox to a torque of 80 Nm. All other tightening torques are given in the tables of dimensions and adjustments.

This article is available at russian, bulgarian, belarusian, ukrainian, serbian, croatian, romanian, polish, slovak, hungarian
The text has been checked: Medvedeva Elena

Share information:

Previous articles
Gearbox and differential adjustment
Gearbox assembly
Checking gearbox parts
M5 gearbox disassembly
Dismantling and installation of the M5 box
Gearbox. General information
Next articles
Disassembling the gearbox 02A
Automatic four-speed gearbox. General information
Removal an automatic transmission
Checking the oil and working fluid levels in the automatic transmission and final drive
Front drive shafts
Dismantling and installation of the drive shaft


Similar articles from other manuals for VW cars:
Dismantling and installation of the camshaft Transporter T3 (1979-1992)
Dismantling and assembly of the primary shaft Caddy 3 (2003-2010)
Link to this page in different formats


Visitor comments


No comments yet


How much will 34 + 29 =


Golf 5 
  • General information
  • User manual
  • Maintenance
  • Troubleshooting
  • Power unit
  • Engine repair
  • Cooling and ventilation system
  • Fuel system
  • Ignition system
  • Transmission
  • Clutch
  • Mechanical gearbox
  • Automatic gearbox
  • Chassis
  • Brake system
  • Car suspension
  • Steering
  • Body
  • Interior (internal elements)
  • Exterior (external elements)
  • Doors and covers
  • Electrical equipment
  • Power devices
  • Washers and wipers
  • Lighting and appliances
  • Electrical circuits
Golf 4 
  • General information
  • User manual
  • Weekly checks
  • Maintenance
  • Power unit
  • Petrol engines
  • Diesel engines
  • Cooling system
  • Fuel system (petrol)
  • Control system (petrol)
  • Fuel system (diesel)
  • Exhaust system
  • Transmission
  • Clutch
  • Car gearbox
  • Drive shafts
  • Chassis
  • Car suspension
  • Steering
  • Wheels and tires
  • Brake system
  • Body
  • Exterior (external elements)
  • Interior (internal elements)
  • Ventilation and heating
  • Car doors and sunroof
  • Washers and glass cleaners
  • Electrical equipment
  • Power devices
  • Lighting and appliances
  • Electrical circuits
Golf 3 
  • Petrol engine
  • Engine repair
  • Lubrication system
  • Cooling system
  • Ignition system
  • Diesel engine
  • Engine repair
  • Diesel injection system
  • Pre-glow system
  • Transmission
  • Clutch
  • Gearbox and drive shafts
  • Chassis
  • Steering
  • Wheels and suspension
  • Brake system
  • Electrical equipment
  • Lighting and appliances
  • Electrical circuits
Golf 2 
  • General information
  • Introduction to guide
  • User manual
  • Petrol engines 1.3 l
  • Engine repair
  • Lubrication system
  • Cooling system
  • Carburetors
  • Supply system
  • Ignition system
  • Petrol engines 1.6/1.8 l
  • Engine repair
  • Supply system
  • Ignition system
  • Diesel engines
  • Engine repair
  • Lubrication system
  • Cooling system
  • Power and exhaust system
  • Transmission
  • Clutch
  • 4-speed gearbox 084
  • 5-speed gearbox 085
  • 4-speed gearbox 020/4R
  • 5-speed gearbox 020/4T
  • Automatic gearbox
  • Drive shafts
  • Chassis
  • Steering
  • Car suspension
  • Brake system
  • Body
  • Body elements
  • Doors, locks and windows
  • Electrical equipment
  • Equipment and devices
  • Power devices
Golf 2 (petrol) 
  • General information
  • Characteristics
  • Car care
  • Maintenance
  • Power unit
  • Engine repair
  • Engine 1.05/1.30
  • Engine 1.60/1.80
  • Cooling and lubrication system
  • Power and exhaust system
  • Transmission
  • Clutch
  • Car gearbox
  • Drive shafts
  • Chassis
  • Brake system
  • Steering
  • Suspension
  • Body
  • Body and equipment
  • Electrical equipment
  • Lighting and appliances
  • Electrical circuits
Golf 1 (petrol) 
  • General information
  • Characteristics
  • User manual
  • Maintenance
  • Power unit
  • Engine adjustment
  • Engine 1.1/1.3
  • Engine 1.5/1.6/1.8
  • Engine electrical equipment
  • Cooling system
  • Fuel system
  • Transmission
  • Clutch and manual gearbox
  • Automatic gearbox
  • Chassis
  • Steering
  • Front suspension
  • Rear suspension
  • Brake system
  • Electrical equipment
  • Lighting and appliances
  • Electrical circuits
  • Body
  • Body and equipment
  • Optional equipment
Golf 1 (diesel) 
  • General information
  • Specifications
  • Maintenance
  • Power unit
  • Engine repair
  • Exhaust and turbocharger
  • Cooling system
  • Fuel system
  • Fuel injection system
  • Transmission
  • Clutch and drive shafts
  • Car gearbox
  • Chassis
  • Suspension and wheels
  • Steering
  • Brake system
  • Wheels and tires
  • Body
  • Heating and ventilation
  • Exterior (external elements)
  • Interior (internal elements)
  • Doors and windows
  • Electrical equipment
  • Equipment and devices
  • Lighting system
  • Power devices
  • Electrical circuits
VWmanual.ru © 2016-2026 | Mobile version | News and articles | Sitemap: EN BG BY UA RS HR RO PL SK HU | Write message | Site search
Passat B2 • Passat B3 • Passat B4 • Passat B5 • Passat B6 • Golf 1, diesel • Golf 1, petrol • Golf 2, petrol • Golf 2 • Golf 3 • Golf 4 • Golf 5 • Polo 3 • Polo 4 • Touareg 1 • Tiguan 1 • Sharan 1 • Transporter T3 • Transporter T4 • LT 28 • LT 2D • Beetle • Caddy 3 •
Our website uses cookies to ensure functionality and convenience.