



Engines 1.1 and 1.3 l
1. Remove the filter insert.
2. Loosen the air filter housing fastening nuts and remove the metal retaining ring.
3. Mark the location of all pipes and flexible hoses, disconnect them. Remove the air filter housing from the carburetor. Remove the sealing ring.
4. Installation is carried out in the reverse order of disassembly, with careful connection of the elastic pipes.
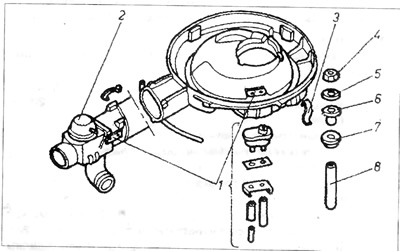
Figure 3.2 Air filter assembly - 1.1 and 1.3L engines
1 - temperature sensor; 2 - overflow valve; 3 - spring latch; 4 - nut; 5 - washer; 6 - spacer nut; 7 - gasket; 8 - spacer sleeve.
Engines 1.6 and 1.8 l
5. Remove the filter insert.
6. Remove the fastening clamp 18 and disconnect the elastic air supply pipe 19 (figure 3.3) on the side surface of the filter housing.
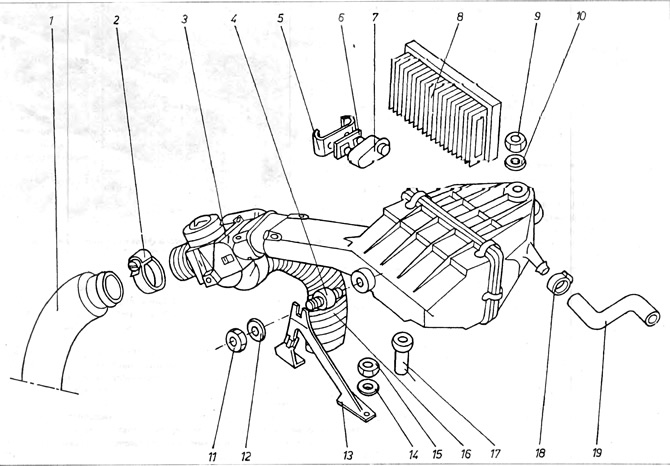
Figure 3.3. Air filter assembly - 1.6 and 1.8 L engines
1 - suction pipe; 2 - clamping belt. 5 - temperature regulator; 4 - rubber shock absorber; 5 - temperature sensor bracket; 6 - temperature sensor; 7 - filter insert; 8 - nut securing the body; 9 - washer; 10 - nut; 11 - washer; 12 - bracket; 13 - washer; 14 - nut; 15 - warm air suction pipe; 16 - spacer sleeve; 17 - clamping belt; 18 - crankcase air outlet pipe.
7. Unscrew the fastening nuts 9 and 11, and then completely disconnect the filter unit, disconnecting all other elastic hoses.
8. Installation is performed in the reverse order of disassembly. When installing, put on a new gasket between the carburetor and the filter housing.
Visitor comments