
2. Valve clearances can be checked and adjusted if necessary during normal seasonal inspection or with the engine head removed (before installation).
Adjustment data have different gap sizes for cold and warm (coolant temperature above 35°C) engine
Engine 1.1L
Cold:
Intake valve 0.15mm
Exhaust valve 0.25mm
Hot:
Intake valve 0.20mm
Exhaust valve 0.30mm
1.3L engine
Cold:
Intake valve 0.10mm
Exhaust valve 0.20mm
Hot:
Inlet valve 0.15mm
Exhaust valve 0.25mm
Engines 1.6, 1.8 l and 1.6D
Cold:
Intake valve 0.20mm
Exhaust valve 0.40 mm
Hot:
Intake valve 0.20mm
Exhaust valve 0.45mm
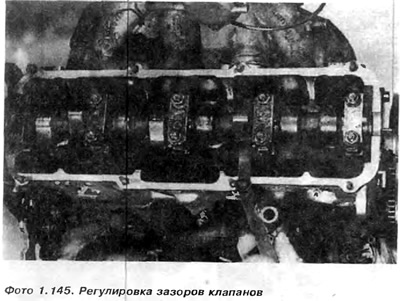
3. The installed engine in the car must be warmed up to normal operating temperature, then turned off and the valve cover removed.
4. Check the clearance of each valve by rotating the crankshaft so that the cam bulge of the valve being checked is set upwards, and the cylindrical surface of the cam is on the side of the adjusting plate. With this setting, the valve is completely closed and, by inserting a feeler gauge between the cylindrical part of the cam and the valve lifter adjusting plate, we measure the gap at the moment. If the engine is fully assembled, it will spin more easily when the spark plugs are removed. It is not necessary to rotate the engine using the camshaft gear, as this puts a lot of strain on the distribution belt. To rotate the crankshaft, you can roll the car in fourth gear or raise the crankshaft.
Attention: Do not rotate the crankshaft with the adjusting plate removed, as the camshaft can damage the top edge of the pushrod.
5. Repeat this measurement for all valves in turn, and then compare the results with the adjustment data.
6. Measure the thickness of the gaps at the moment and calculate the error in relation to the gaps above.
Assume that the clearance measured on exhaust valve #1 is 0.15mm. a should be 0.45 mm This is 0.3 mm less than necessary. In order for the gap to be normal, it is necessary to replace the adjusting plate with a thinner one by 0.3 mm. Since the difference in the thickness of the adjusting plates is 0.05 mm, the correct plate can be selected from the set if the thickness of the currently standing plate is known. If the head has been disassembled before, you need to know the thickness of all the plates.
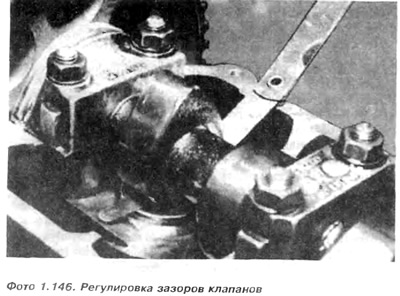
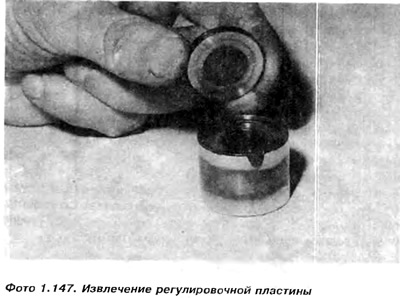
As you know, the thickness of the adjusting plate is etched on the underside of the plate. If the head has not been disassembled, it is necessary to remove the plate to check its thickness. Special equipment is used for this, but the same operation can be performed using a screwdriver and a flat wrench of the appropriate size, suitable for pushing the pusher down without pressing the adjusting plate (this means we press only on the edge of the pusher). The cam should be turned with the bulge up to allow as much room as possible to remove the insert.
Caution: If the key slips while the plate is being removed, it may pop up unexpectedly. During plate removal, the piston in the corresponding cylinder must be returned from TDC to allow the valve to tilt.
7. When the dimensions of all plates are known, you can make a table and calculate the thickness of the new adjustment plates required. Returning to the example, when the plate marked 3.60 is removed, then the 3.30 plate is needed. Pusher plates are available in 26 different thicknesses, every 0.05 mm from 3.00 to 4.25 mm.
8. Before adjusting valve clearances, stock up on a set of adjusting plates.
If there is no kit, it is necessary to prepare for the double extraction of the plates. First, we remove the plate to check its thickness, then insert it back so that it is possible to rotate the camshaft and check the thickness of all plates in comparison with the measured gaps of the corresponding valves. It is possible to buy a set of exactly matching plates to replace the old ones. After replacing the plates with new ones, it is necessary to crank the crankshaft several times using the starter (for the plates to flatten) and re-measure the valve clearance with a feeler gauge. The probe should enter between the cylindrical part of the cam and advance with a felt force.
9. When placing the plates, care must be taken that the etched thickness symbols are on the bottom.
10. After repairing the engine head, valve clearances must be checked on a hot engine after 1000 km of run. Under normal conditions, valve clearances should be checked for the first time after the pre-lapping period, i.e. after 5000 km. Then we carry out adjustment every 30,000 km.
11. After adjusting the valve clearances, screw in the spark plugs and put on the valve cover (engine in a car).
12. Last advice. Notes with the thicknesses of the pusher adjusting plates currently on must be kept. This will help to avoid double removal of the inserts during the next adjustment.
Visitor comments