
1. Disconnect the wire to the battery ground.
2. Remove alternator V-belt.
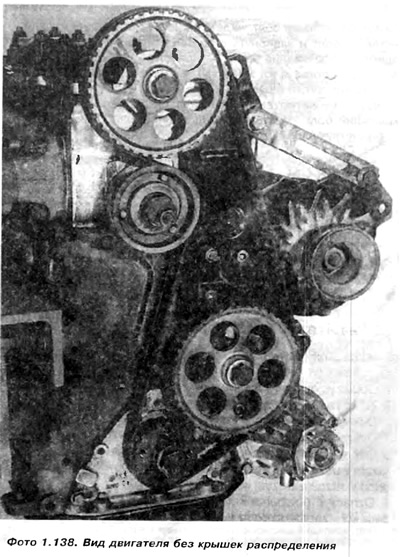
3. Unscrew and remove the water pump pulley (photo 1.138).
4. Unscrew and remove the top cover of the timing belt.
5. Unscrew the nuts and bolts of the valve cover and remove the valve cover together with the gasket and reinforcing straps. Disconnect the crankcase vent pipe.
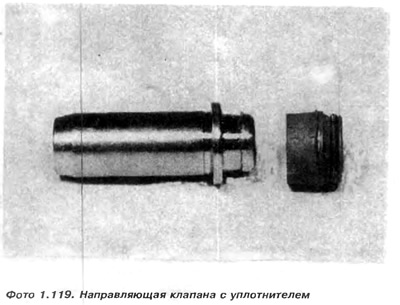
6. Mark the location of the crankshaft pulley relative to the crankshaft gear, then unscrew the four socket head bolts and remove the pulley (photo 1.119).
7. Unscrew and remove the lower distribution cover.
8. Loosen the fastening bolts of the timing gear on the timing shaft, on the intermediate shaft and on the crankshaft. Each of the timing gears is bolted with a washer bolt. To make the crankshaft stationary while loosening the fixing bolt, it is necessary to insert the starter strip extraction.
Now it is necessary to check the engine distribution setting. Put on the crankshaft pulley for a while. On the intermediate shaft gear, one of the teeth has a full point. Rotate the crankshaft until this point lines up with the notch on the crankshaft pulley.
Caution: It is easier to rotate the crankshaft after removing the spark plugs.
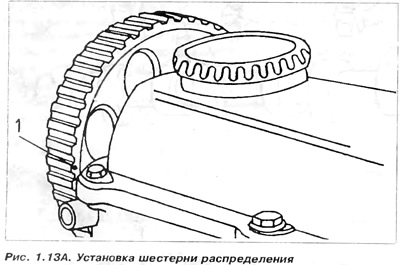
When these designations are equal, look at the camshaft gear. The dot stamped on one of the teeth of this gear should align with the top edge of the head cover (pic. 1.13A). If, after crankshaft rotation, the symbols are in the positions described, look at the cams of cylinder 1 or the cylinder closest to the timing belt. Both cams should be in the closed valve position. Then look through the hole in the clutch housing above the flywheel. Sign "0" on the flywheel should be opposite the sign in the hole in the clutch housing. This means that the piston of the first cylinder is in the TDC position
9. Loosen the tensioner, then remove the timing belt from the timing shaft, intermediate gear and crankshaft gear.
10. Unscrew and remove the fixing bolts and distribution gears, then remove the gears, tapping them with a hammer if necessary. Check the fit of the tongues in the grooves and, if there is a gap, replace. If they are normal, it is necessary to keep them together with their corresponding gears.
Installation
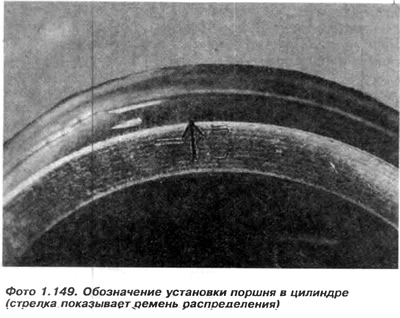
1. Insert the tongue into the groove on the intermediate shaft, then fasten the gear to the shaft. Place the spacer on the bolt, then insert and tighten the bolt to the specified torque. Make the pinion stationary while tightening the bolt (photo 1.149).
2. Post (place) tongue in the groove of the front of the crankshaft, put the timing belt sprocket on the shaft.
Lubricate the fixing bolt, put a spacer on it, insert the bolt and tighten to the appropriate torque. While tightening the bolt, prevent the crankshaft from turning by using the same method as when removing it.
3. Insert the tongue into the groove at the front of the distribution shaft and put on the distribution shaft gear. Insert the fixing bolt together with the spacer washer and tighten to the correct torque.
4. While tightening the bolt, immobilize the gear by inserting a screwdriver into one of the holes and blocking the engine block or head.
5. If it is removed, put on the gear (setting on one line the designations made before) and tighten one bolt.
6. Rotate the camshaft sprocket so that both cams of cylinder #1 are in closed valve positions and the mark on the camshaft sprocket aligns with the top edge of the head cover.
7. Rotate the crankshaft sprocket and countershaft sprocket until until the mark on the countershaft sprocket matches the mark on the crankshaft pulley. Put on the timing belt tensioner and put on the timing belt. Check if the symbols have moved, put the key on the tensioner and tighten the belt so that it can be turned with your thumb and forefinger no more than 90°, holding it in the middle between the camshaft and the intermediate shaft gear. Tighten the eccentric tensioner nut to the appropriate torque.
8. Unscrew and remove the crankshaft pulley.
9. Put on the lower distribution cover, then put the crankshaft pulley back on and tighten the fixing bolts.
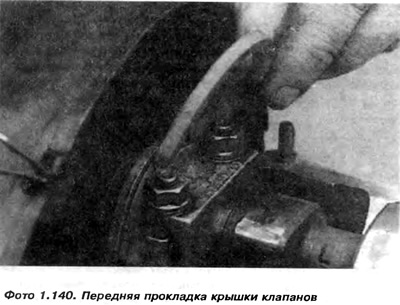
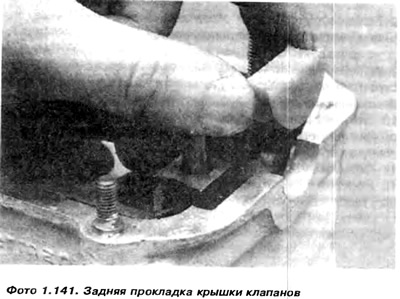
10. Put a new valve cover gasket on the engine head, camshaft bearing No. 1 cover seal (photo 1.140) and a semi-circular sealing ring at the rear of the engine head (photo 1.141).
11. Put on the valve cover, reinforcing belts, then put on and evenly tighten the fixing nuts.
12. To put on the top cover of a distribution belt.
Visitor comments