
Removal and installation of a forward lateral dimensional lantern
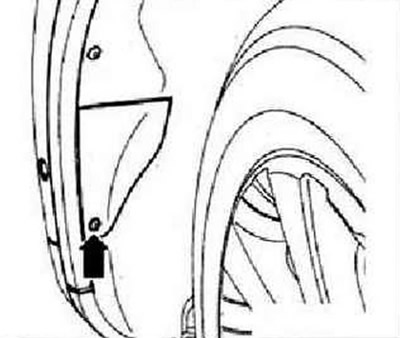
Instructions: Removal and installation of the side marker lamp is carried out without removing the front bumper trim. You can get to the latches for attaching the lamp through a hatch in the wheel arch. The illustrations show the removal and installation of the left side marker light.
Switch off the ignition and all electrical consumers, remove the ignition key. Remove screw -arrow- in wheel housing and open hatch.
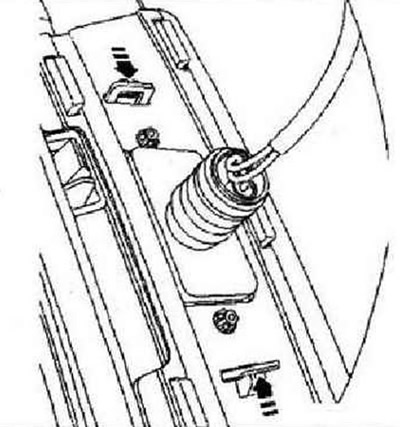
Press latches -arrows- together and pull light out of bumper cover.
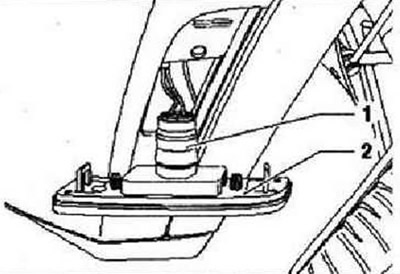
Without tilting, remove socket -1- with bulb from lamp housing -2- in a backward motion.
Installation is carried out in reverse order.
Instructions: When installing the cartridge in the body of the lamp, it is necessary to combine the protrusions on the body with the recesses under the rubber seal.
Removing and installing front side marker lamp bulb -M11-
Instructions: Removal and installation of the front side marker lamp -M11- without removing the front bumper cover. The illustrations show the removal and installation of the left side marker light.
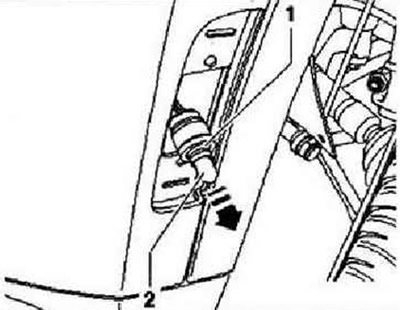
Remove side marker lamp. Remove the bulb -2- by pulling it in the -direction of the arrow- out of the socket. Bulb for front side marker light -M11-: 12 V, W 3 W.
Installation is carried out in the reverse order.
Instructions: When installing the cartridge in the body of the lamp, it is necessary to combine the protrusions on the body with the recesses under the rubber seal.
Rear side marker lights, vehicles for USA and Canada
Note: The function of the rear side marker light bulbs -M12- is performed by the left side marker light bulb -M4- and the right rear marker light bulb -M2-.
Visitor comments