
Instruction: When removing and installing elements that are in sight (switches, covers, facing pashas, etc.), seal the points of use of the tool, wedge -VAS 3409-, screwdriver, etc., with commercial adhesive tape.
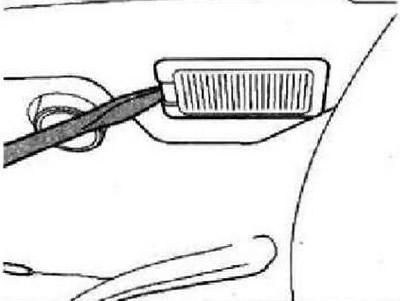
Removing and installing interior monitor deactivation switch -E267-
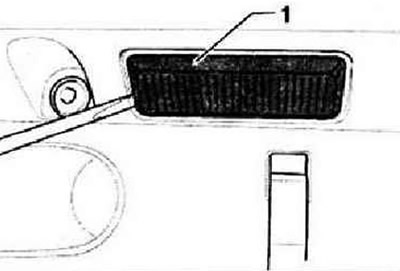
Instructions: To remove the switch to deactivate interior monitoring E267, the anti-theft system must be deactivated. The interior monitor deactivation switch -E267- is located in the -B- pillar trim on the driver's side.
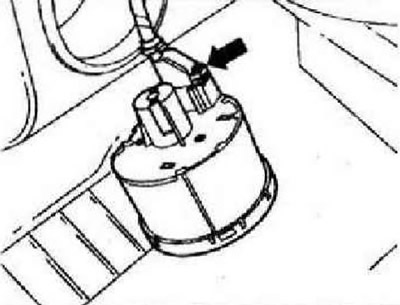
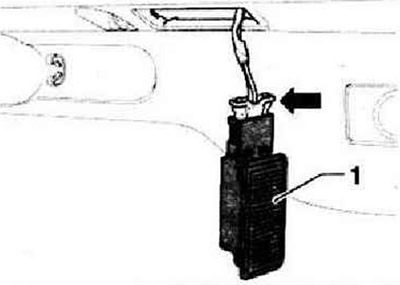
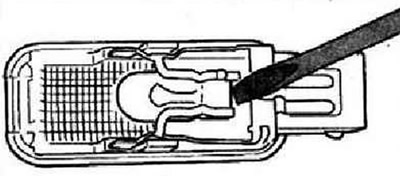
Switch off the ignition and all electrical consumers, remove the ignition key. Carefully pry off interior monitor switch -E267- -1- with a wedge -VAS 3409- or a screwdriver.
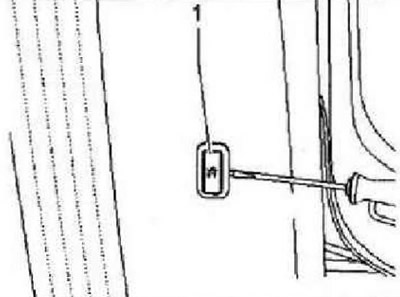
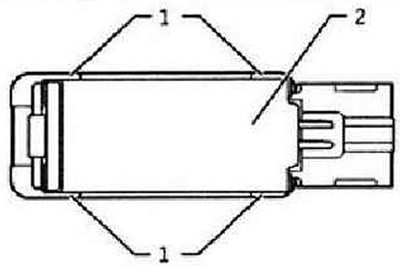
Unlock and disconnect connector -arrow-. Remove switch.
Installation is carried out in the reverse order.
Lighting lamp and switch in the engine compartment
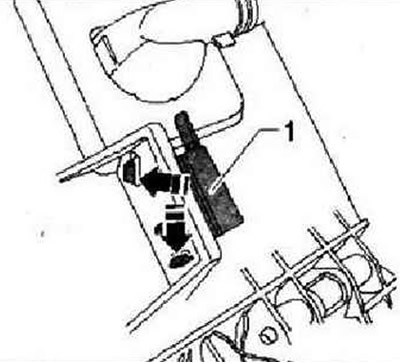
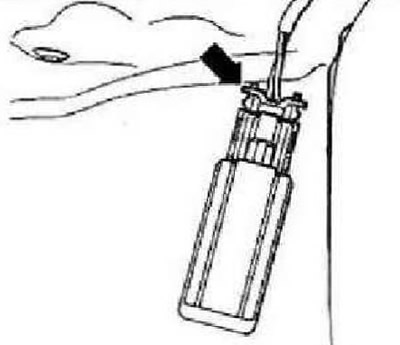
Removing and installing bonnet limit switch -F266-
Switch off the ignition and all electrical consumers, remove the ignition key. Remove the hood latch.
Instruction: The cable can not be disconnected from the lock.
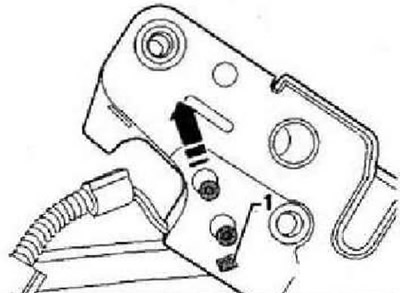
Unlock catch -1- and slide bonnet contact switch -F266- in direction of -arrow-. Remove the contact switch from the hood latch. Installation is carried out in the reverse order..
Lamps and switches on the front panel
Removing and installing light switch -E1-
The following components are installed in the light switch -E1-:
- Fog light switch -E7-
- Rear fog light switch -E18-
- Illumination lamp for light switch -L9-
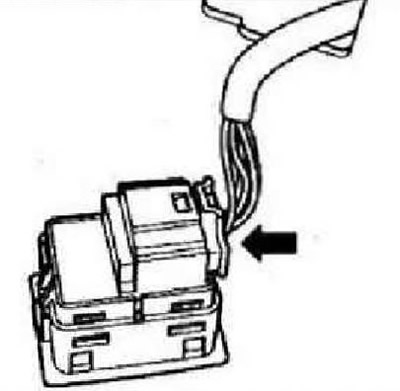
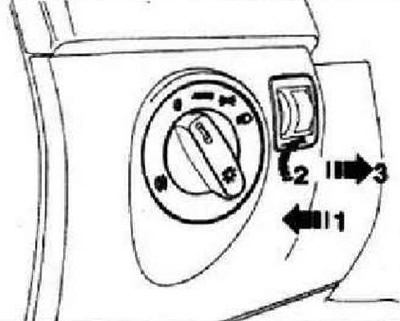
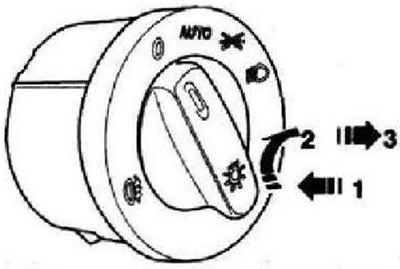
Switch off the ignition and all electrical consumers. Turn the light switch knob to position "0". Press rotary knob inward -arrow 1- and turn slightly to the right -arrow 2-. Hold the handle in this position and pull the light switch out of the dash panel by the handle -arrow 3-.
Unlock and disconnect connector -arrow-.
Installation
Insert the plug connection into the switch. Hold down the light switch and push in the light switch knob -arrow 1- and turn slightly to the right -arrow 2-.
Hold the handle in this position and install the light switch in the front panel. Turn the rotary knob to position "0", release it and lock the switch.
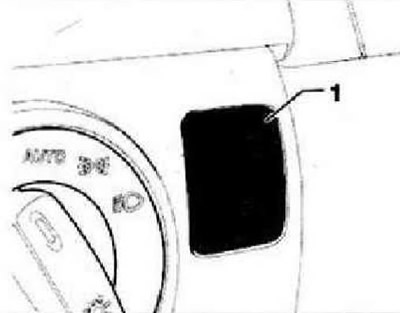
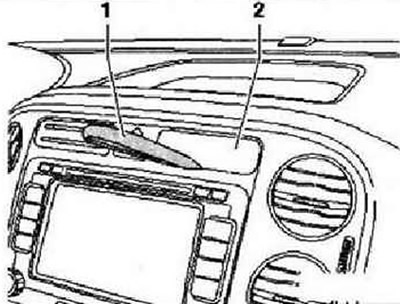
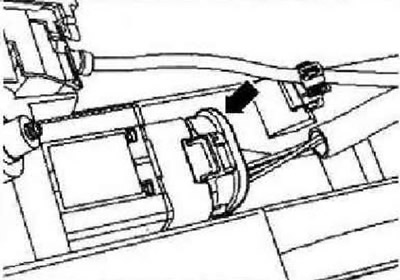
Removing and installing control for instrument panel lighting and switches -E20- and headlight range adjustment control -E102-
Instruction: Depending on the configuration, only the instrument and switch backlight control or a combined unit with headlight range control is installed. Removal and installation of both components is carried out in the same way.
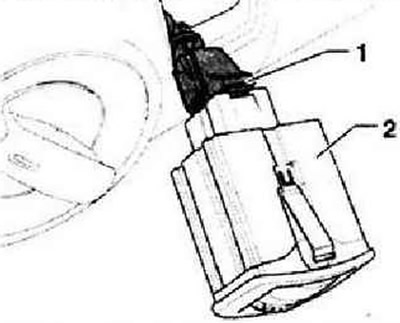
Switch off the ignition and all electrical consumers. Carefully press the instrument and switch illumination control -1- out of the front panel using a wedge.
Unlock and disconnect connector -1- and remove instrument and switch illumination control -2-.
Installation is carried out in the reverse order.
Removing and installing glove box lighting -W6-
Switch off the ignition and all electrical consumers. Carefully pry off lens -1- using wedge -VAS 3409- or a screwdriver.
Unplug connector -arrow- and remove glove compartment light -1-.
Installation in reverse order. Check the operation of the glove box light switch. When the lid is closed, the glove box light must be switched off.
Replacing bulb for glove box lighting -W6-
Remove glove box light -W6-. Unlock catches -1- and remove heat shield -2- from lamp cover.
Carefully remove the bulb from the socket. Replace glass base lamp (12V, 3W).
Installation in reverse order. Check the operation of the glove box lighting.
Removing and installing glove box illumination switch -E26-
The glove box light switch is located on the back of the glove box. Switch off the ignition and all electrical consumers. Remove glove box. Unlock catches -arrows- and remove switch for glove box illumination -1-.
Installation is carried out in the reverse order.
Removing and installing airbag deactivation indicator lamp for front passenger -K145-
Note: The front passenger airbag warning lamp is located in the middle of the dashboard, above the radio.
Switch off the ignition and all electrical consumers. Insert the wedge -VAS 3409- -1- in the middle under the OFF indicator lamp. front passenger airbags -K145- -2-. Hit the wedge -VAS 34G9- with the palm of your hand to release the retainers of the indicator lamp.
Unplug connector -arrow- and remove warning lamp -1-.
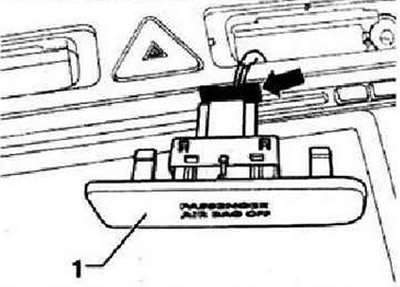
Installation is carried out in the reverse order.
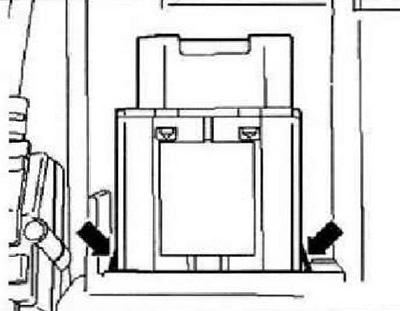
Removing and installing hazard warning switch -E3-
Switch off the ignition and all electrical consumers. Remove center deflector. Unplug connectors -arrows-.

Unlock catches -arrows- and remove hazard warning light switch.
Installation is carried out in the reverse order.
Left footwell light -W9- and right footwell light -W10- - Removing and installing
Instruction: The illustrations show the removal and installation of the footwell light on the right side. Removing and installing the footwell light on the left side is carried out in the same way. Removal and installation of both footwell lights is carried out in the same way, therefore the description is given for only one light.
Switch off the ignition and all electrical consumers. Using a wedge -VAS 3409- or a screwdriver, pry the footwell light out of the trim under the dashboard.
Disconnect connector -arrow-.
Installation is carried out in the reverse order.
Removing and installing key switch for deactivating front passenger airbag -E224-
Caution: Observe the safety precautions when working on the airbag.
Switch off the ignition and all electrical consumers. Remove glove box. Disconnect connector -arrow-.
Remove clips -arrows- and remove key switch.
Installation is carried out in the reverse order.
Visitor comments