



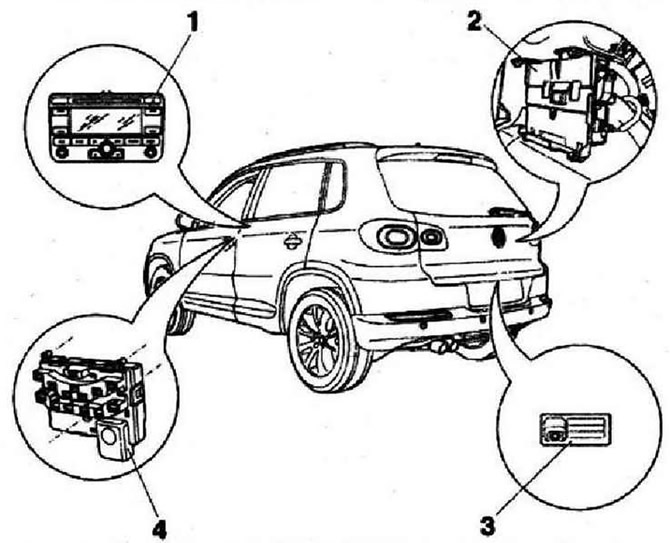
- 1 - Control unit with display device for radio and navigation system "J503". Installation location: front in the center console
- 2 - Rear view camera system control unit "J772". Installation location: behind the right side trim in the trunk
- 3 - Rear view camera "R189". Installation location: in the rear door handle button, tightening torque of the mounting nuts: 6 Nm
- 4 - Steering angle sensor "G85". Installation location: in the trim of the steering column switch under the steering wheel
Instructions: When repairing or troubleshooting, use the VAS 5051A tester or the IMS 5052 tester in the "guided troubleshooting" mode. When connecting the battery, take into account the need to check the vehicle equipment (radio, clock, comfort system, etc.).
The rear view camera system is an auxiliary system - the driver sees a picture of what is happening behind the car on the monitor of the radio or radio navigation system. This system is an option and is supplied only with the RNS 510 radio navigation system or the RCD 510 radio. The system is switched on when the reverse gear is engaged, also when the radio or radio navigation system is switched off.
The rear view camera consists of the following components: rear view camera "R189", rear view camera system control unit "J772", control unit with display device for radio and navigation system "J503", and steering wheel with steering wheel angle sensor "G85".
Instructions: Installation of an additional license plate holder in vehicles with a rear view camera system is not allowed, otherwise the operation of the rear view camera system may be disrupted. The license plate illumination may also be disrupted.
Fault detection and error indication
The rear view camera system has a self-diagnosis function. When troubleshooting, use the tester -VAS 5051 A- or tester -VAS 5052- in the "Guided Fault Finding" mode.
Removal and installation the rear view camera
The rear view camera is built into the rear door handle button. To remove the rear view camera, you must first remove the rear door handle button. Then you can remove the rear view camera from the handle button.
Removal the rear view camera button handle from the rear door
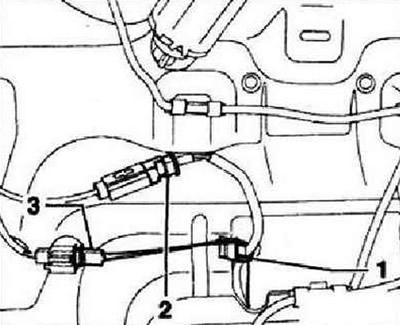
Switch off the ignition and all electrical consumers, remove the ignition key. Remove the trunk lid trim. Open the holder of wire "1" and remove both wires. Unlock the lock and disconnect connectors "2" and "3".
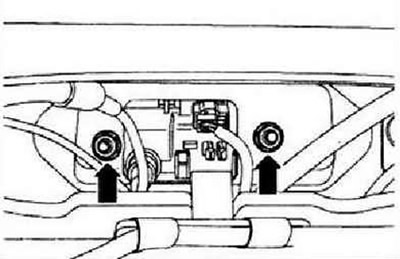
Unscrew the two "arrow" fastening nuts.
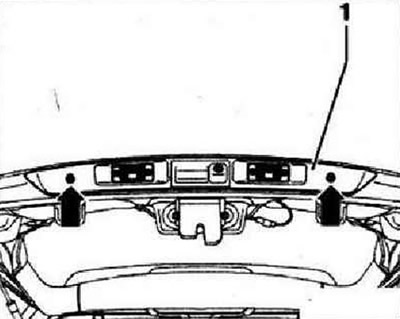
Unscrew both fastening nuts of the "arrow" and remove the cover "1", taking into account the lengths of the connected wires, from the rear door.
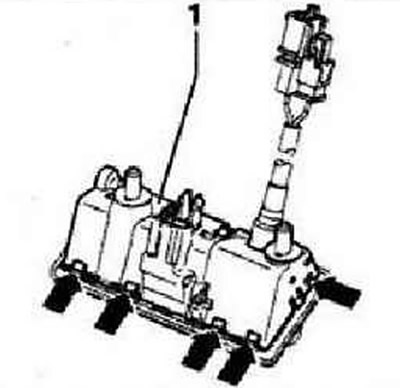
Unlock and disconnect the plug connector "1". Unlock both side locking tabs "arrows" and remove the knob with the rear view camera "2" from the cover. Remove the rear view camera from the knob.
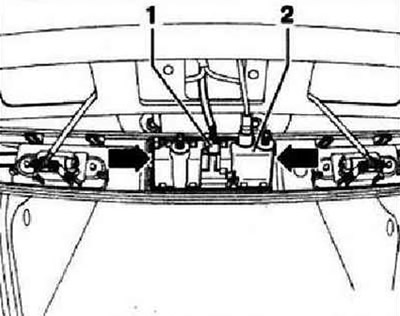
Installation in reverse order. Secure the rear view camera wires in the holder "1" to protect against noise that may occur when they vibrate. Clean the rear view camera optics with a lint-free cloth after installation. Calibrate the system.
Removal the rear view camera from the knob
Unlock the "arrow" tabs and lift the housing insert "1".
[The original can be found at: www.VWmanual.ru]
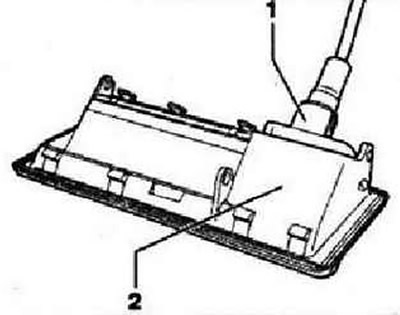
Remove rear view camera "1" from the bottom of the knob "2".
Installation is carried out in reverse order.
Removal and installation of the rear view camera system control unit "J772"
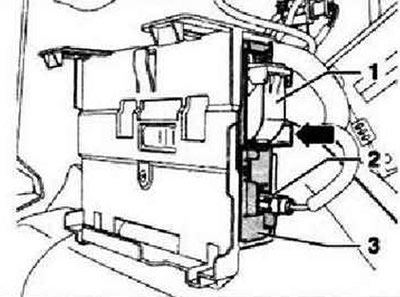
The control unit is installed in the trunk behind the right side panel. Switch off the ignition and all power consumers, remove the ignition key. Remove the right side trim of the trunk. Unlock the lock and disconnect connectors "1" and "2". Press the locking button "arrow" and remove the rear view camera system control unit-3-back from the mount.
Installation is carried out in the reverse order. Only after replacing the control unit, calibrate the system.
Visitor comments