



Contents: Removal ↓ Installation ↓
Rear brake caliper
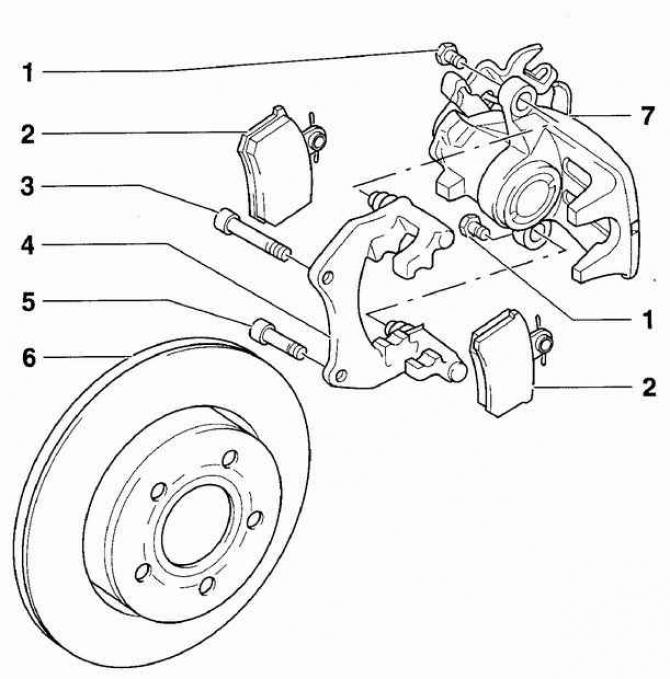
- 1 - self-locking bolt, 30 Nm,
- 2 - brake pads,
- 3 - bolt 95, Nm,
- 4 - caliper holder with guide pins and protective covers,
- 5 - bolt 95, Nm,
- 6 - brake disc,
- 7 - support
Warning: When installing bolt 1, a new bolt must be used. When unscrewing the bolt, hold the guide pin to prevent it from turning.
Warning: Replace brake pads 2 as a set on one axle of the vehicle.
Warning: The caliper holder with guide pins and protective boots 4 is supplied as a complete spare part.
Removal
1. Raise the rear of the vehicle and support it on stands.
2. The condition of the outer rear brake pads can be checked visually through the hole in the wheels. The inner pads can be checked using a small mirror and a portable lamp, looking at the pads through the holes in the back of the brake calipers.
Warning: Always replace all pads on one axle of the vehicle, even if only one pad has reached the wear limit. If the pads are to be reinstalled, they must be marked before removal.
3. Disconnect the handbrake cable from the caliper.
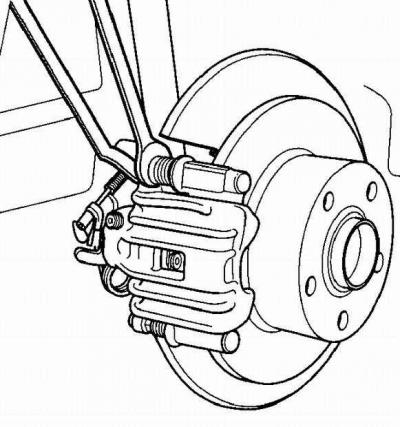
4. Unscrew the caliper mounting bolts, holding the guide pin from turning.
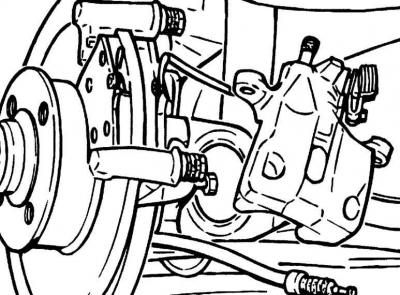
5. Remove the caliper and, using soft wire, tie the caliper to the rear suspension. The brake caliper 7 should not hang on the brake hose. The brake hose should not be stretched or twisted.
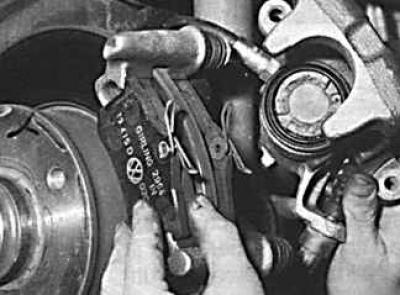
6. Remove the brake pads from the caliper. If the pads are to be reinstalled, mark their position.
7. Clean the caliper from dust and dirt.
Installation
When installing new brake pads, it is necessary to screw the piston into the caliper.
Warning: When screwing in the piston, brake fluid is forced out of the brake cylinder into the expansion tank, so constantly monitor the brake fluid level in the tank. If necessary, pump out the fluid from the tank.
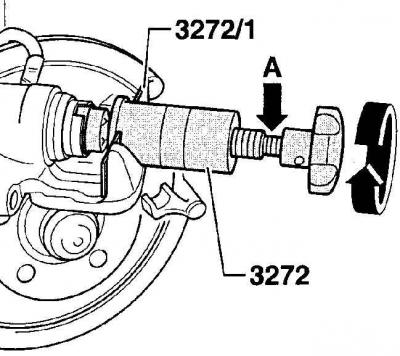
1. To screw the piston into the cylinder, use the VW3272 tool. To screw in the piston, position the tool so that the shoulder of the tool fits into the grooves of the piston. Rotate the body of the special tool counterclockwise until it stops. Rotate the handle of the special tool clockwise to screw the piston into the caliper. If screwing in the piston is difficult, place a 13 mm spanner on the splines at the base of the handle and use the spanner to screw in the piston (A).
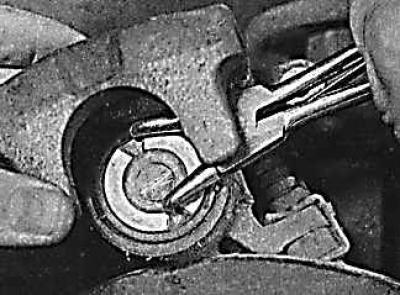
2. If you do not have a special tool, screw the piston into the caliper using angled snap ring pliers.
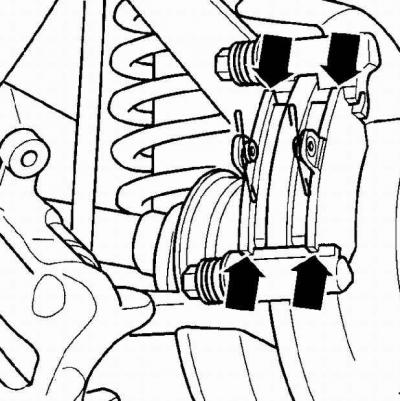
3. Install the brake pads into the caliper holder, making sure that the pressure springs are vertical. If you are installing old pads, make sure that they are installed in their original position.
4. Install the caliper, screw in the new guide pin mounting bolt and tighten it to 30 Nm.
Warning: Every genuine VW brake pad set comes with one new bolt for each caliper.
5. Connect the handbrake cable to the caliper, install the wheels, then check the operation of the handbrake.
6. Check the brake fluid level and top up to the normal level if necessary.
7. Press the brake pedal to engage the pads into their working positions.
Visitor comments