
Diesel oil pan and oil pump
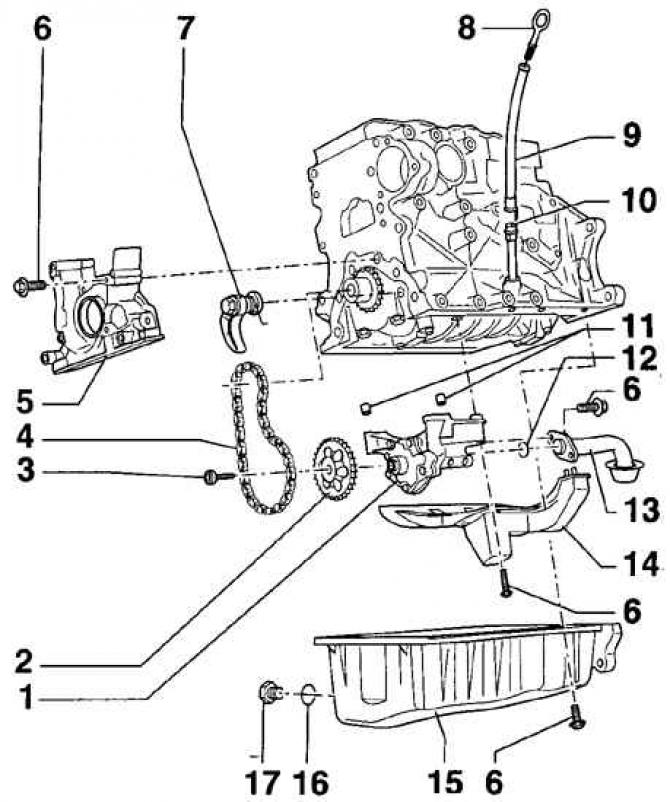
- 1 - oil pump;
- 2 - oil pump sprocket;
- 3 - bolt, 25 Nm;
- 4 - chain;
- 5 - front cover with sealing ring. The cover is installed on the sealant VW-D 176404А2. The front sealing ring of the crankshaft is installed in the cover;
- 6 - bolt, 15 Nm;
- 7 - chain tensioner, 15 Nm;
- 8 - dipstick for measuring the level of engine oil;
- 9 - inlet pipe;
- 10 - guide pipe;
- 11 - guide bushings of the oil pump;
- 12 - o-ring of circular cross-section;
- 13 - oil intake pipe;
- 14 - oil deflector;
- 15 - oil pan. The oil pan is installed on the VW-D 176404А2 sealant;
- 16 - sealing ring. At installation it is necessary to use a new sealing ring;
- 17 - oil drain plug, 30 Nm
Diesel engine oil filter
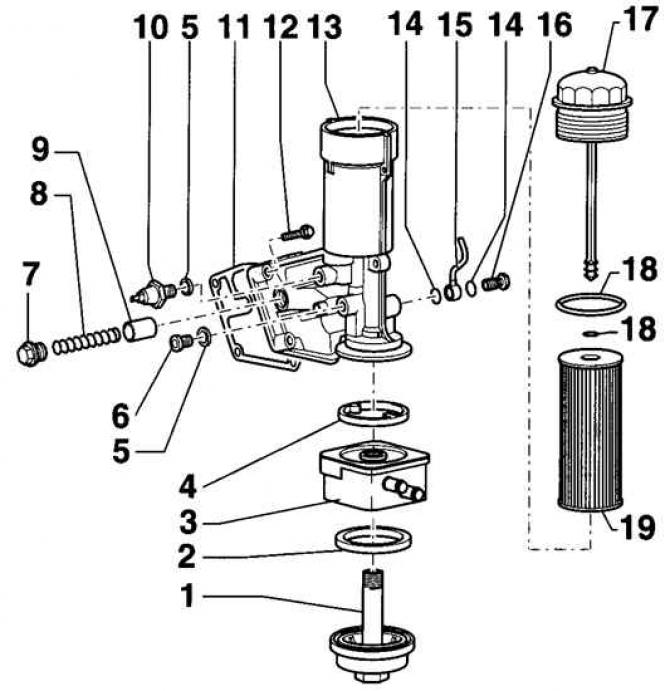
- 1 - screw plug, 25 Nm;
- 2 - seal;
- 3 - oil heat exchanger. If there is a large amount of chips in the engine oil, this indicates seizures in the engine and the need to replace the oil heat exchanger;
- 4 - seal. The seal is installed in the groove of the heat exchanger;
- 5 - sealing ring. In the presence of defects, a new sealing ring must be used;
- 6 - screw plug, 10 Nm;
- 7 - threaded plug;
- 8 - pressure reducing valve spring 5 bar;
- 9 - plunger of the pressure reducing valve 5 bar;
- 10 - oil pressure sensor, 25 Nm (gray color);
- 11 - seal;
- 12 - bolt, 15 Nm + tighten by 90°. When installing, a new bolt must be used. First of all, the upper left and lower bolts are screwed in, after which all four bolts are tightened to the required torque;
- 13 - oil filter holder;
- 14 - sealing ring;
- 15 - oil supply pipeline to the turbocharger (TDI);
- 16 - hollow screw, 20 Nm;
- 17 - cover, 25 Nm;
- 18 - O-ring of circular cross-section;
- 19 - oil filter element
Removing
1. Remove the lower engine mudguard.
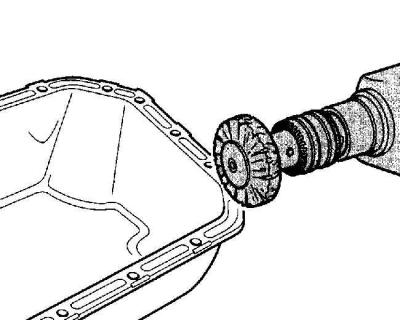
2. Drain the engine oil by loosening the oil drain plug about half a turn. Place an oil drain container under the drain plug and unscrew the plug completely. If necessary, press down on the plug when unscrewing to prevent the oil from leaking prematurely.
3. When the oil has drained completely, screw in the oil drain plug and tighten it to 30 Nm.
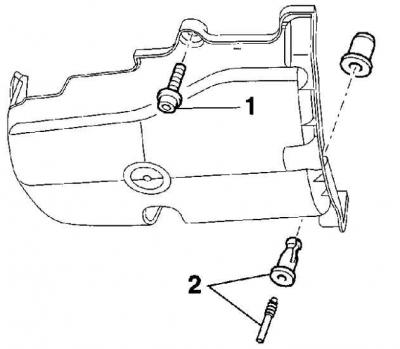
4. If equipped, remove the additional noise-insulating casing of the oil pan and engine. To do this, unscrew the bolt (1) and remove the expansion pins (2) from rubber sockets.
5. Unscrew two or three bolts securing the oil pan to the gearbox housing.
6. Loosen the bolts with a wrench (e.g. HAZET 2528-10) and remove the oil pan from the cylinder block.
Installation
1. Using a plastic or wooden scraper, scrape the old gasket off the surface of the cylinder block that mates with the oil pan.
2. Using a rotating metal brush mounted on an electric drill, clean the sealant from the oil pan.
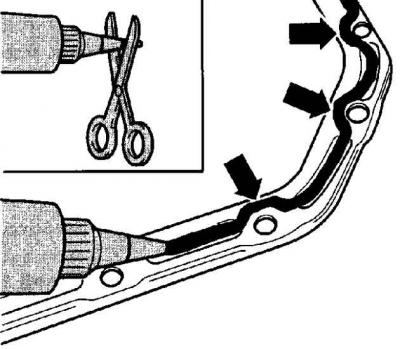
3. Apply a layer of sealant VW-D 176 404 A2 with a diameter of 3 mm to the mating surface of the oil pan (places of application of sealant are indicated by arrows).
Warning: After applying a layer of sealant to the oil pan, install the oil pan within 5 minutes. The drying time of the sealant is 30 minutes, and only after that can engine oil be poured into the engine.
Warning: The sealant layer should only be 3 mm in diameter, as in the case of a thick sealant layer, excess sealant will enter the oil and may block the strainer.

4. You can also apply a layer of sealant to the mating surface of the cylinder block (places of application of sealant are indicated by arrows)
5. Install the oil pan to the engine block and secure it with the bolts finger-tight.
6. Screw in the bolts securing the oil pan to the gearbox housing and tighten them to a torque of 40 Nm.
7. Tighten the oil pan bolts crosswise to 10 Nm, then tighten all bolts in the same sequence to 15 Nm.
8. Install the additional soundproof casing of the oil pan and engine and secure it with a bolt and expansion caps.
9. Fill the engine with engine oil.
10. Install the lower engine compartment mudguard.
Visitor comments