
Removal and installation of the ceiling end cap
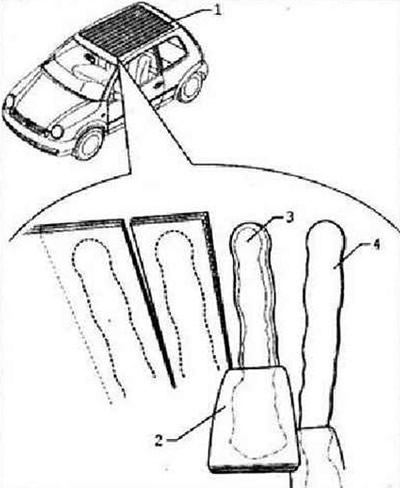
Open the tailgate. Pull headliner -1- downwards to detach it from the roof cross member and remove it from the tailgate seal bezel.
Removal and installation of the panel of facing of a ceiling
Switch off the ignition. Remove the front dome light and reading lamp.
Vehicles with overhead console
Remove roof console.
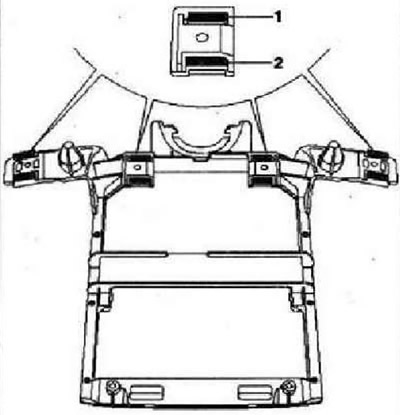
Vehicles with separating net
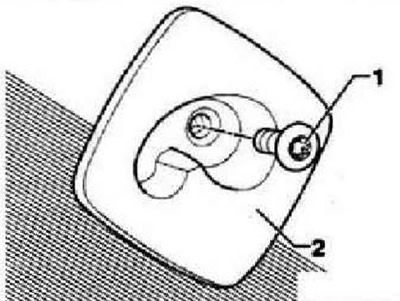
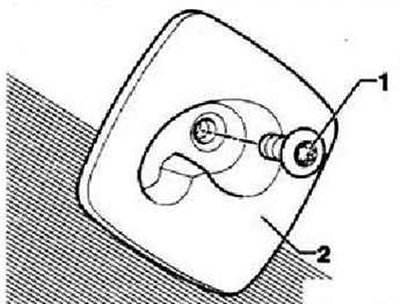
Unscrew one screw -1- in each of the sockets -2- (8 Nm).
All
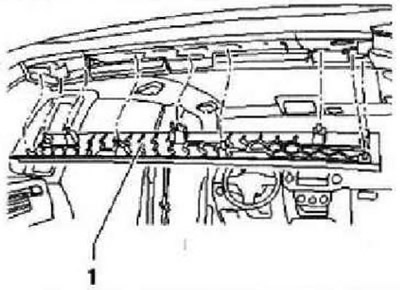
Remove the ceiling trim. Remove the A-pillar top trims. Remove the B-pillar top trims from the mountings.
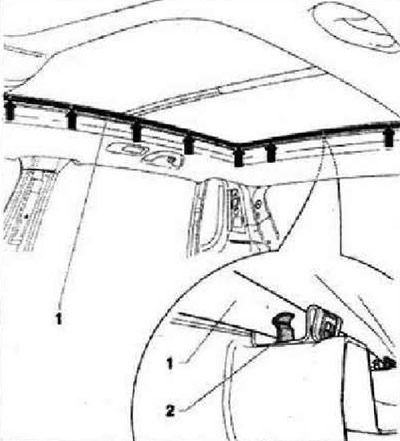
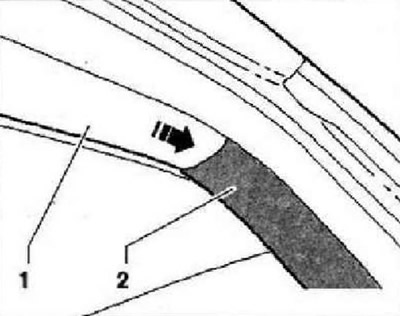
On vehicles with a panoramic sliding sunroof, remove trim profile -1- with puller -T10236- and wedge -3409- from mounting brackets -2-.
Instruction: The border profile is secured with 23 staples -arrows-.
Remove ceiling handles. Remove sun visors. Fold forward the backs of both parts of the rear seat. Move the front seats as far forward as possible and lower their backs.
Note: It is not necessary to remove the C-pillar trims.
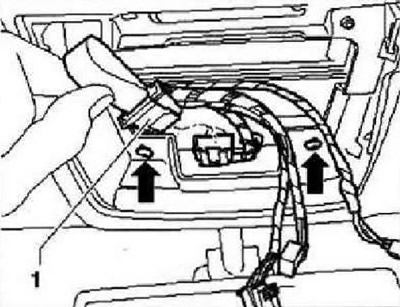
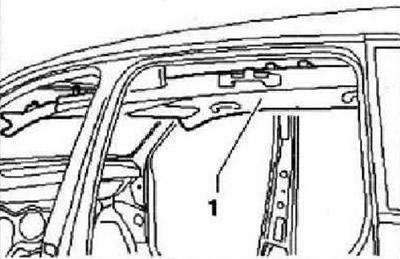
Disconnect connector -1- and remove two screws -arrows- (on vehicles with overhead console these screws have already been removed). Detach headlining panel in area of overhead console. At the same time, the brackets for attaching the console, breaking in the places provided, remain in the sockets on the body. Lower the headlining panel below the level of the mirror and pull it out from under the C-pillar trims in the direction of travel of the vehicle.
Using a second mechanic, remove headlining panel -1- through luggage compartment opening (the panel should be slightly skewed).
Installation
Remove the remaining parts of the clips -1- and -2- from the bracket for the roof lining in the area of the four threaded holes. Installation is carried out in the reverse order.
When installing, insert headlining panel -1- under C-pillar trims -2- and slide it in the opposite direction of vehicle travel -arrow-.
Removal and installation of soundproofing/reinforcing ceiling mat
Switch off the ignition. Remove the front dome light and reading lamp.
Vehicles with overhead console
Remove roof console.
Vehicles with separating net
Unscrew one screw -1- in each of the sockets -2- (8 Nm).
All
Remove the ceiling trim. Remove the upper trims of the pillars A. Remove the upper trims of the pillars B from the fasteners. Remove the handles on the ceiling. Remove sun visors. Fold forward the backs of both parts of the rear seat. Move the front seats as far forward as possible and lower their backs. Remove the ceiling trim panel.
Instructions: The illustrations show the Lupo car as an example. Removal and installation of the soundproofing/reinforcing ceiling mat in the Tiguan is carried out in the same way.
Using a carpet cutter, cut the mat -1- into lengthwise (parallel to the direction of movement of the vehicle) strips about 6 cm wide -2-. Tear off the strips -2- from the ceiling. Remove adhesive residue -3- with electric cutter -VAG 1561-A and knife -VAG 1561/20- -4-.
Installation
Instructions: When installing the soundproofing/reinforcing ceiling mat, follow the adhesive's instructions for use.
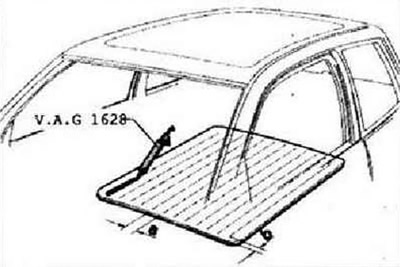
Using gun -VAG 1628- apply adhesive D 190 MKD AZ to mat. Beads of adhesive should be applied as follows. Dimension a = 58±2 mm. Dimension b = 25±5 mm. Insert the mat through the opening of the tailgate and press it against the ceiling over the entire plane.
Visitor comments