



Contents: Removal ↓ Installation ↓
Front door trim
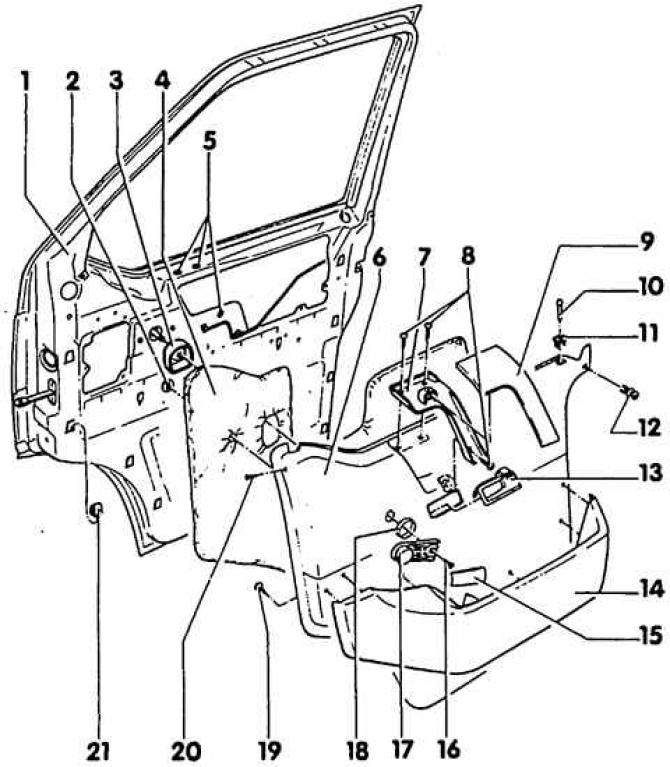
1. Front door; 2. Lock washer; 3. Compaction; 4. Noise absorber; 5. Blind rivet nut; 6. Sheathing; 7. Pen; 8. Screw; 9. Lid; 10. Locking button; 11. Socket; 12. Clip; 13. Internal door drive; 14. Door storage box; 15. Lid; 16. Phillips head screw, 4 Nm; 17. Window handle; 18. Lining; 19. Phillips screw; 20. Phillips screw; 21. Intermediate gasket
Removal
1. Roll the glass down.
2. Unscrew the cross-shaped screw (20) and clip (12) at the top, right and left – see Fig. Front door trim.
The original text can be found at: www.VWmanual.ru
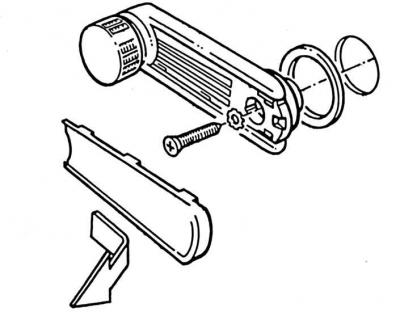
3. Slide the window handle cover down (indicated by the arrow) and take it off.
4. Unscrew the screw with the toothed washer on the window handle trim, remove the window handle together with the lining. Note the position for subsequent assembly.
5. Remove the handle (7). To do this, remove the cover (9) and unscrew the screw (8) located underneath it – see Fig. Front door trim.
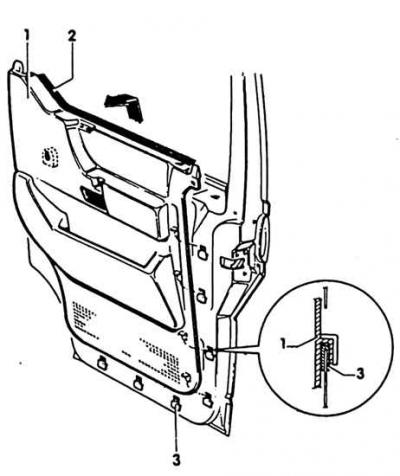
6. Lift the trim (1) together with the inner window seal (2) up and remove it from the support holes. In doing so, apply force.
Installation
1. Before installing the casing, install intermediate spacers 3 into the support holes (see fig above).
2. Install the trim in the reverse order of removal.
3. When installing the window handle, do not forget the gasket.
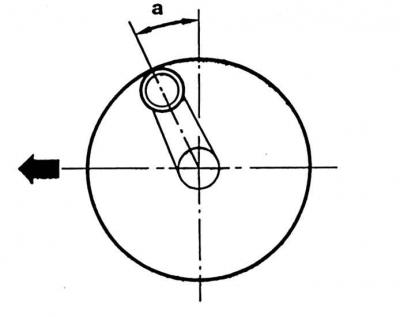
4. Position the handle on the axle so that when the window is closed it points forward and upward at approximately 25° (a) in the direction of travel of the vehicle.
Visitor comments