



Removal
1. Turn off the ignition and remove the ground cable from the battery.
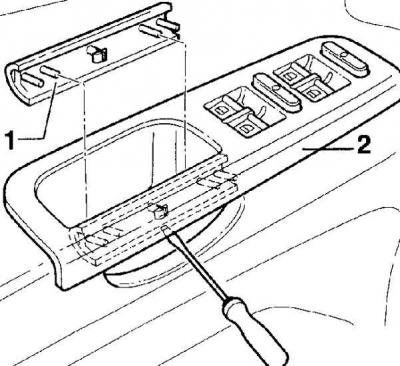
2. Insert a thin screwdriver blade between the handle cover (1) and the recessed handle (2) and slide the handle cover toward the door. Use a very thin-bladed screwdriver to avoid damaging the plastic handle cover and the door handle.
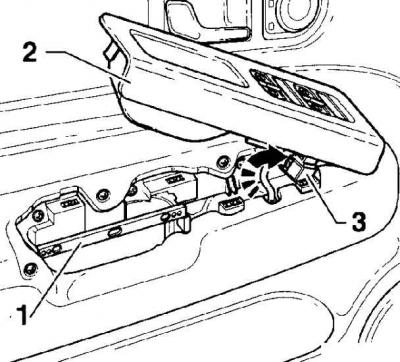
3. Using a screwdriver inserted under the edge of the recessed handle, remove the recessed handle from the interior door trim. Do not remove the interior door handle (2) by the recess, as the interior door trim crossbar (1) (3 - electrical connector) is located underneath it.
4. Pull the electrical connector retainer out of the connector and disconnect the electrical connector from the inside door handle.
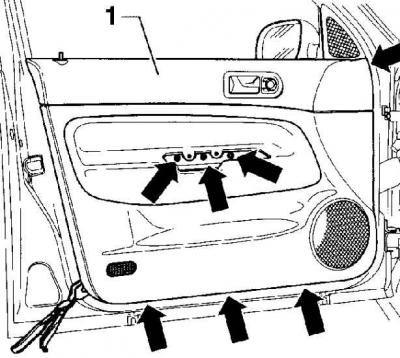
5. Remove the 7 screws (arrows) securing the inner door trim (1).
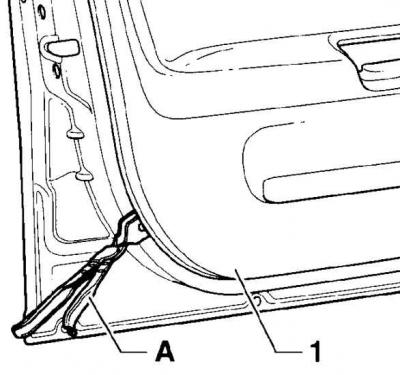
6. Using special tool 799/4 (A) or a self-made tool in the form of a flat fork, separate the door trim (1) from the door.
7. By lifting the door trim upward, release the top of the door trim from the window opening.
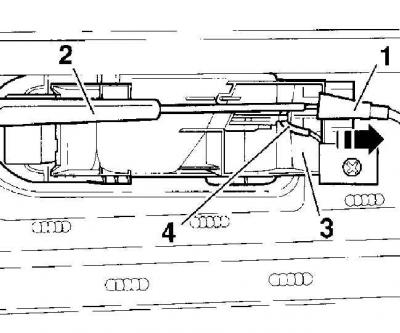
8. By moving the door opening rod (1) back, remove it from the guide (3) and disconnect it from the inner door opening handle (2 – screwdriver, 4 – rod hook).
9. Disconnect the electrical connectors.
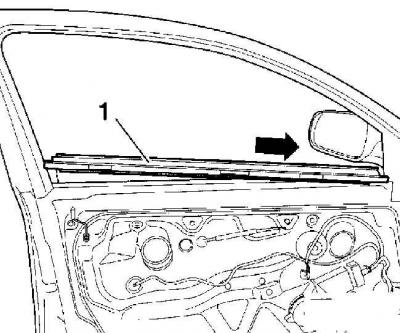
10. Remove the lower inner glass seal (1) from the door trim and install it in the window opening.
Differences when removing the trim of the right front door
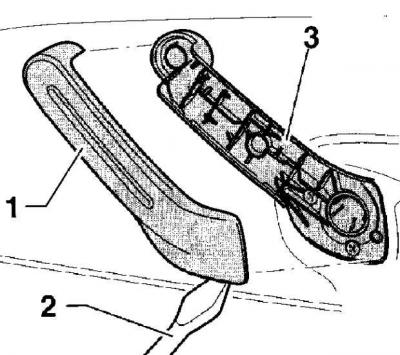
1. Insert the blade of the screwdriver (2) into the holes on the bottom of the inner door handle (3) and, by turning the screwdriver, remove the handle cover (1). To avoid damaging the door trim, place a plastic spacer under the blade of the screwdriver.
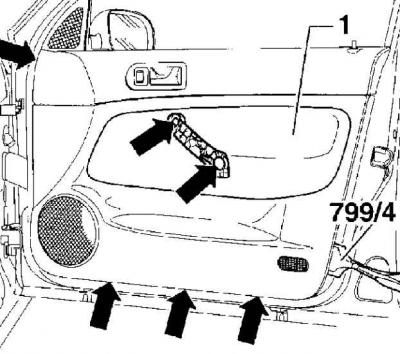
2. Unscrew 6 screws (indicated by arrows) fastening the interior door trim.
3. The interior door handle is attached to the door trim with two screws on the back of the trim. The interior door handle can only be unscrewed from the trim after removing the door trim.
Installation
1. Before installing the door trim, check the condition of the trim fasteners and, if necessary, replace any damaged fasteners.
2. Install the clips into the holes in the door trim.
(View the original on this resource: www.VWMANUAL.ru)
3. Installation is carried out in the reverse order of removal.
Visitor comments