



Contents: Removal ↓ Installation ↓
The door bracket is where the door lock, window lift and loudspeaker are mounted.
If it is necessary to replace the electric window lifter, it must be replaced together with the bracket.
Removal
1. The door bracket can only be removed when the door glass is not secured in the window lifter clips. To do this, lower the door glass to the level of the technological holes in the bracket and release the clips.
2. Remove the front door interior trim.
3. Remove the front door lock cylinder housing.
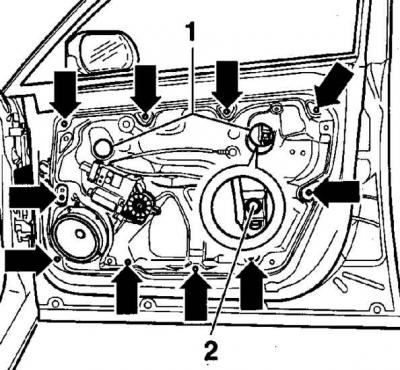
4. Remove the technological plugs (1) from the front door bracket (2 – bolt, arrows show the location of the screws for fastening the bracket with units to the door).
5. Lower the door glass until the glass mounting bolts are accessible. Loosen the bolts (2) and release the clips securing the door glass.
6. Move the door glass all the way up and use tape to secure it in this position.
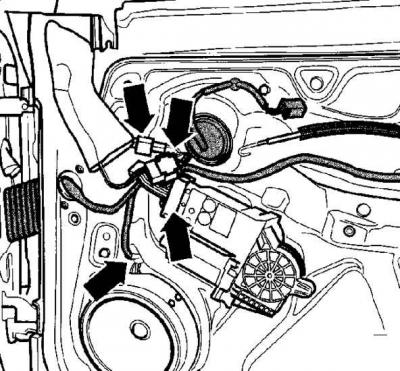
7. Disconnect all electrical connectors in the front door (arrows).
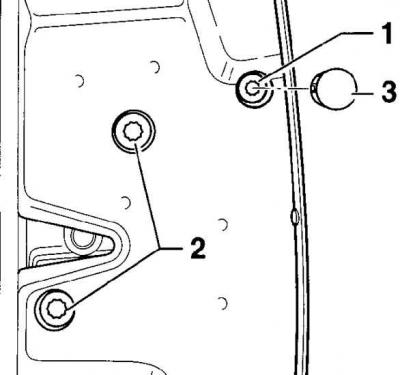
8. At the end of the front door, unscrew the two bolts (2) securing the door lock (1 – lock cylinder mounting bolt, 3 – protective cap).
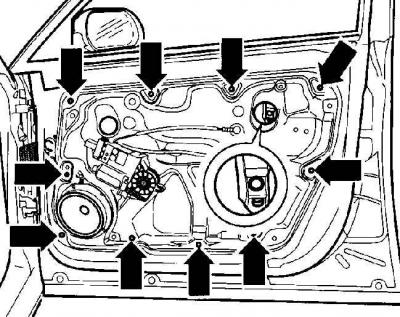
9. Remove the screws securing the bracket to the front door.
10. Remove the top of the bracket from the door, then lift the bracket up and use the door hinge to move it out of the door.
11. Turn the bracket over and disconnect the electrical connector from the door lock.
12. On the back of the bracket, release the clamps holding the electrical wires.
Installation
1. Install the bracket into the front door in the reverse order of removal.
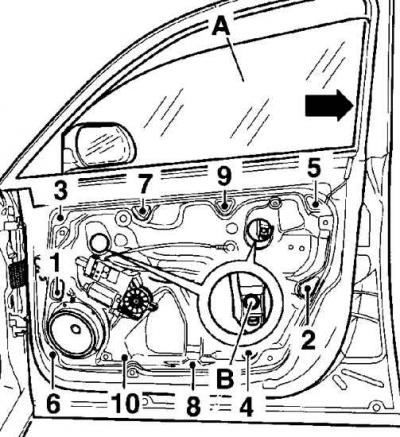
2. Screw in the bracket mounting screws and tighten to a torque of 8 Nm in a specific sequence (A – door glass, B – glass retainer mounting screw).
3. Remove the adhesive tape holding the door glass in the upper position, move the glass back to the guide, secure it in the clips and tighten the screw (B) to 10 Nm.
4. Further installation is carried out in the reverse order of removal.
Visitor comments