
English Русский
Български
Беларускі
Український
Српски
Hrvatski
Română
Polski
Slovenský
Magyar
  |  Articles  |  Sitemap  |  Contacts  |    |
Car maintenance Ford Car maintenance Hyundai Car maintenance Chevrolet Car maintenance BMW Car maintenance Audi Car maintenance Opel Car maintenance AvtoVAZ
VWmanual.ru


Main   Passat   Golf   Polo   Touareg   Tiguan   Sharan   Transporter   Others  
Tiguan 1 (2007-2015)

Pillar facings (VW Tiguan 1)

  • Main
  • Tiguan
  • Tiguan 1
  • Body
  • Internal equipment
  • Pillar facings
            0


Removal and installation the upper trim of the A-pillar


Instructions: The work on removing and installing the left side of the car is described below. The work on removing and installing the right side of the car is carried out in a similar manner.


Pull the trim "1" towards the passenger compartment from the A-pillar in the area of the "Airbag" lettering.
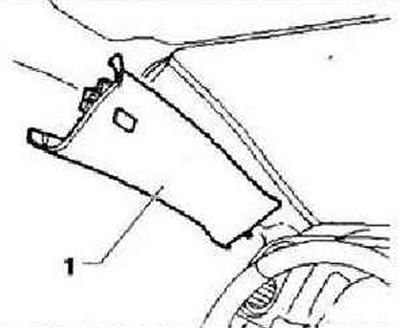
Pull the trim «1» towards the passenger compartment from the A-pillar in the area of the «Airbag»…


Cut retainer "1" with side cutters. Remove the trim from the remaining fasteners. Remove the remaining part of the retainer on the body using the puller "T10236".
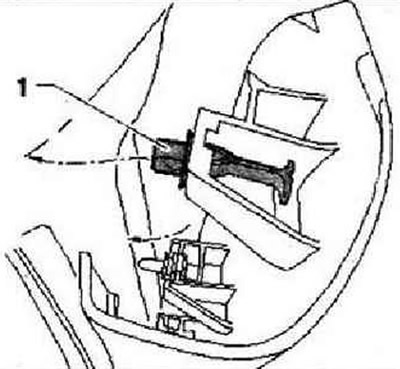
Cut retainer «1» with side cutters. Remove the trim from the remaining fasteners. Remove the…


Removal and installation the lower trim of the A-pillar on the driver's side
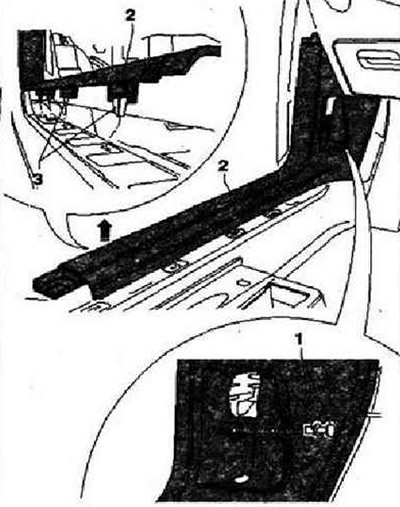


Removal and installation the lower trim of the A-pillar on the driver's side


Remove the left side trim of the front panel. Remove the hood release lever. Remove the upper trim of the left B-pillar from its fasteners. Remove the lower trim of the left B-pillar. Remove the retainer. Disconnect trim "2" from the body "arrow".


Removal from the fasteners and fixing the upper trim of the B-pillar


Instructions: The following describes the work on removing from the fasteners and fixing on the right side of the car. On the left side of the car, the work is performed in a similar manner.
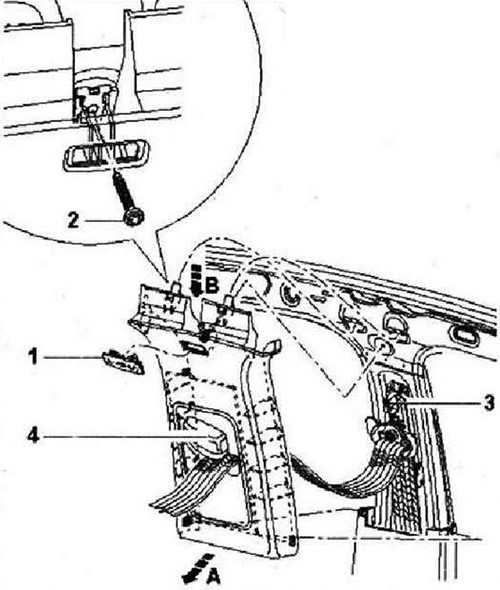

Instructions: The following describes the work on removing from the fasteners and fixing on the…


Removal from the mounts


Remove the cover with the inscription Airbag "1" using the wedge "3409" and unscrew the screw "2" (4 Nm). Taking hold of the sides by the lower part of the trim, pull them slightly in opposite directions, and then detach the trim from the lower trim of the B-pillar "arrow A". Remove the trim from the edges of the door opening seals. Using a movement in the direction of "arrow B", detach the upper fasteners of the trim.

Removal and installation the upper trim of the B-pillar


Instructions: The following describes the removal and installation work on the right side of the car. The removal and installation work on the left side of the car is carried out in a similar manner.
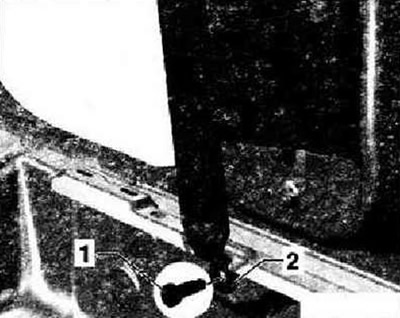

Instructions: The following describes the removal and installation work on the right side of the…


Remove the upper trim of the B-pillar from its mountings. Remove the lower trim of the B-pillar. Unscrew screw "1" (40 Nm) and disconnect the seat belt eye "2" from the body. Pull the belt tape with the eye through the hole in the trim.


Removal and installation the lower trim of the B-pillar


Instructions: The work on removal and installation on the new side of the car is described below. The work on removal and installation on the right side of the car is carried out in a similar manner.


Cars with interior security system (from the driver's side)


Turn off the ignition.

All


Remove the upper trim of the B-pillar from its fastenings. Disconnect trim "1" from the top of the body "arrow A". Using a movement in the direction of arrows B, remove the trim from the fastening sockets in the sill area.
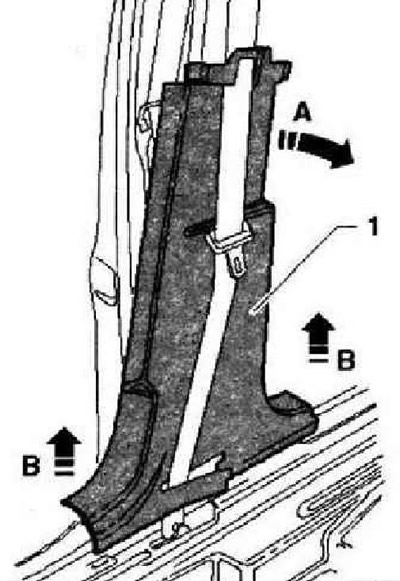
Remove the upper trim of the B-pillar from its fastenings. Disconnect trim «1» from the top of the…


Move tongue "1" to the side and remove seat belt "2".
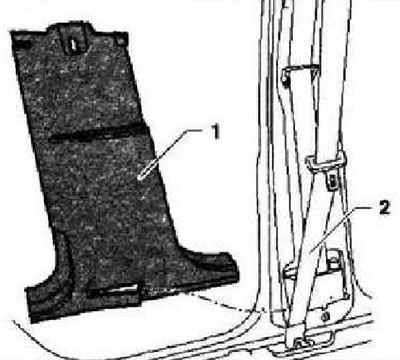
Move tongue «1» to the side and remove seat belt «2».


Removal and installation the C-pillar trim


Instructions: The following describes the work on removing and installing the teardrop side of the car. The work on removing and installing the right side of the car is carried out in a similar way.


Remove the end trim of the ceiling. Remove the rear wheel arch trim. Unscrew screw "1" (1.5 Nm) from the side trim of the luggage compartment. Remove bracket "2" (a plug can be installed instead).
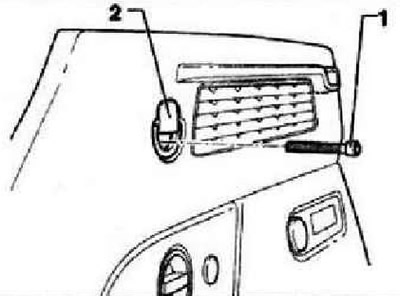
Remove the end trim of the ceiling. Remove the rear wheel arch trim. Unscrew screw «1» (1.5 Nm)…


Unscrew screw "1" (1.5 Nm) located in the rear shelf socket. Disconnect the upper part of the side trim of the luggage compartment.
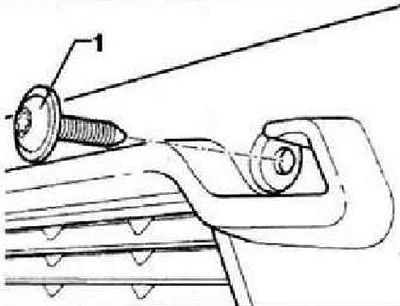
Unscrew screw «1» (1.5 Nm) located in the rear shelf socket. Disconnect the upper part of the side…


Disconnect the C-pillar trim "1" from the roof crossbar "arrow" at the top.
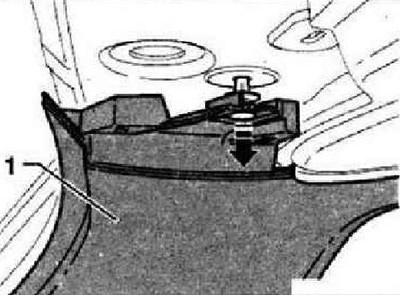
Disconnect the C-pillar trim «1» from the roof crossbar «arrow» at the top.


Disconnect the trim "1" from the top "arrow A". Using the movement in the direction of "arrow B", remove the trim from the mounting sockets from below.
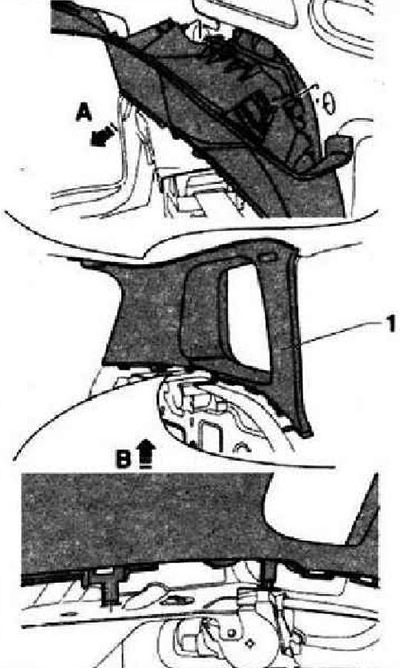
Disconnect the trim «1» from the top «arrow A». Using the movement in the direction of «arrow B»,…


The information is presented on the website: VWmanual.ru

This article is available at russian, bulgarian, belarusian, ukrainian, serbian, croatian, romanian, polish, slovak, hungarian
The text has been checked: Tarasov Ivan

Share information:

Previous articles
Removal and installation the rear door trim
Removal and installation the front door trim
Front panel adjustment
Installing the front panel in the correct position
Removal and installation of the supporting frame
Removal and installation the front panel
Next articles
Luggage compartment door trims
Luggage compartment trims
Ceiling lining
Removal and installation the front seat
Removal and installation front seat components
Front seat with manual height adjustment


Similar articles from other manuals for VW cars:
Removal and installation the rear door pillar Golf 4 (1997-2004)
Removal and installation the A-pillar trim on POLO vehicles Polo 4 (2001-2009)
Link to this page in different formats


Visitor comments


No comments yet


How much will 11 + 28 =


Tiguan 1 
  • General information
  • Characteristics
  • Vehicle overview
  • Power unit
  • Petrol engine 1.4 BWK
  • Petrol engine 1.4 CAVA
  • Engine 2.0 (petrol)
  • Engine 2.0 (diesel)
  • Transmission
  • 6-speed manual gearbox 0A6
  • 6-speed automatic gearbox 09M
  • Drive shafts
  • Chassis
  • Front suspension
  • Rear suspension (2x4)
  • Rear suspension (4x4)
  • Air suspension
  • Wheels and rims
  • Brake system
  • Steering gear
  • Body
  • External equipment
  • Internal equipment
  • Electrical equipment
  • Power devices
  • Appliances and lighting
  • Communication systems
  • Heating and air conditioning
  • Electrical circuits
VWmanual.ru © 2016-2026 | Mobile version | News and articles | Sitemap: EN BG BY UA RS HR RO PL SK HU | Write message | Site search
Passat B2 • Passat B3 • Passat B4 • Passat B5 • Passat B6 • Golf 1, diesel • Golf 1, petrol • Golf 2, petrol • Golf 2 • Golf 3 • Golf 4 • Golf 5 • Polo 3 • Polo 4 • Touareg 1 • Tiguan 1 • Sharan 1 • Transporter T3 • Transporter T4 • LT 28 • LT 2D • Beetle • Caddy 3 •
Our website uses cookies to ensure functionality and convenience.