
Vehicles with center console without armrest
Remove center console without armrest.
Vehicles with center console with armrest
If present, remove the DVD player. If present, remove CD changer. If present, remove holder for "iPod player" firms "Apple". If present, remove storage compartment with USB connector. If present, remove the multimedia system control unit.
Vehicles with multimedia system
Remove the multimedia system control panel.
Vehicles with inverter with socket, 12 V-230 V -U13-
Remove inverter with socket, 12 V-230 V -U13-. Remove the rear panel of the center console. Remove center console with armrest.
All
Remove light switch -E1-. Remove the left trim on the driver's side. If present, remove the phone holder. Remove the front panel center trim. Remove trim for heater and air conditioner control panel.
Vehicles with audio system or radio navigation system
Remove tape recorder.
Climate control "Climatic " with manual adjustment
Remove heater and air conditioner control panel "Climatic".
Climate control "Climatronic" with automatic control
Remove the Climatronic air conditioner control and display panel -E87- with the Climatronic control unit -J255-.
Vehicles without air conditioning
Remove the heater and ventilation control panel.
All
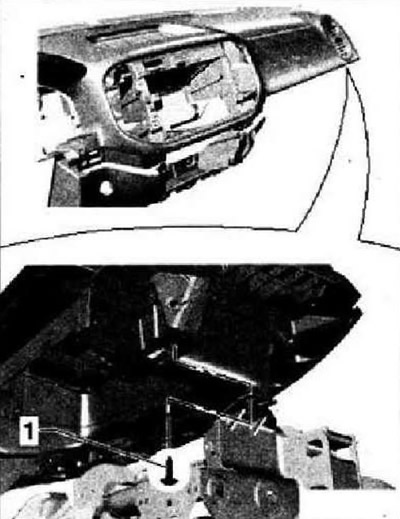
Remove the lower front panel trim. Remove screw -1- (2.5±0.5 Nm) under the left deflector. Remove screw -2- (2.5±0.5 Nm), located in the area of the instrument cluster socket.
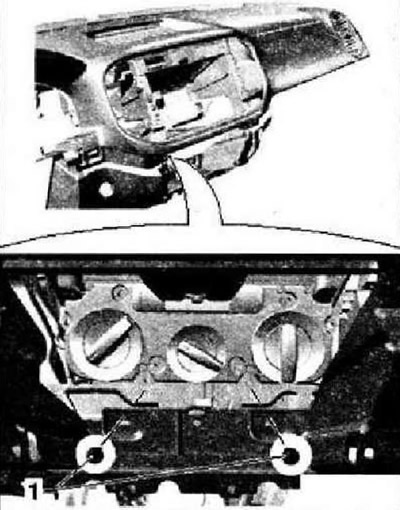
Remove screw -1- (2.5±0.5 Nm) under the right deflector.
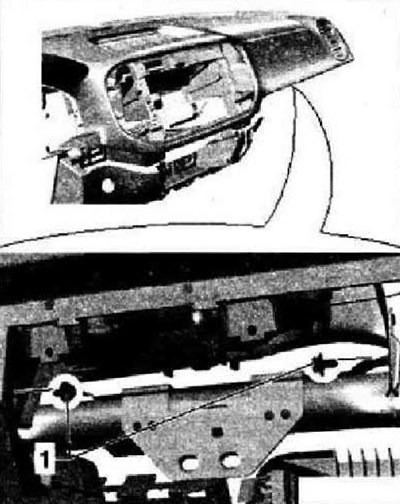
Remove two screws -1- (2.5±0.5 Nm), above the tunnel.
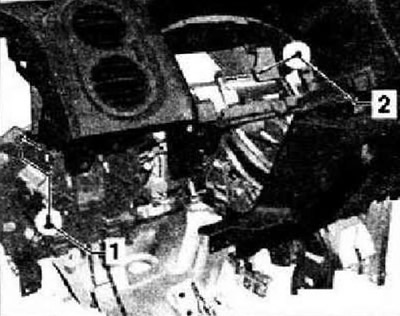
Remove two screws -1- (9 Nm) front passenger airbag mounts.
Disconnect connector -1- from headlight range control control unit -J431-. Disconnect connector -2- from front passenger airbag.

If present, unplug connector -1- at left vent temperature sender -G150-. Slightly raise dash panel until lateral centering lugs -2- come out of brackets -3-.
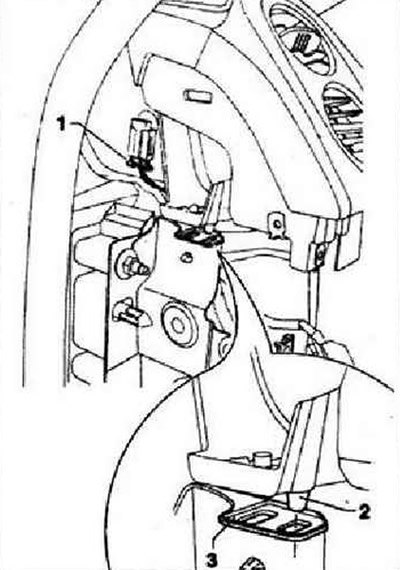
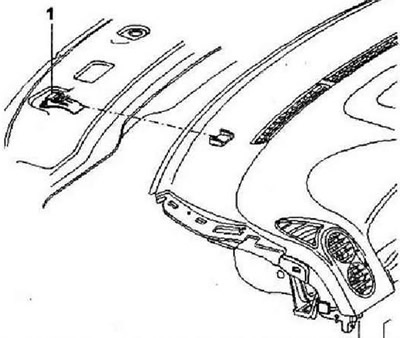
Detach dash panel from mounting sockets -1- next to windshield. Disconnect the remaining wiring harnesses from the front panel (quantity depends on configuration) and remove it with the help of a second mechanic from the car.
Visitor comments