



Cars with a center console without an armrest
Remove the center console without the armrest.
Cars with a center console with an armrest
If available, remove the DVD player. If available, remove the CD changer. If available, remove the holder for the Apple iPod player. If available, remove the storage compartment with the USB connector. If available, remove the multimedia system control unit.
Car with multimedia system
Remove the multimedia system control panel.
Cars with inverter with socket, 12V-230V "U13"
Remove inverter with socket, 12V-230V "U13". Remove rear panel of center console. Remove center console with armrest.
All
Remove the "E1" light switch. Remove the left trim panel on the driver's side. If available, remove the telephone holder. Remove the central trim panel of the front panel. Remove the trim panel of the heater and air conditioning system.
Cars with audio system or radio navigation system
Remove the radio.
Climate control system "Climatic" with manual adjustment
Remove the control panel of the heater and air conditioning system "Climatic".
Air conditioning system "Climatronic" with automatic control
Remove the control and display panel of the Climatronic "E87" air conditioning system with the Climatronic-J255- control unit.
Cars without air conditioning
Remove the heating and ventilation control panel.
All
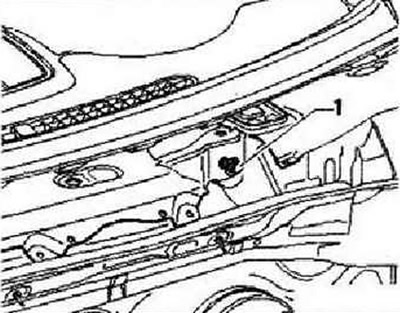
Remove the lower trim of the front panel. Remove the front panel. Remove the wiper arms. Remove the water drainage box casing. Unscrew screw "1" (20 Nm) in the water drainage box.
The original article is available at: VWMANUAL
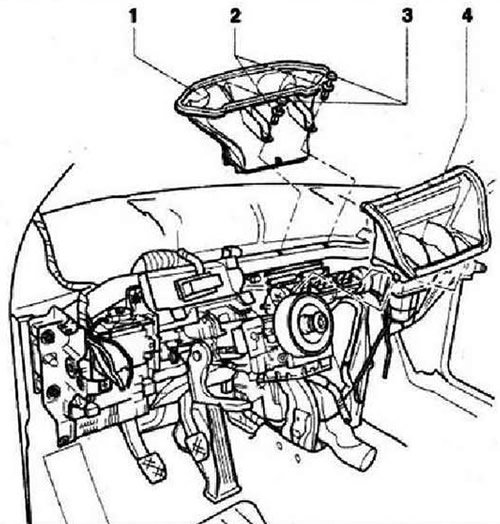
Remove the rods "3" and remove the two spacer pistons "2". Remove the air ducts "1" and "4" from the climate control module.
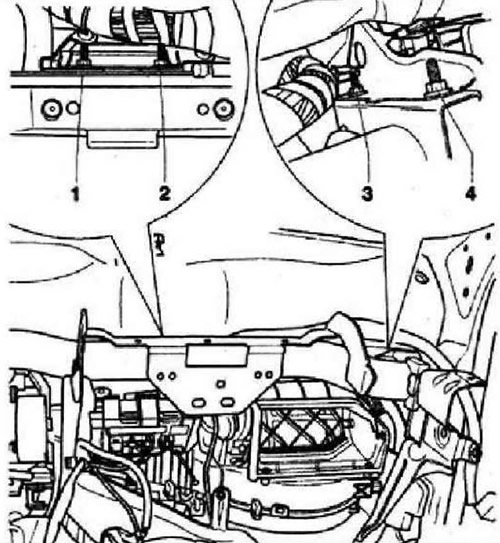
Unscrew nuts "1" and "2" (8 Nm) securing the supporting frame at the front. Raise tabs "3" slightly and move the "arrow" instrument cluster connector "4" to the left.
Remove the connector from the hole in the supporting frame.
Instructions: Before removing the supporting frame, make appropriate sketches or photographs so that you can properly route and secure the wiring harnesses later,
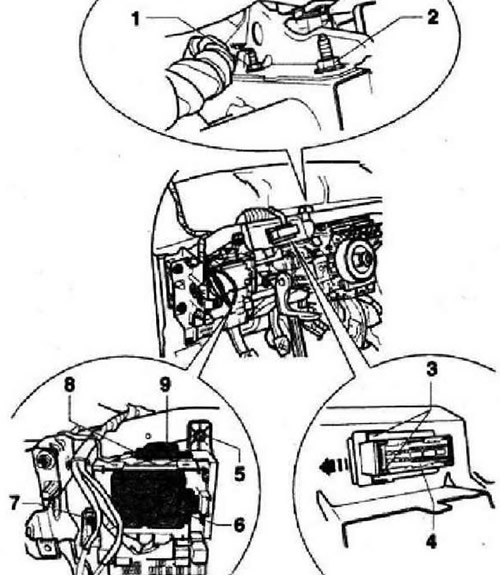
Loosen nut "5" (4.5 Nm). Release the side clips of the automatic parking aid control unit -J791-5- and remove the control unit from the relay unit. Loosen nut "7" (4.5 Nm). Disconnect wiring harness "3" from the front parking aid warning buzzer "H22" "9". Disconnect the relay unit from the supporting frame.
Remove the left footwell air duct. Disconnect the wiring harness "1" from the immobilizer reading coil "D2". Unscrew the steering column from the supporting frame.
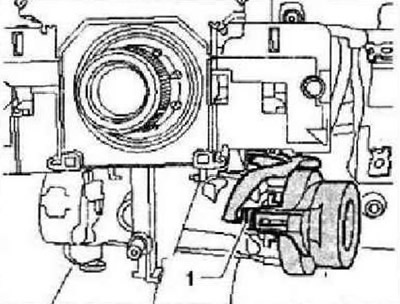
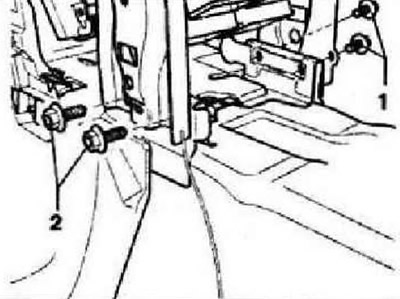
Unscrew two screws "1" and "2" on the left and right (20 Nm).
Unscrew nuts "1" and "2" (8 Nm) securing the supporting frame at the front. Unscrew nuts "3" and "4" (8 Nm) securing the supporting frame at the front.
Instructions: Using a scriber, make marks in the area of nuts "1" and "2" to mark the position of the supporting frame vertically and horizontally.
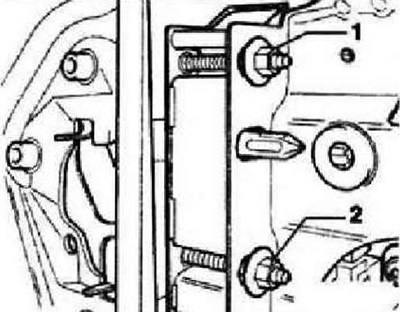
Unscrew two nuts "1" and "2" (20 Nm) on the driver's side.
Instructions: Using a scriber, make marks in the area of nut "2" to mark the position of the supporting frame vertically and horizontally.
Unscrew nut "2" on the front passenger side (20 Nm). Disconnect the wiring harnesses from the supporting frame (quantity depends on the vehicle configuration).
Instructions: Before removing the supporting frame, take the appropriate photographs so that you can properly route and secure the wiring harnesses.
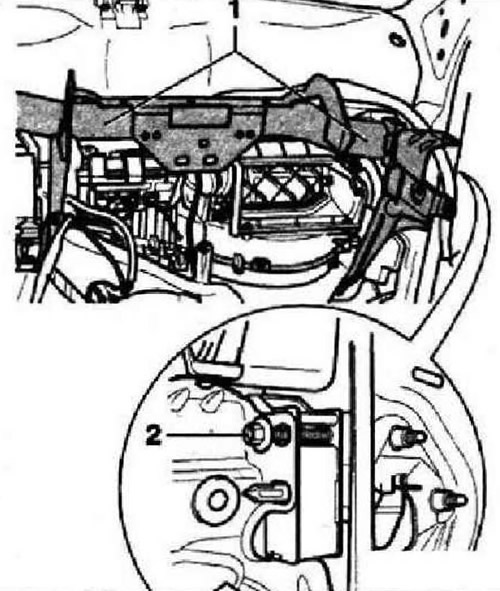
With the help of the 2nd mechanic, remove the supporting frame "1" from the vehicle.
Visitor comments