



Installing the front panel in the correct position relative to the body
To increase the vertical gap between the door trim and the front panel, it is not necessary to change the position of the front panel. To increase the gap on the left, attach a rag of the appropriate thickness to the left end of the front panel, and then close the door. This will pull the trim closer to the door, and the gap between the trim and the front panel will increase accordingly. With this method of adjustment, it is not necessary to move the front panel.
Instructions: On the front passenger side, the work is performed in a similar manner.
Installing the front panel in the correct position
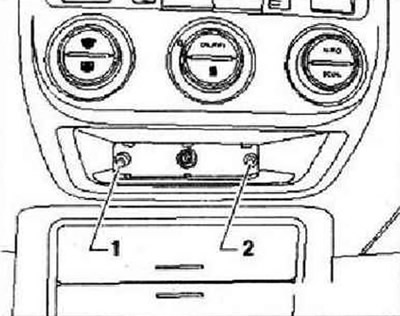
The front panel is height and transversely adjustable. Remove the windshield wiper arms. Remove the water drainage box casing. Remove the side trims of the front panel. Remove the trim of the heater and air conditioning control panel. Loosen screws "1" and "2" located under the heater and air conditioning control panel by approximately 2-3 turns (2.5±0.5 Nm). Remove the trims in the footwell on both sides.
Loosen screw "1" in the water drainage box by 2-3 turns (20 Nm).
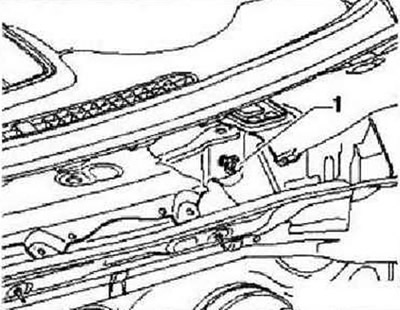
Instructions: Even though the picture shows a Golf Plus, the work is carried out in a similar manner.
Loosen two screws "1" and "2" on each side of the tunnel by approximately 2-3 turns (20 Nm).
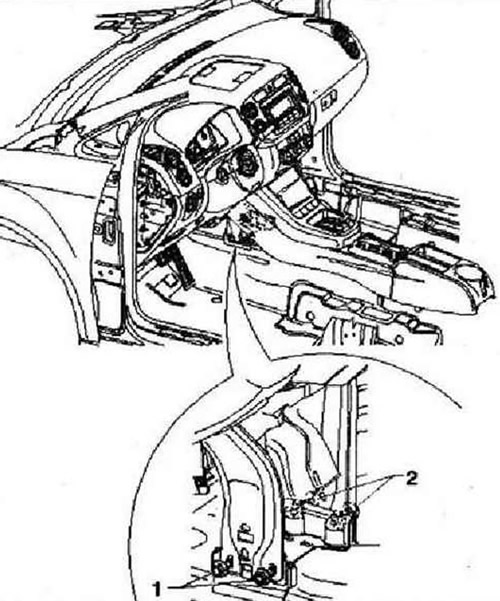
Loosen nut "1" on the right side by about 2-3 turns (20 Nm). Loosen two nuts "2" on the left side by about 2-3 turns (20 Nm).
Visitor comments