
Removal and installation of an upholstery and a pillow of a back seat
Instructions: The removal and installation work for the left side of the rear bench seat is described below. Removal and installation work for the right side of the rear bench seat is carried out in the same way.
Move the left side of the rear seat as far forward as possible. Tilt the seatback forward. Remove screw -1- (6 Nm) and disconnect the gas stop -2- from the slider -3-.
Caution: The backrest must be folded forward when detaching the gas stop -2-. There is no force in the atom position on the gas stop.
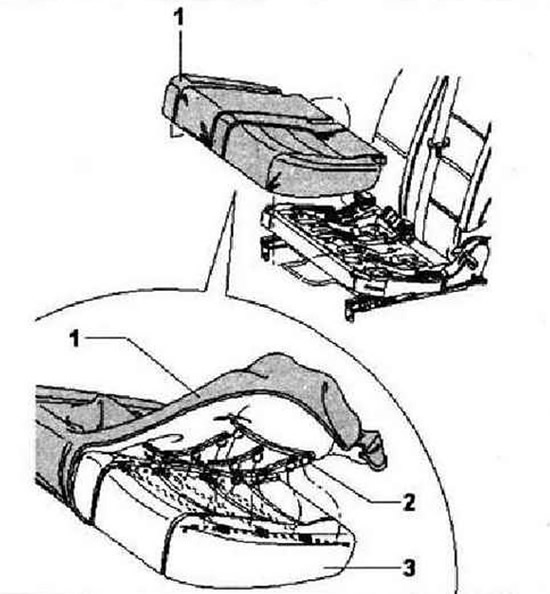
Tilt back again. Remove the upholstery fixing strips -4- around the perimeter from the underside of the seat from the seat frame.

Remove upholstery -1- and cushion -3- from seat frame. Turn the upholstery up around the perimeter. Remove clips -2- and remove upholstery from cushion.
Instruction: Staples -2- are destroyed when removed. When assembling, they must be replaced with new ones. Use pliers -VAG 1634- for this.
Removal and installation of an upholstery and pillow of a back of a seat
Instructions: The following describes the removal and installation work for the left backrest. Removal and installation work for the right backrest is carried out in the same way.
Remove the left side of the rear bench seat, this part does not need to be removed to remove the right side back cushion. Tilt the seat back forward.
Vehicles with cargo floor
Remove the cargo floor from the vehicle.
Caution: Trim -3- is secured with two springs. When removing the cushion, the second mechanic must press it down.
All
Remove screw -4- (6 Nm) and disconnect the gas stop -5- from the slider -6-.
Caution: When releasing the gas stop -5-, the backrest must be folded forward. In this position, there is no force on the gas stop.
Tilt back again. Unlock catches -arrows- and detach cover for seat belt outlet opening -2-.
Instruction: The design of the lining of the seat belt outlet hole -2- does not provide for re-fixing, therefore, when assembling, install a new lining.
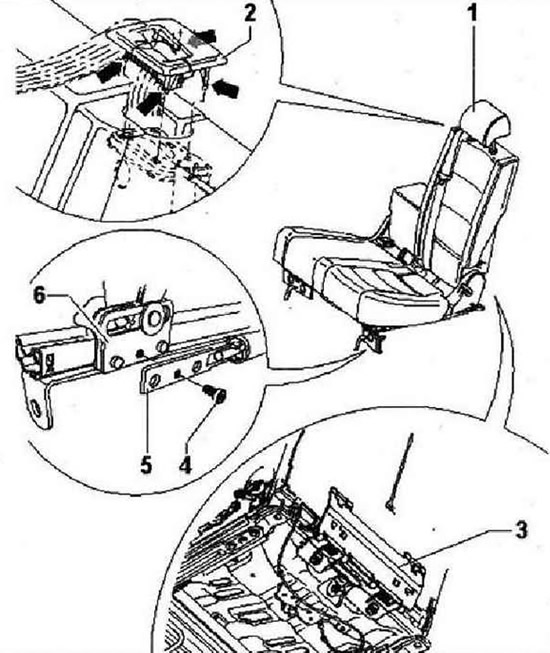
Remove screw -7- (40 Nm) and detach the seat belt eyelet -6- from the seat. Pull the seat belt forward.
Instructions: When installing, do not thread the eye through the ISOFIX brackets.
Remove trims -3- and -4- all around from mounting sockets -5- on backrest frame. Fold up the trim -1- on the sides. Remove all brackets -8-.
Instructions: Staples -8- are destroyed when removed. When assembling, they must be replaced with new ones. Use pliers -VAG 1634- for this.
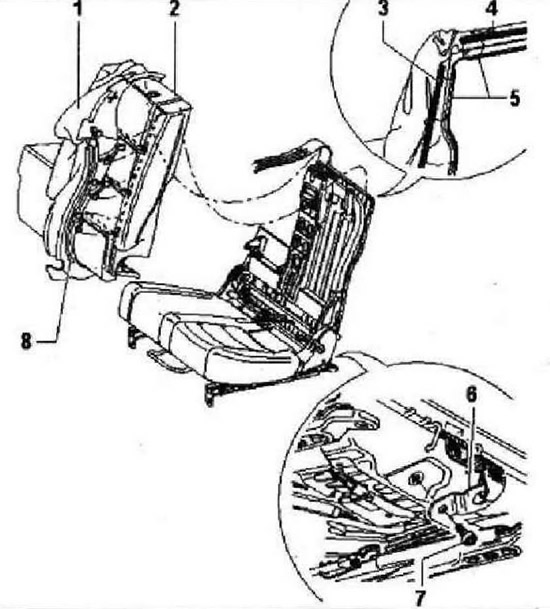
Remove upholstery -1- and cushion -2- from backrest frame.
Removal and installation of the hatch for transportation of long loads with an armrest

Move the left side of the rear seat as far forward as possible. Press the release button and remove the headrest -3- from the bulkhead module. Remove screw -1- (20 Nm). Fold forward the armrest -2- as shown in the figure, (about 50°) -arrow A-. Move up - arrow B - remove the armrest from the seat in the backrest.
Instructions: The armrest -2- can only be removed and installed in the position shown in the figure.
Removal and installation of an upholstery and a pillow of the hatch module for transportation of long cargoes with an armrest
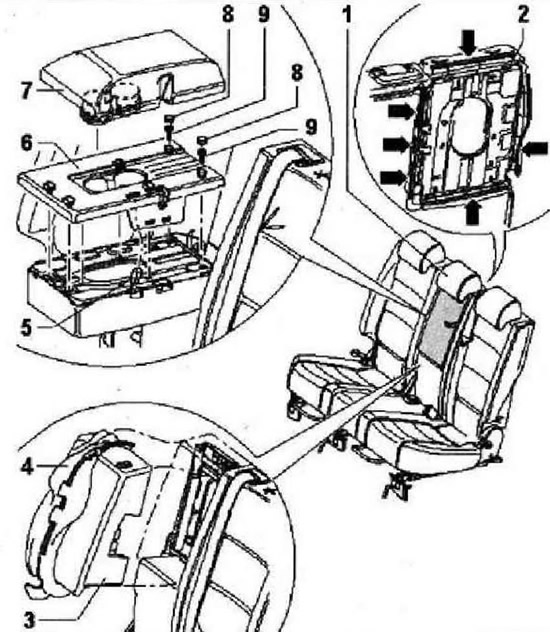
Detach cushion -7- from armrest. Use a small screwdriver to remove the two plugs -8-. Remove two screws -9- (2.5 Nm). Unlock locks in armrest and remove storage compartment -6- towards top.
Instructions: When installing, pass the opening loop -5- through the storage compartment -6-.
From the rear, remove all trim strips -arrows- from the mounting holes -2- of the armrest frame. Remove upholstery -4- and cushion -3- from armrest frame. Remove the upholstery from the pillow, turning it inside out.
Visitor comments