
When assembling the piston and connecting rod, observe the following recommendations:
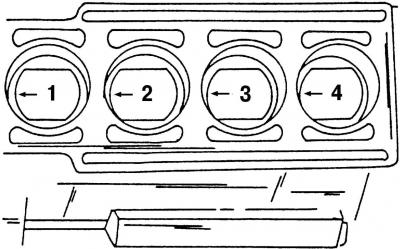
Pic. 130. Marking the bottom of the pistons before removing them
- arrow on the bottom of the piston (either drawn or knocked out if the piston is new) must point towards the front of the engine (pic. 130);
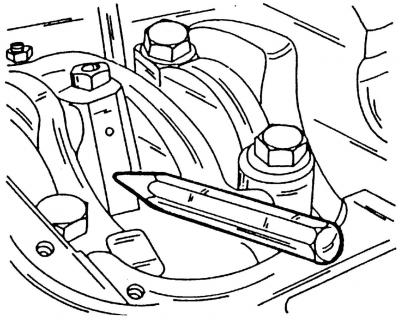
Pic. 56. Assembling the connecting rod and connecting rod bearing cap. The arrows show the protrusions
- cast lugs on the connecting rod and connecting rod cap (pic. 56) must point in the direction of the engine crankshaft sprocket;
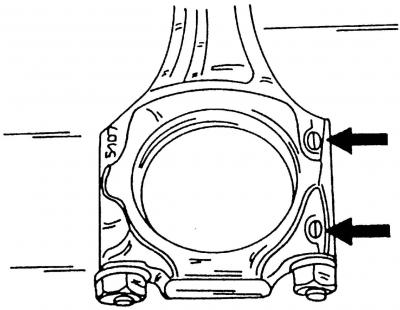
Pic. 55. Marking of the connecting rod and connecting rod bearing cap
- cylinder number marking (pic. 55) must be the same for the connecting rod and connecting rod cap.
Assemble the pistons and connecting rods in the following order:
- heat the piston to 60°C (to do this, put it in hot water) and pick up the mandrel, which should go inside the piston pin;
- heat the connecting rod;
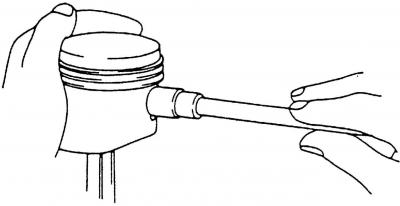
Pic. 133. Installing the piston pin with a mandrel
- by hand, using a mandrel, insert the piston pin into the heated piston and connecting rod (pic. 133). If the piston is very hot, then it can be wrapped with a rag;
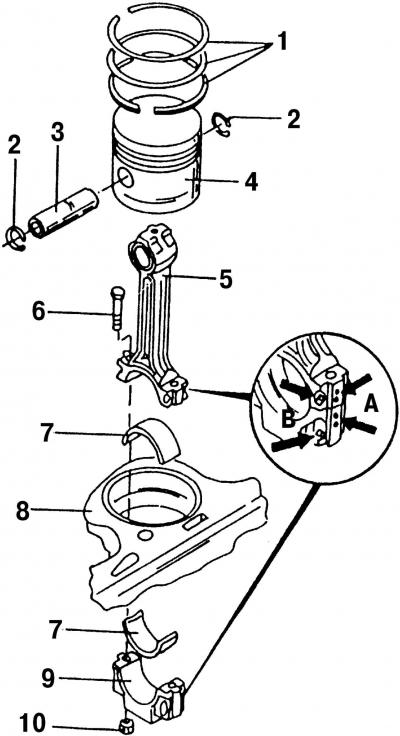
Pic. 132. Details of the connecting rod and piston group: 1 - piston rings; 2 - retaining ring; 3 - piston pin; 4 - piston; 5 - connecting rod; 6 - connecting rod mounting bolt; 7 - connecting rod bearing shell; 8 - cylinder block; 9 - connecting rod bearing cover; 10 - connecting rod nut; A - marks on the connecting rod and cover; B - the position of the cast protrusions
- install snap rings 2 (pic. 132) on both sides of the piston pin 3 and make sure that they fit snugly in the grooves;
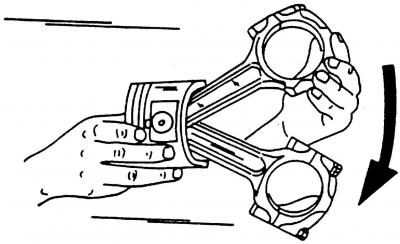
Pic. 65. Checking the ease of movement of the connecting rod
- check: the connecting rod after assembly moves freely back and forth (pic. 65). It should move smoothly, no jamming should be felt;

Pic. 58. Removing the piston ring with a puller
- lubricate the grooves on the piston and piston rings with engine oil and use special pliers to install the piston rings (pic. 58) install the piston rings in the grooves. If the ring is marked «Oben» or «Thor», then install the ring with the mark up (to the bottom of the piston). Compression piston rings are easy to mix up. For this reason, you need to look at their cross section before installation;
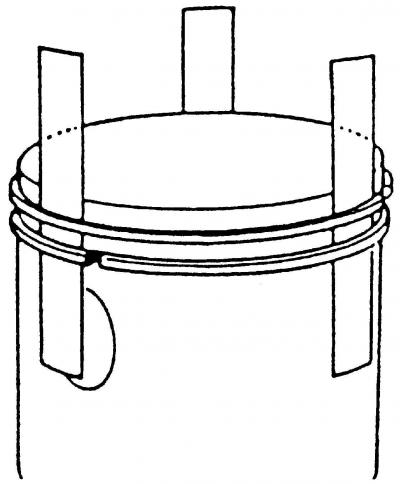
Pic. 59. Removing the piston ring with metal strips
- if there are no special pliers for installing piston rings, then metal strips can be used (pic. 59). To do this, put the rings on metal strips and bring them to the level of the piston grooves. After that, pull out the metal strips and install the piston rings in the grooves.
Visitor comments