



Contents: Disassembly ↓ Assembly ↓ Installing the tripod sprocket…↓ Installing the tripod sprocket…↓
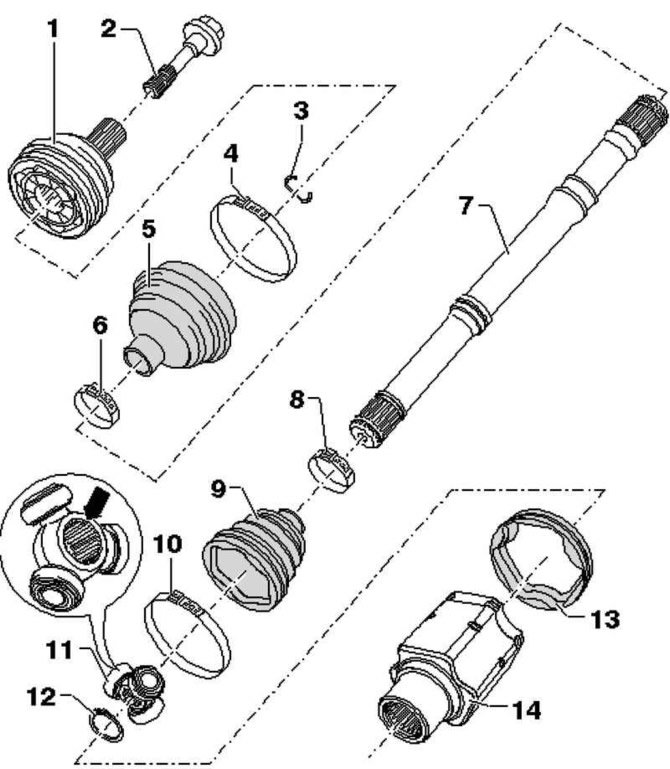
Fig. 3.114. Drive shaft with AAR3300i tipoid joint for 6-speed automatic transmission 09M (all wheel drive): 1 – outer CV joint; 2 – bolt; 3 – retaining ring; 4 – clamp; 5 – CV joint boot; 6 – clamp; 7 – drive shaft; 8 – clamp; 9 – tripod joint boot; 10 – clamp; 11 – tripod with rollers; 12 – retaining ring; 13 – adapter; 14 – hinge housing
The components of the AAR3300i tip-joint drive shaft for the 6-speed 09M automatic transmission are shown in Figure 3.114.
Disassembly
Open the inner joint clamp and slide the boot off the adapter.
Remove the hinge element from the drive shaft.
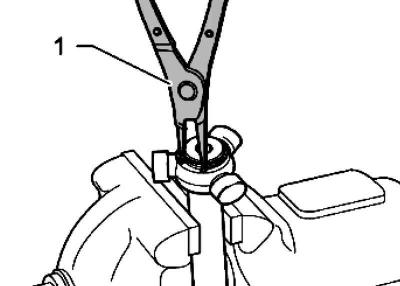
Fig. 3.115. Removing the retaining ring: 1 – pliers (universal)
Remove the retaining ring (fig. 3.115).
Place the drive shaft in a vice.
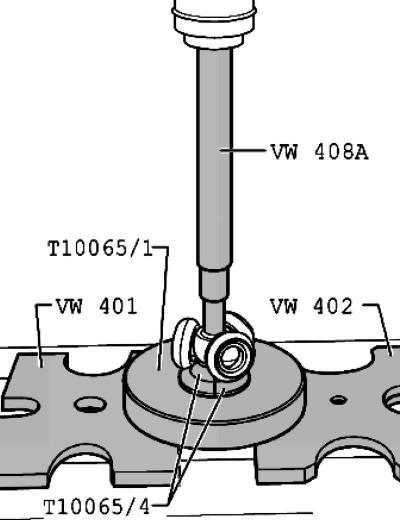
Fig. 3.116. Pressing out the joint sprocket
Press the Tripod joint sprocket off the drive shaft (fig. 3.116).
Remove the boot from the shaft.
Clean the shaft, joint element and seal groove.
Assembly
Place the smaller CV boot clamp onto the shaft.
Place the boot on the shaft.
Place the joint housing onto the shaft.
Installing the tripod sprocket (bevel drive shaft)
The chamfer in the splined hole of the tripod serves as a guide during installation and should be directed towards the shaft.
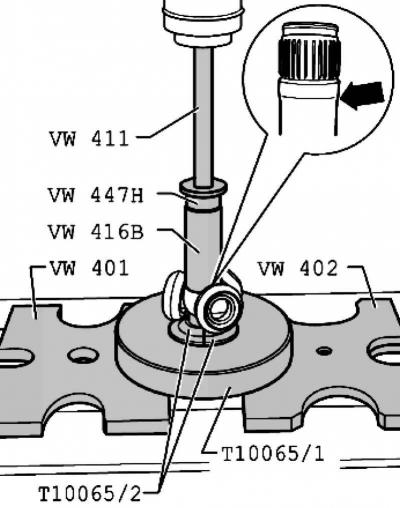
Fig. 3.117. Pressing in the joint sprocket
Place the tripod onto the splined end of the shaft and press it in until it stops (fig. 3.117).
Make sure that the pressing force does not exceed 3.0 t
If necessary, apply plastic grease G 052 142 A2 to the splined end of the drive shaft and the splines of the tripod bore.
Install the retaining ring, making sure it fits correctly.
Inject 70 grams of drive shaft grease from the repair kit into the Tripod joint.
Slide the hinge housing using the rollers and fix it.
Apply 60 grams of drive shaft grease from the repair kit to the rear of the tripod joint.
Install the boot.
Installing the tripod sprocket (cylindrical drive shaft)
Place the tripod onto the splined end of the shaft and press it in until it stops.
Make sure that the pressing force does not exceed 3.0 t
If necessary, apply G 052 142 A2 plastic grease to the splined end of the drive shaft and the splines of the tripod bore.
Install the retaining ring, making sure it fits correctly.
Inject 70 grams of drive shaft grease from the repair kit into the Tripod joint.
Slide the hinge housing using the rollers and fix it.
Apply 60 grams of drive shaft grease from the repair kit to the rear of the tripod joint.
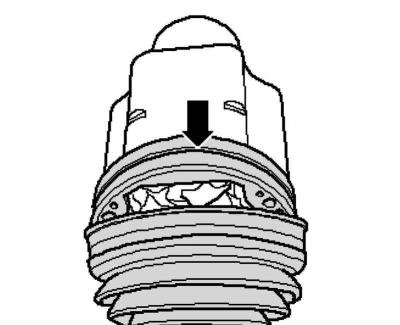
Fig. 3.118. Installing the dust cover
View the original article on the resource VWManual
Slide the boot onto the adapter and make sure the boot is securely seated in the adapter groove (fig. 3.118).
Install the clamp and press with clamp pliers until a good seal is achieved.
Visitor comments