
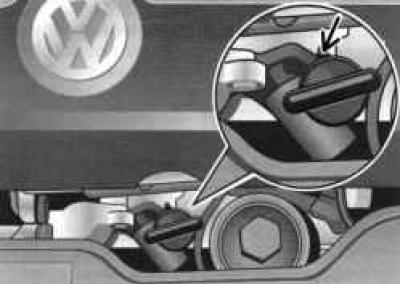
Pic. 1.70. Location of dipstick cover
The location of the oil dipstick to check the engine oil level in the engine is shown in Figure 1.70.
When measuring the oil level, the vehicle must be level. After stopping the engine, wait a couple of minutes so that the oil can drain into the oil pan.
Then remove the dipstick, wipe it with a clean cloth and insert the dipstick again until it stops.
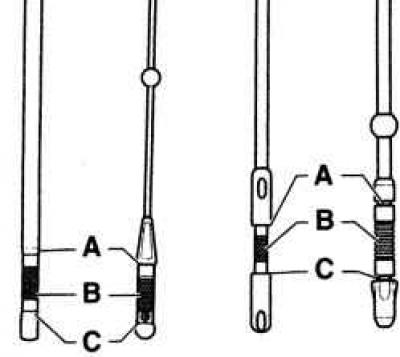
Pic. 1.71. Checking the oil level
If the dipstick has a sock (pic. 1.71), make sure that this toe is aligned with the toe of the guide tube. Otherwise, the measurement results will be incorrect - there is a risk of engine damage.
In conclusion, remove the dipstick again and look at what level the oil is:
A - If the oil level is in zone A, the oil should not be topped up.
B - If the oil level is in zone B, the oil can be topped up. There is enough oil in the engine if its level after topping up is in zone A.
C - If the oil level is in zone C or even lower, the oil must be topped up. It is quite acceptable that the oil level after topping up is in the zone of mark B.
The oil level must never be higher than zone A.
Under special engine operating conditions, such as when driving for a long time (within 10–12 hours), the oil level should, if possible, be kept in the zone of mark A, but not higher.
Adding oil to the engine

Pic. 1.72. Oil filler cap
Loosen the filler cap (pic. 1.72).
Add a small amount of oil.
Wait a few minutes and check the oil level. Normally, if the oil level is in zone B, no more oil should be added, otherwise you can overfill.
The oil level must never be higher than zone A.
Otherwise, the oil will enter the crankcase ventilation system and be released into the atmosphere with exhaust gases. On vehicles equipped with a catalytic converter, oil can burn in the catalytic converter and damage it.
Carefully close the filler plug and insert the dipstick all the way. Otherwise, oil may be ejected during engine operation.
Visitor comments