
Note: Camber correction is required only after body repair. Camber is not adjustable but can be adjusted on both sides by moving the consoles and/or subframe
Note: The subframe can only be moved to the left or right, never in the direction of or against the direction of travel.
Remove the noise shield.
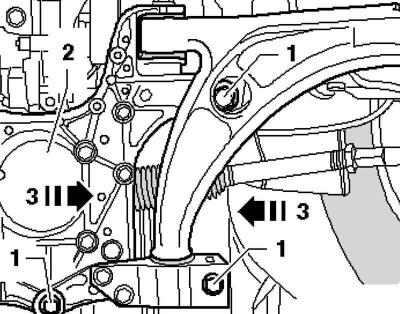
Pic. 4.32. Subframe mount
Loosen the bolts 1 of the subframe 2 on the body on both sides (pic. 4.32).
The ability to adjust the camber is limited by the tolerances in the holes of the consoles and subframe. If it is not possible to achieve the nominal value by moving parts, then these parts and the body must be checked.
The nominal camber can be adjusted by moving subframe 3.
Tighten the subframe-to-body bolts to an additional tightening angle.
After moving the subframe, check the gap between the universal joint with cross and the cutout in the front wall.
Unscrew the fixing nuts and remove the trim in the footwell.
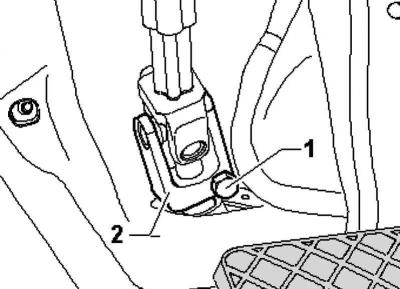
Pic. 4.33. Cardan joint
Along the perimeter between the universal joint 2 and the cutout in the front wall there must be a gap of at least 5 mm (pic. 4.33).
Visitor comments