



Rear bumper of Sedan models
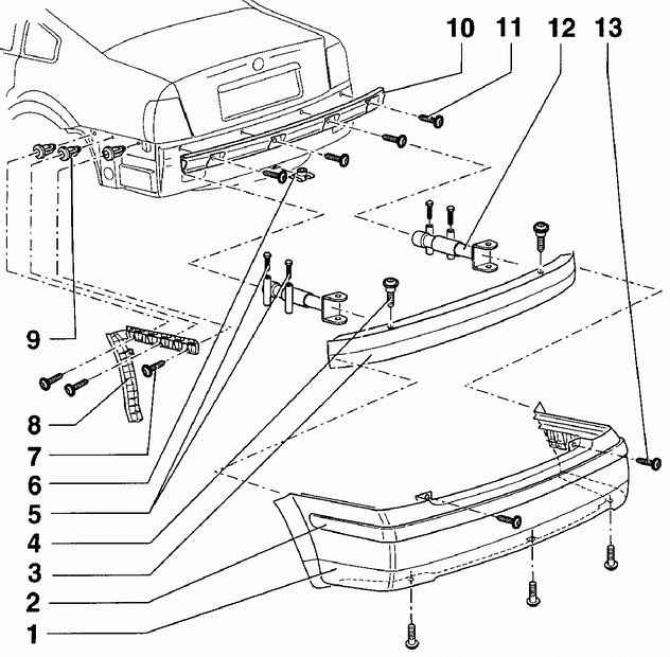
- 1 - bumper,
- 2 - shock absorbing pad,
- 3 - bumper bracket,
- 4 - screws 2 pcs., 15 Nm,
- 5 - bolts 4 pcs., 30 Nm + turn further by 180°,
- 6 - nut,
- 7 - screws 6 pcs., 2 Nm,
- 8 - guide bracket,
- 9 - nuts 6 pcs.,
- 10 - base,
- 11 - screws 4 pcs., 1.2 Nm,
- 12 - bumper fastening element,
- 13 - bolts 5 pcs., 6 Nm
Warning: Shock absorber 2 is attached to the bumper.
[The original information is posted on the website: VWMANUAL]
Warning: When removing the rear bumper, move it backwards parallel to guide bracket 8.
Rear bumper of station wagon models
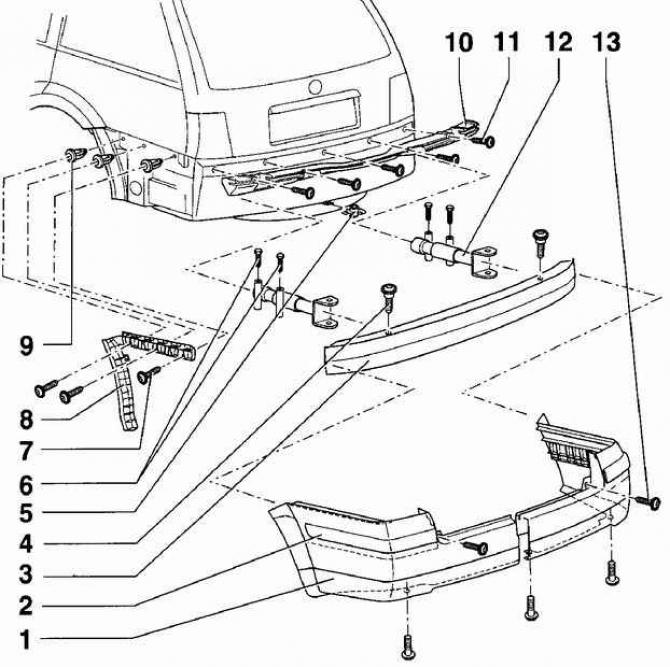
- 1 - rear bumper,
- 2 - shock absorbing pad,
- 3 - bumper bracket,
- 4 - bolts 2 pcs., 15 Nm,
- 5 - nut,
- 6 - bolts 4 pcs., 30 Nm + turn further by 180°,
- 7 - screws 6 pcs., 2 Nm,
- 8 - guide bracket,
- 9 - nuts 6 pcs.,
- 10 - base,
- 11 - screws 4 pcs., 1.2 Nm,
- 12 - bumper fastening element,
- 13 - screws 5 pcs., 6 Nm
Warning: Shock absorber 2 is attached to the bumper.
Warning: When removing the rear bumper, move it backwards parallel to guide bracket 8.
Warning: When installing bolts 6, new bolts must be used.
This subsection describes the procedure for performing work on Sedan models.
Execution order
1. Unscrew the screws securing the side part of the bumper
2. Unscrew the screws securing the rear and lower parts of the bumper (13), see Fig. Rear bumper of Sedan models.
3. Pull back to remove the bumper from the guide brackets.
Visitor comments