



Remove the air cleaner housing assembly if it is located in the battery area.
Remove the battery, battery cover and battery bracket.
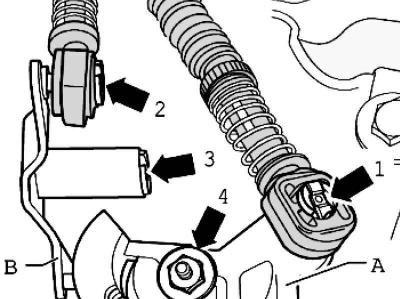
Fig. 3.23. Fastening the clutch cables and gear shift lever
Remove lock washer 1 for the shift cable from gear shift lever A (Fig. 3.23).
Remove lock washer 2 for gear selection cable from intermediate lever B (Fig. 3.23).
Remove the shift cable and selector cable from the pivots.
Remove lock washer 3 from intermediate lever B and remove the lever.
Remove gear shift lever A by unscrewing nut 4 (Fig. 3.23).
Disconnect the cable stop from the gearbox.
Then tie the shift cable and selector cable at the top.
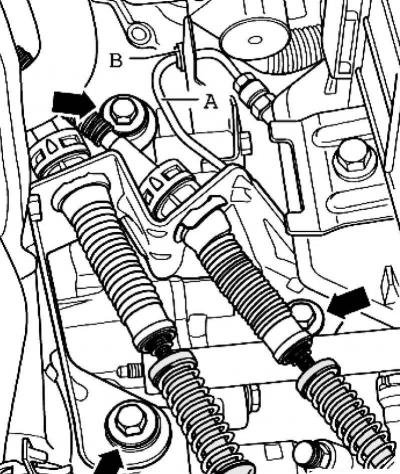
Fig. 3.24. Gearbox bracket and tubular hose
Remove bracket B from the gearbox and pull it off the pipe-hose line A (Fig. 3.24).
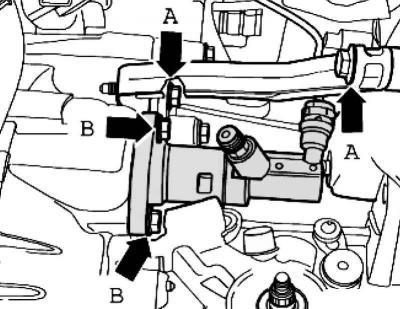
Fig. 3.25. Fastening the clutch slave cylinder
Then remove the gearbox support A (Fig. 3.25).
Remove the clutch slave cylinder B and put it aside, secure it with wire, do not open the lines.
Caution: Do not press the clutch pedal any further.
Remove the ground wire from the upper transmission-to-engine mounting bolt.
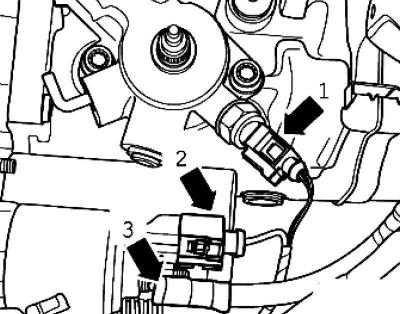
Fig. 3.58. Reversing light switch and starter connectors
Disconnect connector 1 from the reversing light switch (Fig. 3.58).
After this, disconnect connector 2 and line 3 from the starter.
Then remove the top mounting screw on the starter.
Remove the transmission/engine mounting screws at the top.
Disconnect all hoses and wires passing through the area of the engine mounting eyes of crossmember A.
Install the gripping device together with the adapters in front of the hood stop.
Lightly clamp the engine/gearbox assembly using the lead screws.
Screw the holder to the rear three receiving holes of the battery bracket.
To do this, use a flange bolt M6x80 or a battery bracket mounting bolt.
Loosen the wheel bolts of the left and right front wheels.
Raise the car.
Remove the front wheels.
Remove the sound insulation.
Remove the lower part of the front left fender liner.
Then be sure to disconnect all hoses from the transmission.
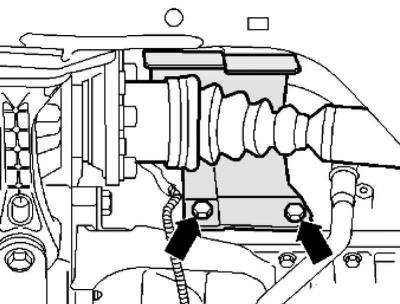
Fig. 3.59. Protective cap for the inner right CV joint
Remove, if present, the protective cap for the inner right CV joint (Fig. 3.59).
Disconnect the exhaust system at the double clamp and unscrew the exhaust pipe bracket from the subframe.
Disconnect the drive shafts from the flange shafts and secure them in the highest position, being careful not to damage the protective coating.
Remove the left and right connecting rods from the stabilizer.
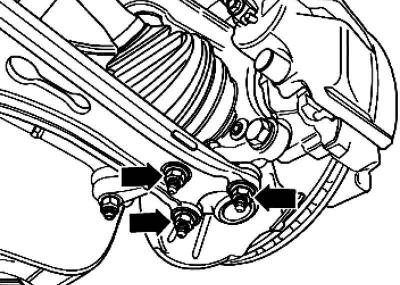
Fig. 3.60. Ball joint nuts
Unscrew the nuts of the ball joint to the support arm (Fig. 3.60).
Remove the lower powertrain mount from the transmission.
Remove the steering gear from the subframe and tie up the mechanism.
Secure the subframe before removing.
Remove the subframe with the pendulum support, stabilizer and suspension arms.
Remove the left powertrain mount hex head screws from the transmission mount.
Place the engine/gearbox unit in an inclined position by lowering crossmember A using the lead screw.
Lower the gearbox by moving the screw clamp
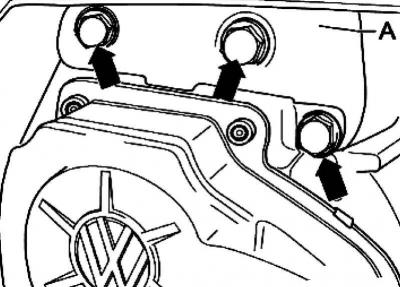
Fig. 3.61. Gearbox console mounting
Remove gearbox console A (Fig. 3.61).
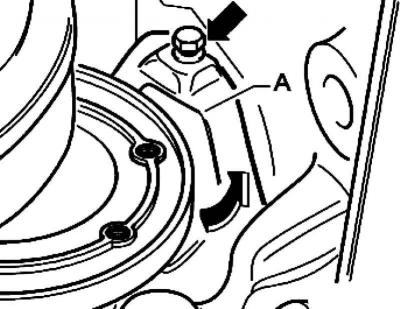
Fig. 3.2. Small shield
Remove the small shield A for the flywheel behind the right shaft with flange, if present (Fig. 3.2).
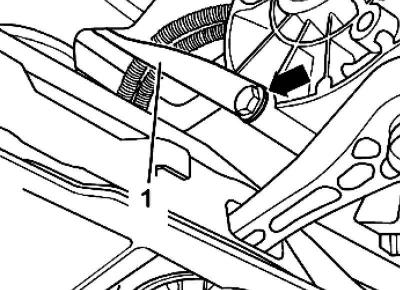
Fig. 3.62. Fastening the exhaust system rod
Remove exhaust rod 1 from gearbox and exhaust system (the rod mount to the exhaust system is not visible in the picture) (Fig. 3.62).
Remove the starter.
The mounting bracket is equipped with an installation template for removing the "02S" gearbox.
Install the mounting bracket onto the tilter.
Position the mounting bracket tabs according to the hole positions of the installation template.
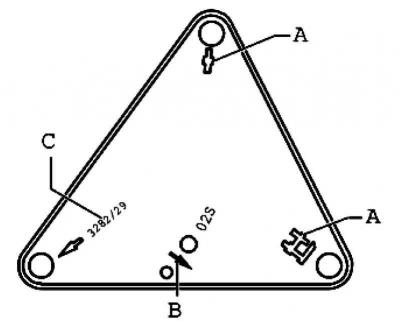
Fig. 3.63. Mounting bracket location
Screw fastening elements A and C as shown on the installation template (Fig. 3.63).
[The information is posted on this resource VWmanual.ru]
The tilter must be placed under the vehicle; arrow B on the installation template shows the direction of vehicle movement (Fig. 3.63).
Align the installation template parallel to the gearbox and secure the locking support to it.
Then screw the pin into the hole for the lower powertrain mount mounting screw on the transmission.
Remove the gearbox-to-engine mounting bolts at the bottom.
Press the gearbox away from the fitted bushings and carefully lower it.
Change the position of the transmission when lowering using the mounting bracket lead screws.
Note: When lowering the transmission, watch all lines.
Visitor comments