
Removing
1. Make sure the wiper brushes are in their original position.
2. Disconnect the battery.
3. Remove the brush holders.
4. Remove the fairing grille, see the relevant chapter.
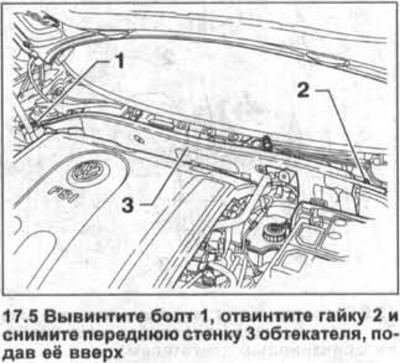
5. Unscrew the bolt 1, unscrew the nut 2 and remove the front wall 3 of the fairing, pushing it up (see illustration).
6. Disconnect the plug 1 power supply of the glass cleaner motor (see illustration).

7. Unscrew bolts of fastening of a frame of a cleaner 2 (see arrows in illustration 17.6) and remove the frame together with the rods and the electric motor, pushing the frame up.
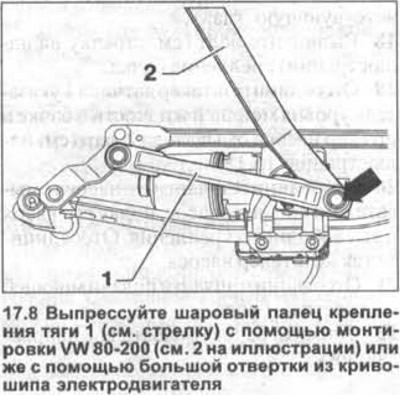
8. Press out the spherical pin of fastening of draft 1 (see arrow in illustration) with VW 80-200 mount (see 2 in illustration) or using a large screwdriver from the motor crank.
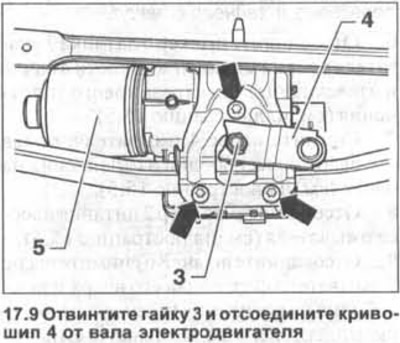
9. Unscrew the nut 3 and disconnect the crank 4 from the motor shaft (see illustration).
10. Remove the three screws (see arrows in illustration 17.9) and disconnect the wiper motor 5 from the frame.
Installation
Attention! Make sure the motor is in the correct position for the park position of the wiper blades. If necessary, connect the plug and battery and let the motor run for a short time and then switch it off. The electric motor after every second shutdown is set to its original position.
11. Fasten the motor to the frame by tightening the mounting bolts to 8 Nm.
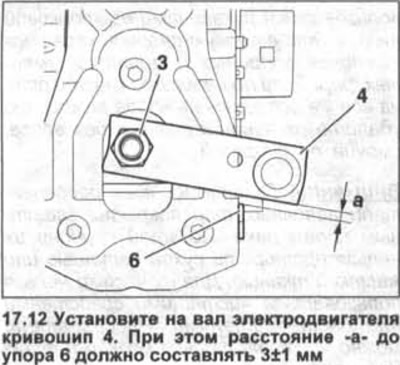
12. Install the crank 4 on the motor shaft. In this case, the distance -a- to the stop 6 should be 3±1 mm (see illustration). In this crank position, tighten nut 3 to 18 Nm.
13. Secure the linkage to the crank with the ball pin, locking it.
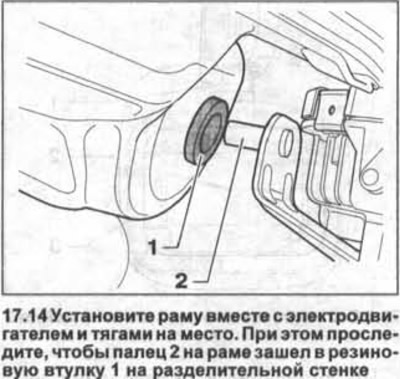
14. Install the frame together with the electric motor and rods in place. At the same time, make sure that the pin 2 on the frame goes into the rubber bushing 1 on the dividing wall (see illustration).
15. Tighten the bolts of the glass cleaner frame to the body with a force of 8 Nm.
16. Connect the cleaner motor power plug.
The rest of the parts are installed in the reverse order of removal.
17. Check the parking position of the wiper brushes.
Visitor comments