



Adjusting the gear shift mechanism
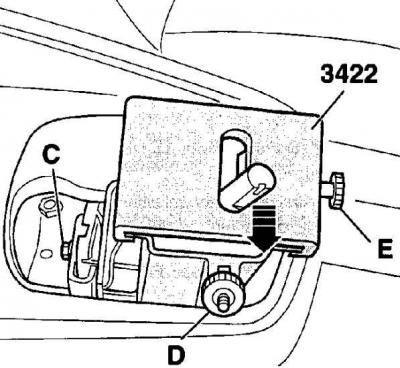
- C - screw for fixing the adjusting device;
- D - gear shift lever fixing screw;
- E - slider fixing screw
Before adjusting the shift cables, check that the gearbox, clutch and clutch control are in order. In addition, the shift lever should move smoothly and without jerking.
Execution order
1. Place the gear shift lever in neutral and apply the handbrake.
2. Release and lift up the gear shift lever protective boot.
3. Loosen the gearbox stop mounting bolt (A, see figure in clause 4 of subsection 8.1.1).
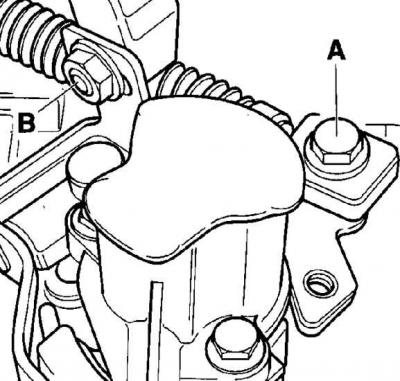
4. Loosen the shift cable mounting bolt (A) and the nut from the pre-selector cable end (B) so that the shift cables can move freely in the longitudinal holes.
5. Inside the vehicle, unscrew the bolt at the front of the gearshift lever housing (C, see figure Adjusting the gear shift mechanism) and install adjusting tool 3422.
6. Place the adjusting device's mounting hook under the plate and secure with a screw (D, see figure Adjusting the gear shift mechanism). Move the gear shift lever to the left into the slots of the adjusting device slider.
7. Move the gear shift lever and adjusting device to the left until it stops and secure the slider firmly with the screw (E, see figure Adjusting the gear shift mechanism).
8. Move the gearshift lever to the right in the slots of the adjuster and tighten the bolt (C) to a torque of 15 Nm.
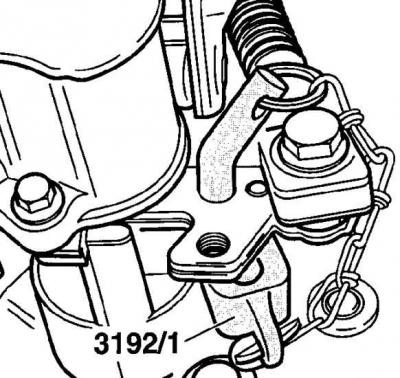
9. Install the slotted plate and guide pin into the shift lever on the transmission. Slide the plate between the shift lever and cover until it is firmly seated, but should not lift the shift lever.
10. In this position, screw in both gear shift cables, with the cable between the stop and the clamp bolt being taut, and remove the plate with the guide pin, as well as the adjusting device. Bolt (A, see the figure in point 4) tighten to 25 Nm and tighten nut (B) to 15 Nm.
11. Install the gear shift lever protective boot.
12. Tighten the gearbox stop mounting bolt to 25 Nm.
Visitor comments