
English Русский
Български
Беларускі
Український
Српски
Hrvatski
Română
Polski
Slovenský
Magyar
  |  Articles  |  Sitemap  |  Contacts  |    |
Car maintenance Ford Car maintenance Hyundai Car maintenance Chevrolet Car maintenance BMW Car maintenance Audi Car maintenance Opel Car maintenance AvtoVAZ
VWmanual.ru


Main   Passat   Golf   Polo   Touareg   Tiguan   Sharan   Transporter   Others  
LT 28 (1975-1991) LT 2D (1996-2003) Beetle (1960-1986) Caddy 3 (2003-2010)

Removal, checking and installation the oil pump (VW Beetle)

  • Main
  • Volkswagen
  • Beetle
  • Power unit
  • Cooling and lubrication system
  • Removal, checking and installation the oil pump
            0


Contents: Removal ↓ Examination ↓ Installation ↓

Removal


Removing the oil pump is possible without removing the engine.

Remove the rear engine cover (see section "Removal and installation the rear engine cover").

Remove the V-belt pulley (see section "Replacing V-belt pulleys").

Remove the protective cover under the V-belt pulley.

Unscrew the 4 nuts securing the oil pump cover.

Remove the oil pump cover together with the sealing gasket and take out the gears.

Lightly tap with a rubber hammer to remove the oil pump housing.

Examination


Before installation, check the wear of the oil pump housing and gear bearing journals. Worn surfaces in the housing lead to loss of oil pressure.

Check the rigidity of the fit of the short gear shafts installed in the housing; replace the housing if necessary.
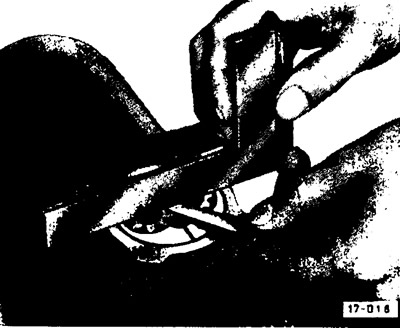
Check the axial play of the oil pump gears. To do this, place a steel ruler on the body and use a…


Check the axial play of the oil pump gears. To do this, place a steel ruler on the body and use a feeler gauge to check the gap. It should not exceed 0.1 mm.

Check the pump cover for signs of wear; sand down or replace the worn out cover.

Check the mounting surface on the crankcase for the oil pump housing for damage and cleanliness.


Installation


Install the oil pump housing with a new gasket and insert the gears.

Turn the crankshaft two revolutions so that the camshaft makes one revolution and sets the gears in motion. This will ensure that the gears are centered in the pump body.

Install the pump cover with a new sealing gasket and tighten the M8 nuts to a torque of 25 Nm (2.5 kgfm), without changing the position of the pump body.

Install a protective cover under the V-belt pulley.

Install the V-belt pulley.

Install the rear engine cover.

This article is available at russian, bulgarian, belarusian, ukrainian, serbian, croatian, romanian, polish, slovak, hungarian
The text has been checked: Kolesnikov Artem

Share information:

Previous articles
Removal, installation and checking the oil pressure sensor
Removal and installation the safety valve
Main elements of the lubrication system
General description of the engine lubrication system
Next articles
Removal and installation the oil filler neck
Removal and installation the oil radiator
Engine lubrication system malfunctions
Engine cooling system — design description
Removal and installation the fan shroud
Removal, installation, adjusting and checking the thermostat


Similar articles from other manuals for VW cars:
Checking the additional coolant pump Passat B3 (1988-1993)
Checking the fuel pump voltage supply Golf 4 (1997-2004)
Checking the fuel pump Polo 3 (1995-2003)
Checking and adjusting the position of the pump-injector pistons… Touareg 1 (2002-2006)
Removal and installation the cooling system pump Tiguan 1 (2007-2015)
Checking the performance of the fuel pump Sharan 1 (1995-2000)
Windshield Washer Water Pump — Checking and Replacing Transporter T4 (1990-2003)
Link to this page in different formats


Visitor comments


No comments yet


How much will 28 + 18 =


Caddy 3 
  • General information
  • User manual
  • Daily care
  • Maintenance
  • Petrol engines 1.4 l
  • Engine repair
  • Cooling and lubrication system
  • Power and exhaust system
  • Petrol engines 1.6 l
  • Engine repair
  • Cooling and lubrication system
  • Power and exhaust system
  • Diesel engines
  • Engine repair
  • Cooling and lubrication system
  • Power and exhaust system
  • Transmission
  • Mechanical gearbox 0AH
  • Mechanical gearbox 0A4
  • Drive shafts
  • Chassis
  • Car suspension
  • Steering
  • Brake system
  • Body and wiring diagrams
  • Interior and exterior
  • Electrical circuits
Beetle 
  • General information
  • Maintenance
  • Power unit
  • Engine repair
  • Cooling and lubrication system
  • Supply system
  • Exhaust system
  • Transmission
  • Clutch
  • Car gearbox
  • Chassis
  • Front suspension
  • Rear suspension
  • Steering
  • Brake system
  • Wheels and tires
  • Body
  • Exterior
  • Electrical equipment
  • Equipment and devices
  • Power devices
  • Electrical circuits
LT 2D 
  • General information
  • User manual
  • Maintenance
  • Power unit
  • Petrol engines 2.3 l
  • Diesel engines 2.5 l
  • Diesel engines 2.8 l
  • Injection system (diesel 2.8 l)
  • Transmission
  • Clutch
  • Manual gearbox
  • Differential
  • Chassis
  • Car suspension
  • Steering system
  • Brake system
  • Body
  • Body elements
  • Heating system
  • Electrical equipment
  • Equipment and devices
  • Electrical circuits
LT 28 
  • General information
  • Maintenance
  • Power unit
  • Petrol engines 2.0L
  • Petrol engines 2.4L
  • Diesel engines
  • Cooling and heating
  • Fuel and exhaust system
  • Ignition system
  • Transmission
  • Clutch
  • Car gearbox
  • Cardan shaft
  • Rear axle
  • Chassis
  • Brake system
  • Car suspension
  • Steering system
  • Body
  • Body elements
  • Doors, locks and windows
  • Electrical equipment
  • Power devices
  • Equipment and devices
  • Electrical circuits
VWmanual.ru © 2016-2026 | Mobile version | News and articles | Sitemap: EN BG BY UA RS HR RO PL SK HU | Write message | Site search
Passat B2 • Passat B3 • Passat B4 • Passat B5 • Passat B6 • Golf 1, diesel • Golf 1, petrol • Golf 2, petrol • Golf 2 • Golf 3 • Golf 4 • Golf 5 • Polo 3 • Polo 4 • Touareg 1 • Tiguan 1 • Sharan 1 • Transporter T3 • Transporter T4 • LT 28 • LT 2D • Beetle • Caddy 3 •
Our website uses cookies to ensure functionality and convenience.