
Removing
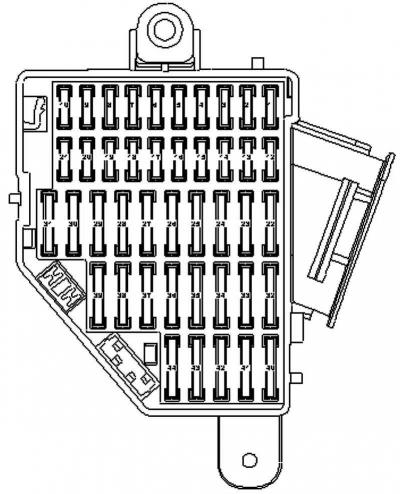
Pic. 2.73. Safety block in the front panel
Remove fuse SD34 (fuel pump) from the fuse box on the right in the front panel (pic. 2.73).
Note: Removing the fuse SD34 interrupts the power supply to the fuel pump for safety reasons, otherwise it would turn on when the driver's door is opened.
Caution: The power system is pressurized to avoid injury and skin contact, wear protective goggles and gloves. Wrap a rag around the connection before disconnecting the hoses. Then release the pressure by gently loosening the connection.

Pic. 2.74. fuel line
Disconnect the fuel line 1 and the line to the solenoid valve 1 of the absorber 3 (pic. 2.74).
Clog hoses and lines to keep dirt out of the power system.
Remove the upper and lower parts of the intake manifold.
Remove the mounting bracket and spacer from the injector.
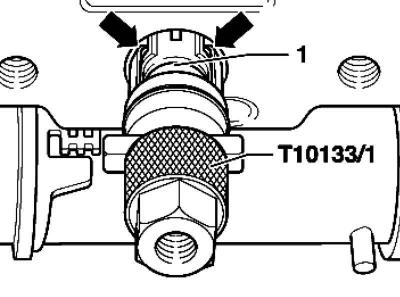
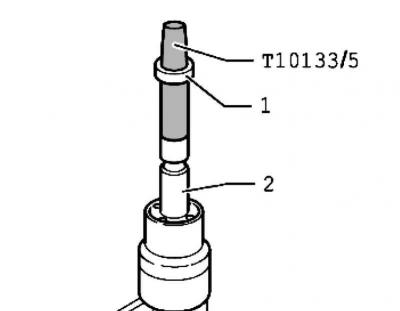
Pic. 2.75. Installing the puller on the nozzle
Put the puller on nozzle 1 (pic. 2.75). Make sure the grips of the puller fit into the notches on the injector.
Tighten the knurled nut of the puller by hand.
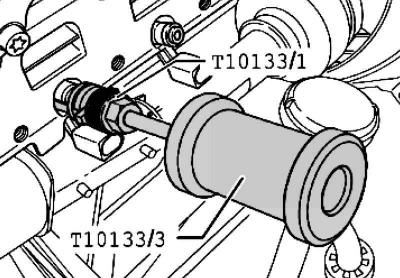
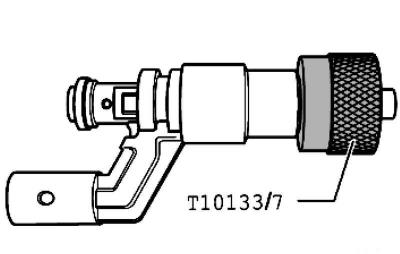
Pic. 2.76. Installing the mandrel on the puller
Screw the mandrel to the puller (pic. 2.76).
Remove the nozzle, gently tapping on the mandrel, from the cylinder head.
Installation
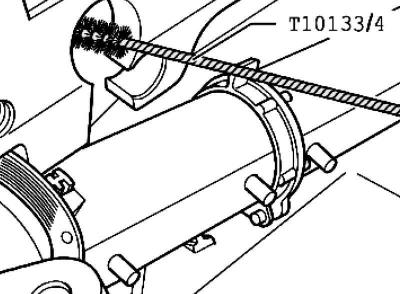
Pic. 2.77. Cleaning holes in the cylinder head with a nylon cylindrical brush
Clean the hole in the cylinder head with a nylon cylindrical brush (pic. 2.77).
Pic. 2.78. Place for cleaning the injector
Thoroughly clean the nozzle in the stuffing box area. Remove existing deposits (soot) wire brush (pic. 2.78).
Carefully cut the seal with a knife.
Clean the groove for the stuffing box.
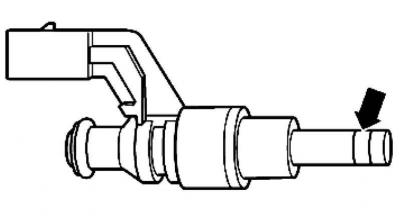
Pic. 2.79. Installing the mounting lug
Push the mounting tip with a new seal 1 onto the injector 2 (pic. 2.79).
Slide the gland with a mandrel deeper onto the spool.
Turn the mandrel over and slide the oil seal into the groove.
Pic. 2.80. Installing the calibration sleeve on the injector
Push in the calibration sleeve with slight rotation (about 180°) on the nozzle to the stop (pic. 2.80).
Remove the calibration sleeve again by turning in the opposite direction.
Push in the calibration sleeve with slight rotation (about 180°) on the nozzle to the stop.
Remove the calibration sleeve again by turning in the opposite direction.
Replace the O-ring on the nozzle and spacer.
Moisten O-rings with clean engine oil before installing.
Note: Do not lubricate the oil seal with engine oil.
Insert the nozzle into the cylinder head.
Note: The nozzle must be easy to insert, otherwise wait until the gland is sufficiently compressed.
Install the mounting bracket and spacer.
Further installation is carried out in the reverse order.
Visitor comments