



Contents: Removal ↓ Installation ↓
Removal
Remove the crankcase guard.
Unscrew the front downpipe from the exhaust manifold.
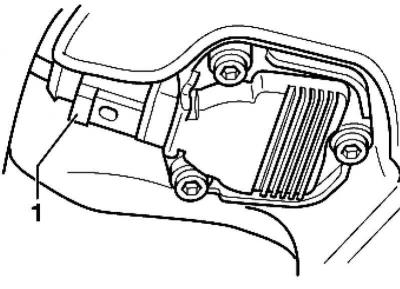
Fig. 2.55. 3-pin plug
Disconnect the 3-pin plug from the oil level and temperature sensor 1 (Fig. 2.55).
Drain the engine oil.
Unscrew the oil pan sealed with liquid sealant.
Remove the oil pan. You can carefully use a rubber mallet to pry the oil pan loose.
Remove any remaining sealant from the cylinder block using a flat scraper.
Remove any remaining sealant from the oil pan using a rotating brush attachment, such as a hand drill with a plastic bristle brush attachment kit (put on safety glasses).
Clean the mounting surfaces. They should be free of oil and grease.
Installation
Cut off the tube tip along the front mark (holes about 3 mm).
Note: Observe the expiration date of the sealant.
Note: The oil pan must be installed within 5 minutes after applying the silicone sealant.
Note: The oil pan is installed more easily and accurately if M6 threaded pins are screwed into two places on the cylinder block flange as guides.
Apply silicone sealant as shown on the clean oil pan mounting surface. The sealant bead should be 2-3 mm thick.
Apply sealant to the inside of the holes for the mounting bolts
Note: The sealant bead should not be thicker than the specified dimensions, otherwise excess sealant may enter the oil pan and clog the mesh filter in the oil intake pipe.
Immediately install the oil pan and lightly tighten all mounting bolts.
Tighten the oil pan mounting bolts to a tightening torque of 13 N·m.
Note: After installing the oil pan, the sealant must dry for about 30 minutes. Only then can you fill the engine with oil.
Visitor comments