
Location of electrical connectors (arrows) in the trunk lid
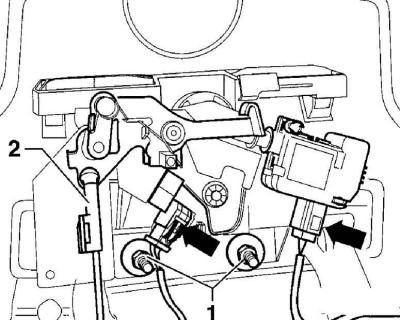
- 1 - nuts,
- 2 - thrust
Using a screwdriver to turn the safety bracket
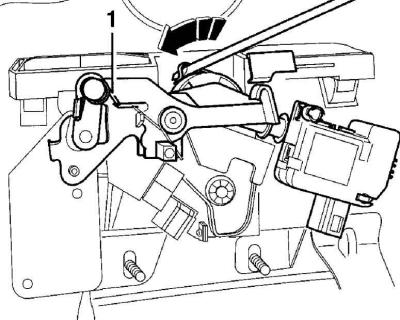
- 1 - lock cylinder bracket
Removing
1. Remove the trunk lid trim.
2. Disconnect electric sockets in a cover of a luggage carrier, see fig. Location of electrical connectors (arrows) in the trunk lid.
3. Disconnect and remove trunk lock rod (2) see fig. Location of electrical connectors (arrows) in the trunk lid.
4. Loosen two nuts (1).
5. Use a screwdriver to turn the safety bracket counterclockwise, see fig. Use a screwdriver to turn the safety bracket and secure it in that position.
6. Remove the bracket with the lock cylinder from the trunk lid (1), see fig. Using a screwdriver to turn the safety bracket.
7. Remove the lock cylinder from the bracket.
Installation
1. Using a screwdriver blade, pry the safety clip counterclockwise again (see fig. Using a screwdriver to turn the safety bracket) and secure it in this position.
2. Install the lock cylinder into the bracket.
3. Install the bracket with the lock cylinder on the handle plate and fix it until you hear a clearly audible click.
4. screw nuts (1) see fig. Location of electrical connectors (arrows) in the trunk lid.
5. Connect the lock opening rod.
6. Connect electrical connectors.
7. Reinstall the trunk lid trim.
Visitor comments