



Adjustment of the parking brake is only necessary after removal and installation:
- drive cables;
- rear wheel brake caliper/shoe guide;
- rear wheel brake discs.
Adjustment
1. Release the parking brake.
2. Remove the center console, see the corresponding chapter.
3. Press the brake pedal all the way down at least three times.
Caution: It is assumed that the foot brake is functioning properly and the system has been bled.
4. Pull the parking brake lever at least three times and release it.
Warning! Jacking up a vehicle may pose a risk of injury. It is recommended that you familiarize yourself with the safety precautions for installing a vehicle on jack stands.
5. Place the rear of the vehicle on jack stands so that the rear wheels hang freely.
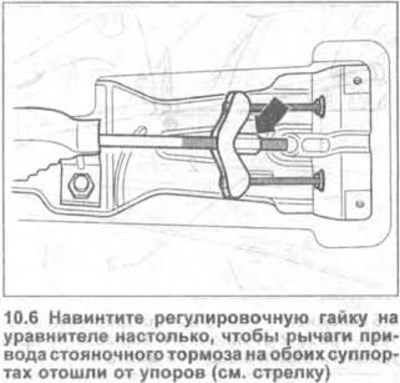
6. Screw the adjusting nut onto the equalizer until the parking brake actuator levers on both calipers move away from the stops (see arrow in illustration). The parking brake lever must be released.
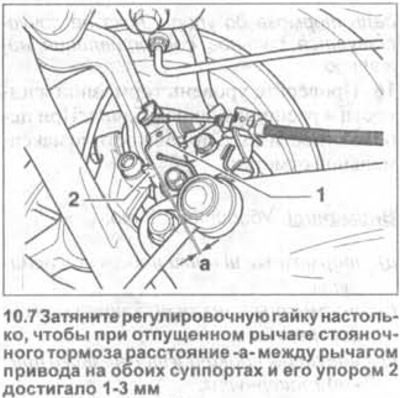
7. Tighten the adjusting nut so that when the parking brake lever is released, the distance "a" between the drive lever on both calipers and its stop 2 reaches 1-3 mm (see illustration).
8. Make sure both rear wheels rotate freely. If necessary, loosen the adjusting nut slightly.
9. Lower the car onto its wheels.
Visitor comments