



Checking the switch
1. Turn on the ignition.
2. Disconnect the plug from the switch and short-circuit the plug contacts with a piece of wire. If the brake lights come on, the brake light switch is faulty.
Removal
Attention! The brake light switch can only be installed once. After dismantling the switch, it must be replaced with a new one.
3. Remove the lower trim of the instrument panel in the driver's side footwell by releasing it from the clips, see the relevant chapter.
4. Disconnect the brake light switch plug by squeezing its lugs.
5. Turn the switch 45° to the left and remove it from the mount.
Installation
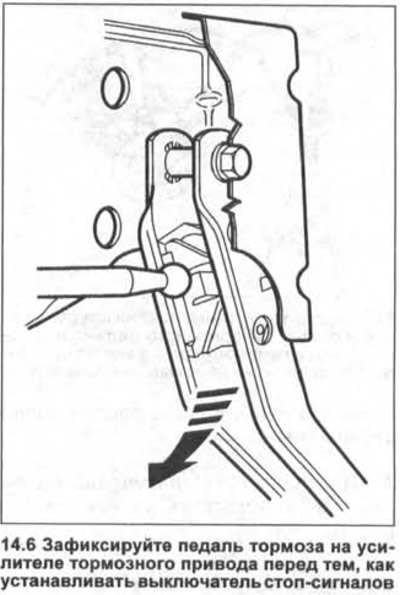
6. Secure the brake pedal to the brake booster before installing the brake light switch. To do this, position the ball head of the pushrod in front of the mounting hole and depress the brake pedal until the ball head engages and locks into the hole (see illustration).
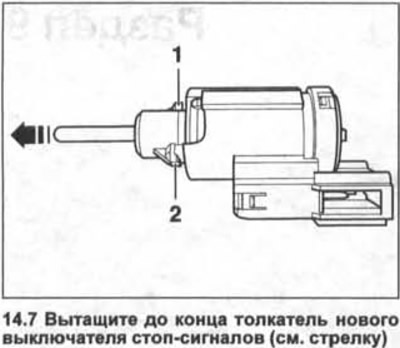
7. Pull the push rod of the new brake light switch out completely (see arrow in illustration).
View the original on this resource: www.VWManual.ru
Caution: When installing the pedal switch on the bracket, do not press it.
8. Install the brake light switch on the mounting location on the pedal bracket so that its protrusions 1 and 2 fit into the recesses (see illustration 14.7).
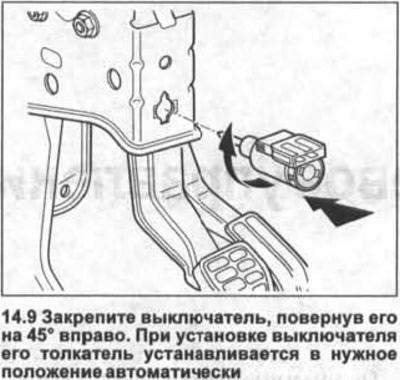
9. Secure the switch by turning it 45° to the right. When installing the switch, its pusher is set to the desired position automatically (see illustration).
10. Connect the switch plug and check the operation of the switch.
11. Check the position of the brake pedal after installing the switch.
Visitor comments