
Removing
1. Disconnect the battery.
2. Vehicles with manual transmission. Disconnect from the central console a cover of the lever of a gear change.
3. Cars with automatic transmission. Remove the spherical head from the gear lever.
4. Remove the finishing insert 1 from the pocket 3 on the front console and unscrew the screw 2 (see illustration).
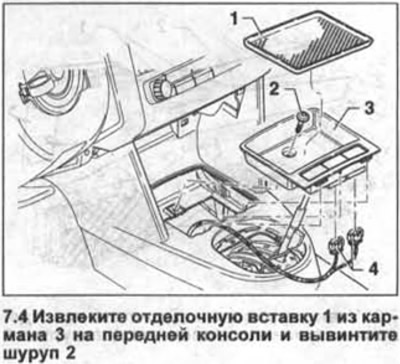
5. Remove the pocket 3 from the mountings on the center console and disconnect the plugs 4 on the back of the switches (see illustration 7.4).
6. Open the ashtray and remove the trim 1 of the cigarette lighter and the plug 2 by prying them with a plastic wedge (see illustration).
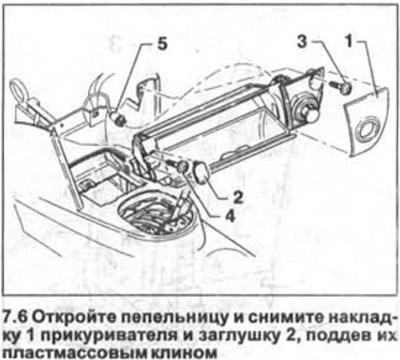
7. unscrew screws 3 and 4 and disconnect the ashtray from the center console (see illustration 7.6).
8. Disconnect plug 5 from the cigarette lighter (see illustration 7.6).
9. Open the drawer in the footwell on the driver's side and unscrew the two screws 1 from the wall of the center console (see illustration).
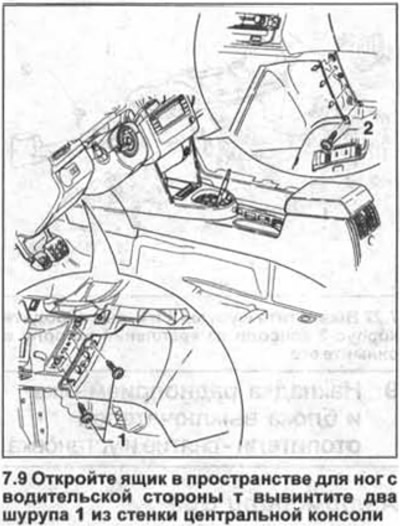
10. Unscrew the screw 2 from the side of the passenger seat footwell (see illustration 7.9).
11. Remove four screws 1 and 2 (see illustration).
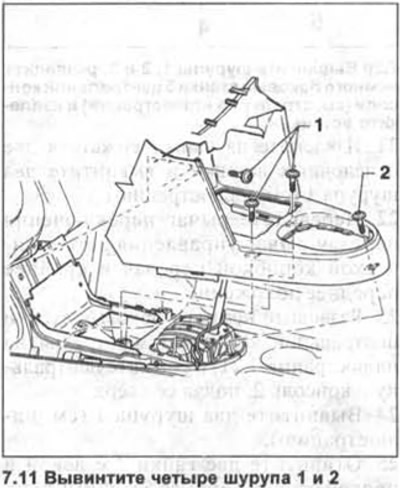
12. Move the shift lever (automatic transmission control lever) to the rearmost position and remove the front section of the center console.
13. Remove the side walls of the console in the left and right footwells.
14. Remove the front seats, see the relevant chapter.
15. Lift up the center armrest and, depending on the equipment, remove the rear pocket 1 or 2 from the center console (see illustration).
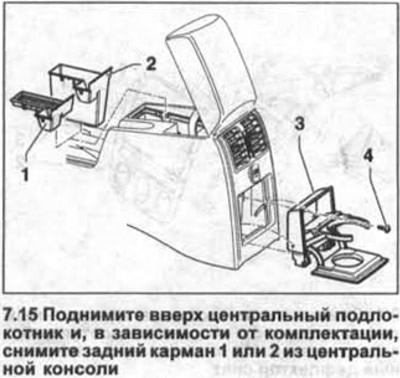
16. Slide the cup holder 3 out of the center console, unscrew the screw 4 and remove the cup holder (see illustration 7.15).
17. Squeeze out, while holding the armrest up, the two locking clips of the deflector 1 (see arrows in illustration) and remove the deflector from the center console.

18. Unscrew the screw 2 and release the trim 3 (see illustration 7.17).
19. Disconnect the plug 5 sockets 4 and remove the trim from the rear of the center console (see illustration 7.17).
20. Unscrew the screws 1, 2 and 3, part the side walls 5 of the center console a little (see arrow in illustration) and remove insert 4.
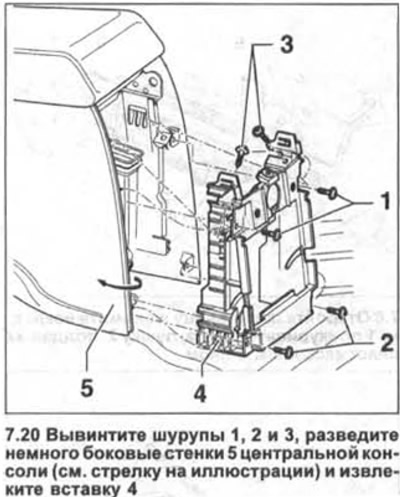
Attention! Screws 1, 2 and 3 during installation should be screwed in in ascending order of their numbering.
21. Remove the two finishing inserts from the cup holder and unscrew the two screws 1 (see illustration).
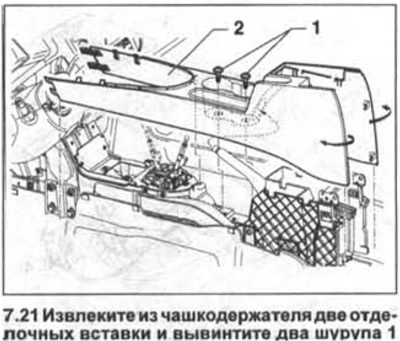
22. Move the shift lever/automatic transmission control lever to the forwardmost position.
23. Slightly spread the side walls of the center console (see arrows in illustration 7.21) and remove the center console 2 by pulling it up.
24. Remove two screws 1 (see illustration).
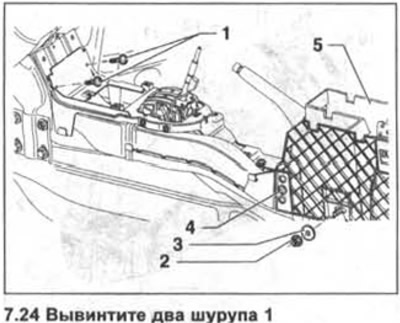
25. Unscrew the two nuts 2 on the left and right sides of the housing 5 and remove them together with the washers (see illustration 7.24).
26. Unscrew the two bolts 4 on the right and left sides and remove the body 5 by pushing it up (see illustration 7.24).
Attention! When installing bolts 4 and screws 2, screw in in reverse order, and then screw nuts 2 onto bolts 4 (see illustration 7.24).
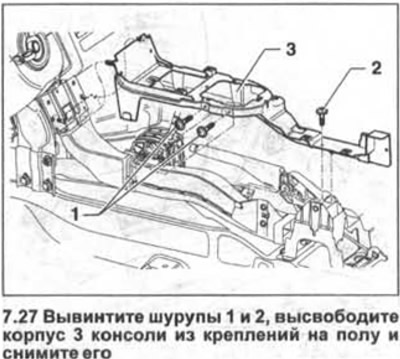
27. Unscrew the screws 1 and 2, release the body 3 of the console from the fixings on the floor and remove it (see illustration).
Installation of the center console is carried out in the reverse order of removal.
Visitor comments