

- 1 - fixing protrusion
- 2 - hand brake lever handle
- 3 - facing
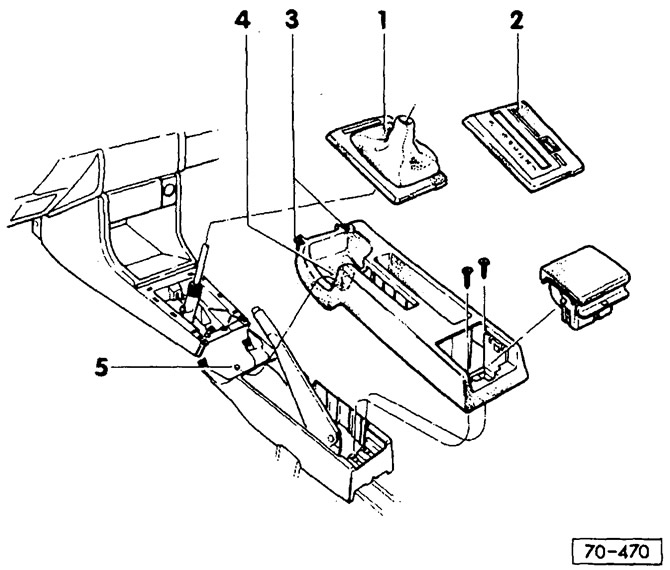
- 1 - casing
For gear lever on vehicles with manual transmission.
- 2 - casing
For gear lever on vehicles with automatic transmission.
- 3 - locking tabs
- 4 - guide
- 5 - T-shaped pin
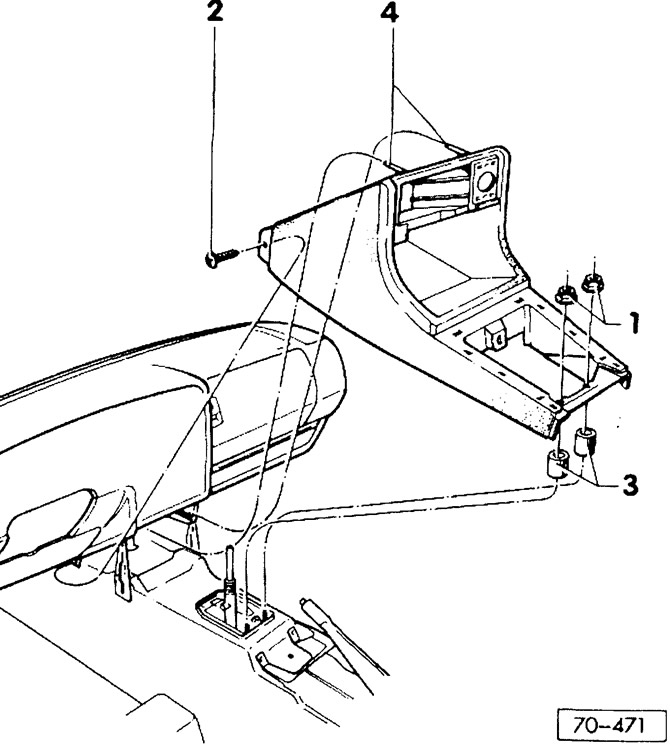
- 1 - fastening nuts
- 2 - Phillips head screws
- 3 - remote bushings
- 4 - holding pins
Removing
Pull the handbrake lever up.
Unfasten and remove the handle from the hand brake lever. To do this, insert a flathead screwdriver between the rear elevation of the handle and the locking lug and turn the screwdriver slightly towards the locking lug while removing the handle.
By turning the screwdriver, the locking lug is squeezed out of the hole, and the handle is released. To remove the handle, you can also pull the locking lug down with tongs while removing the handle from the lever.
Remove the handbrake lever cover.
Unscrew the gear lever knob.
Unclip the shift lever cover and remove it upwards.
Pull out the rear ashtray and remove the 2 Phillips head screws at the back of the console.
Unfasten the ashtray lighting.
Raise the console at the rear, press down the 2 locking tabs -3- at the extension of the center console (figure 70-470) and move back the extension of the console to remove.
Loosen the 2 nuts securing the front section of the center console.
Loosen one Phillips head screw at front left and right.
Raise the rear console slightly and pull back.
Disconnect the electrical connectors and remove the center console.
Installation
Connect electrical connectors.
Check if there are spacers on the studs, if not, install them.
Insert the center console with the retaining pins into the instrument panel and screw down.
Push the extension of the guide console -4- onto the T-pin, see figure 70-470.
Fix the console and screw on from behind.
Attach the ashtray lighting and insert the ashtray.
Install and secure the shift lever cover.
Install trim on handbrake lever.
Put on and fix the handle of the hand brake lever.
Visitor comments