
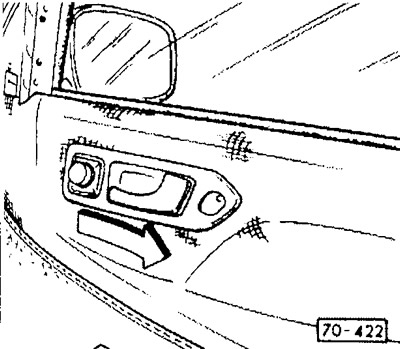
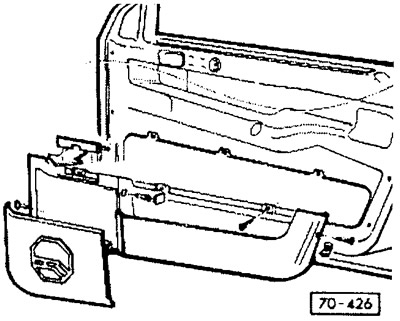
Car models up to 9/93
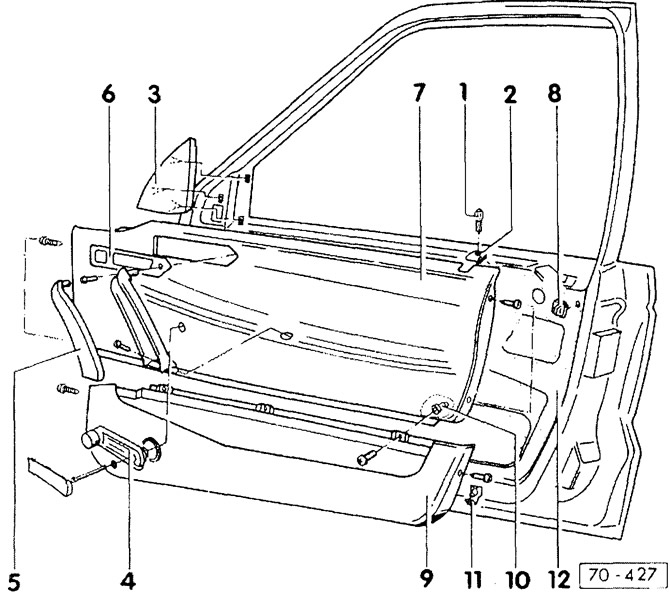
- 1 - lock button
- 2 - socket
- 3 - decorative overlay
- 4 - power window handle
Position with fully closed window glass: 45°±12°.
- 5 - inner door handle
- 6 - decorative overlay
- 7 - lining
Fits into door pocket.
- 8 - lining clamp
- 9 - front door pocket
Dismantling is only possible with the cover removed.
- 10 - insert nut
- 11 - holding corner
- 12 - soundproof gasket
Car models since 10/93
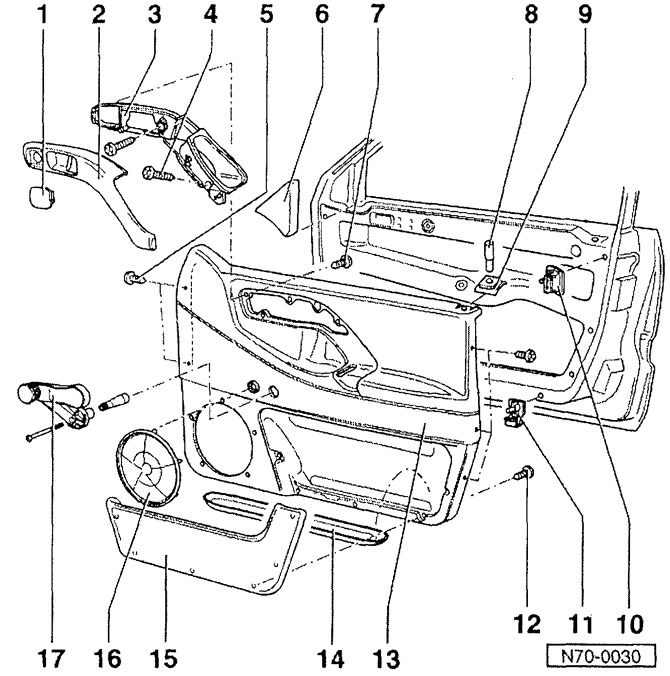
- 1 - decorative overlay
Place for electric mirror drive.
- 2 - casing (on clamps)
- 3 - handle body
- 4 - Phillips head screw
- 5 - Phillips head screw
- 6 - decorative overlay
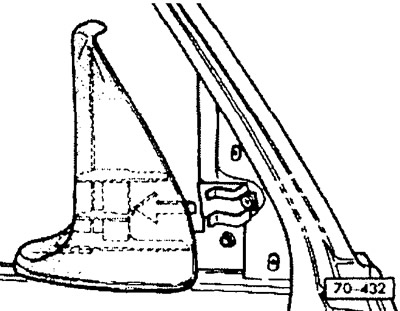
Removal: remove from the door frame in the right corner.
- 7 - Phillips head screw
- 8 - lock button
Removal: unscrew from the rod.
- 9 - socket
Removal: slide inward.
- 10 - lining clamp
Removal: push the expansion pin.
- 11 - holding corner
- 12 - Phillips head screw
- 13 - facing
Removal: push up and remove.
- 14 - rubber insert
- 15 - front door pocket
Dismantling is only possible with the cover removed.
- 16 - speaker cover
- 17 - power window handle
Position with fully closed window glass: 45°±12°.
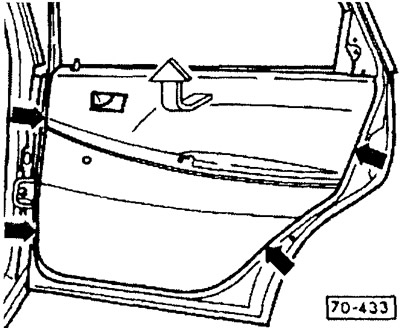
Removing
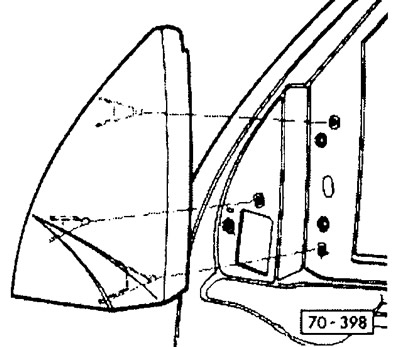
Front door: remove the triangular trim on the right corner from the door frame.
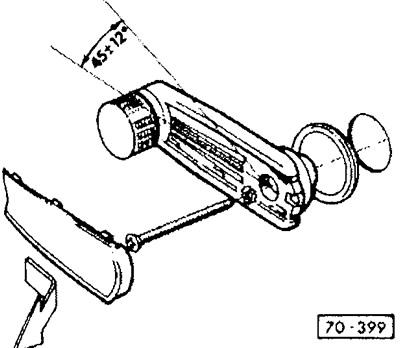
Remove the power window handle, for which unfasten the decorative trim in the direction of the arrow.
While holding the power window handle, unscrew the Phillips head screw and remove it together with the washer. Remove the power window handle from the axle.
Remove the plastic lining from the handle shaft, paying attention to its installation position.

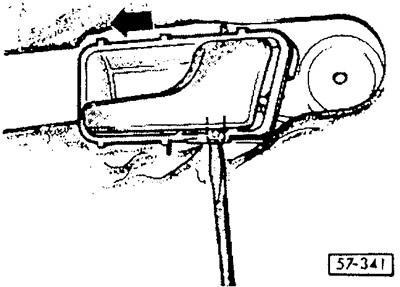
With a wide screwdriver or a knife, carefully press the casing from the bottom of the inside door handle.
Loosen screws.
Up to 9/93: Pull the door lock lever slightly and unfasten the trim in the direction of the arrow.
Disconnect the multi-pin connector if there is an electric mirror drive.
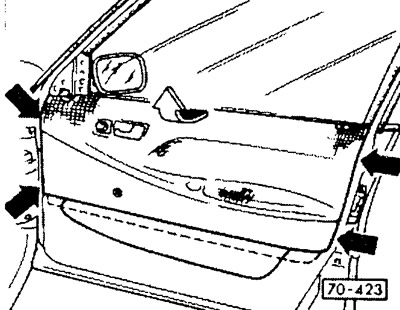
Remove cross head screws (arrows).
Remove the lining from the inner seal of the window shaft.
Disconnect the multi-pin connector if there is an electric window regulator.
Pull trim panel upwards out of door pocket.
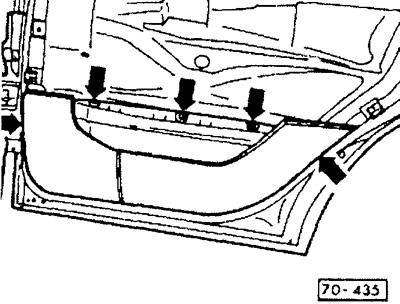
Removing the door pocket
Depending on the model and equipment of the car, different door pockets are installed.
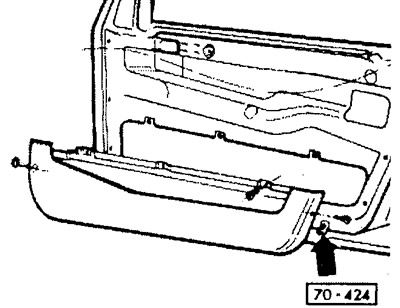
Unscrew the Phillips head screw and remove the pocket from the three corners in an upward motion (arrow).
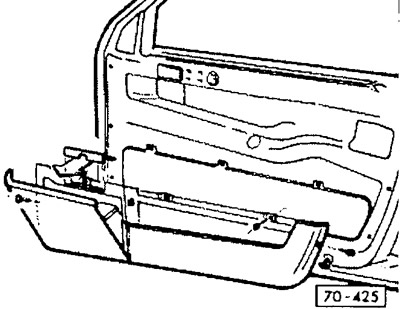
Open the valve and pull out the cover in the direction of the arrow.
Unscrew the Phillips head screw and remove the pocket from the three corners in an upward motion (arrow).
Use a narrow screwdriver to press the cover from the rear end of the loudspeaker housing. Loosen the screw.
Remove the screw from the front end of the loudspeaker.
Tilt the loudspeaker down. Disconnect speaker plug.
Pull the cover together with the loudspeaker from the plastic hinge forward.
Unscrew the Phillips head screw from the rear end of the pocket, tilt the pocket down and remove it from the three corners in an upward motion.
If the inner door handle needs to be removed, press the retaining bar out of the hole in the inner door bulkhead.
Press the inner drive in the direction of the arrow out of the mounting holes.
Backdoor
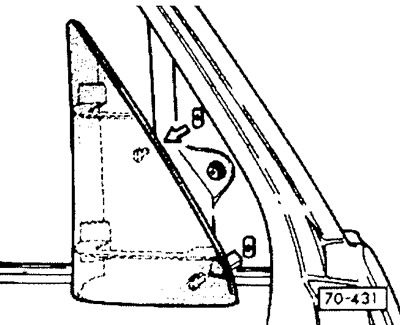
Cars with a pronounced angle between the rear window and the luggage compartment: in the right corner, remove the decorative trim from the door frame.
Model Variant: Remove trim strip from door frame in direction of arrow.
One-piece cladding: Remove the cross head screws (arrows). Pull the lining out of the inner seal of the window shaft and remove it from the two retaining brackets in an upward direction.
With a two-piece cladding: Unscrew the Phillips head screws (arrows). Pull the trim out of the inner seal of the window shaft and pull the trim out of the door pocket towards the top.
Removing the soundproofing pad. First unfasten the retaining clips of the screws securing the door trim. To do this, knock out the expansion pins in the center of the clamps with a 3 mm punch and remove the clamps. After that, remove the expanding pins from the door frame; when installed, the pins can be reused.
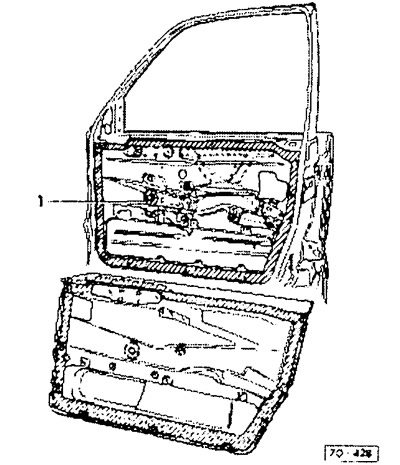
Attention: The soundproof pad is designed to protect the car interior from noise, water penetration and drafts. Therefore, it is always necessary to glue the gasket carefully and without folds. For gluing, a film with a double-sided adhesive coating is used, for example VW-AKL 440025 or AKL 44001 B. Beforehand, thoroughly clean the surface of the remaining adhesive layer and stick the film in the direction from bottom to top.
The bonding surface is shaded in the figure.
Note: Tape off the hole for the power window pin -1- around the circumference.
Installation
Glue the soundproof gasket without folds.
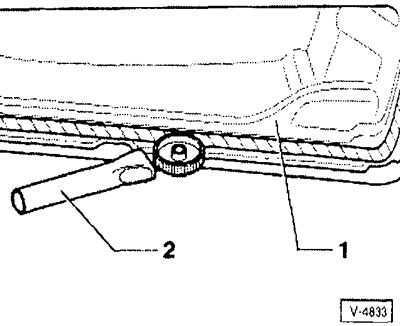
Press the soundproofing gasket -1- against the door around the perimeter using the pressure roller -2-.
Insert the retaining clips into the door clips and firmly drive in the expansion pins.
Hook the door pocket onto the retaining brackets, press up and screw down. If it has been removed, fix the loudspeaker, push it up and screw it on after connecting the multi-pin plug.
If removed, fit inside door handle and secure.
If equipped, connect the power window multi-pin connector.
Fit the inner door trim, press it against the seal of the window shaft and screw it down. Pay attention to the firmness of the installation of the guide for the door lock button.
Slightly pull the internal door lock actuator and attach the decorative trim, having previously connected the multi-pin plug of the electric mirror actuator.
Attach the inner door handle first at the bottom, then at the top and screw down. Press the decorative overlay and drive it into place with a blow of the palm of your hand,
Put the power window handle on the axle so that when the window glass is closed, it points upwards at an angle of 45°±12°. Pre-install the plastic ring.
Fasten the handle firmly with a cross-slotted screw on the head, placing a washer under it.
Put a decorative overlay on the back of the handle and fasten it.
Attach a triangular decorative trim at the attachment points.
Visitor comments