



Removal
1. Disconnect the battery.
2. Remove the gear shift boot from the center console.
3. Remove the parking brake lever cover.
4. Remove the two trim inserts 1 from the console pockets (see illustration).
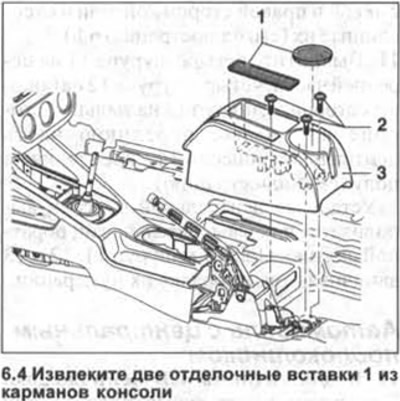
5. Unscrew the three screws 2 and release the rear part of the console 3 from the mount on the bottom (see illustration 6.4).
Then push the console forward to remove it from the parking brake lever.
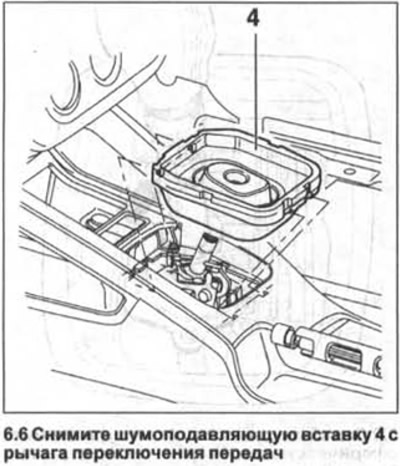
6. Remove the noise-reducing insert 4 from the gear shift lever (see illustration).
7. Unscrew the two screws 5, remove the pocket 6 from the center console and disconnect the switch plugs on the back of the pocket (see illustration).
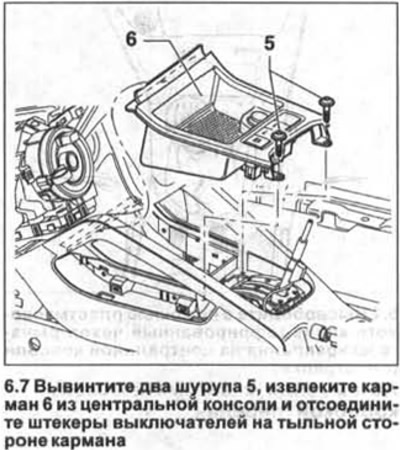
Please note: Depending on the configuration, there may be an ashtray instead of a pocket on the front of the center console.
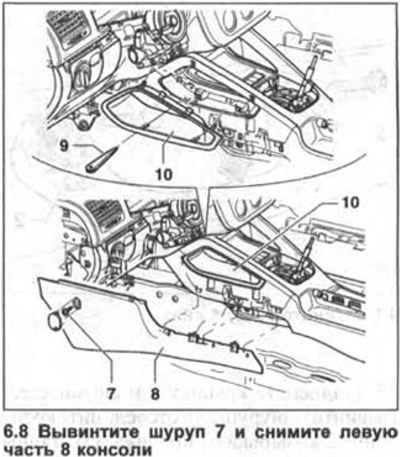
8. Use a screwdriver to pry up and remove the screw cap on the side of the console. Then unscrew screw 7 and remove the left side 8 of the trim (see illustration).
9. Remove the right side of the console in the same way.
10. Release the pads 10 on the left and right sides of the console from the clips using a plastic wedge 9 and disconnect them (see illustration 6.8).
11. Unscrew the four screws 11 on the front, four screws 12 on the sides, screw 13 on the back and remove the front part of the center console 14 from the mounting on the floor (see illustration).
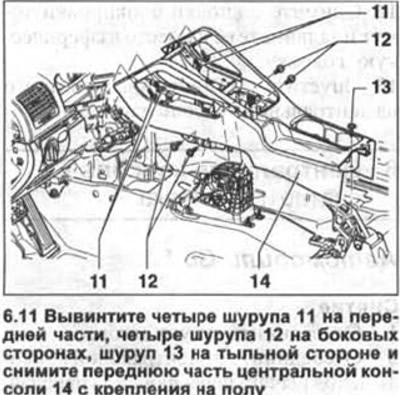
The installation of the central console is performed in the reverse order of removal. In this case, screws 11, 12 and 13 are screwed in the order of their numbering.
Cars with central armrest
12. CD changer equipped. Lift the central armrest up and remove the CD changer.
13. CD changer assembly: Unscrew the front bolt from the CD drawer and remove the trim insert from the pocket on the rear of the center console.
14. Refrigerator assembly. Lift the center armrest upwards and remove the trim insert from the refrigerator compartment at the rear of the center console 1 (see illustration).
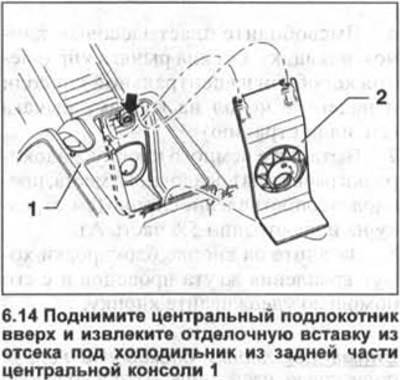
15. Release cover 2 from the mount and unscrew the bolt from the compartment under the refrigerator (see arrow in illustration 6.14).
16. Pull out the cup holder 3 from the center console, unscrew the two screws 4 (see illustration) and pull out the stand.
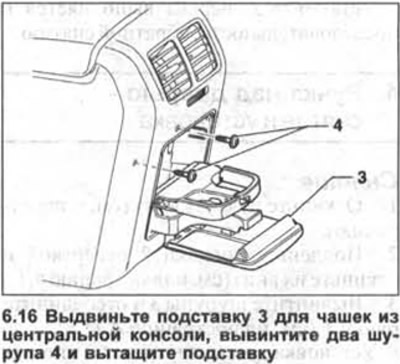
Attention! When installing, the stand should first be inserted into the mounting place in the console, then pulled out and then screwed in two screws.
17. Release panel 5 together with the rear air vent from the lower fasteners (see arrow in illustration).
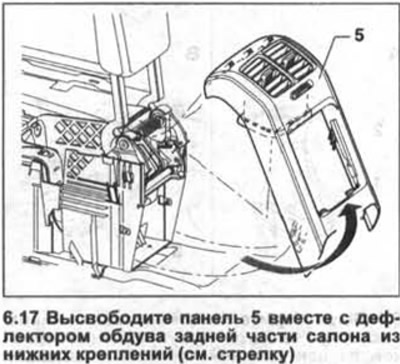
18. Release panel 5 from the upper fasteners and remove it from the rear of the console (see illustration 6.17)
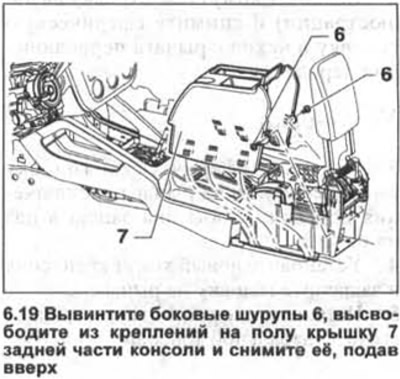
19. Unscrew the side screws 6, release the cover 7 of the rear part of the console from the fasteners on the floor and remove it by pushing it upwards (see illustration).
20. Remove the front console.
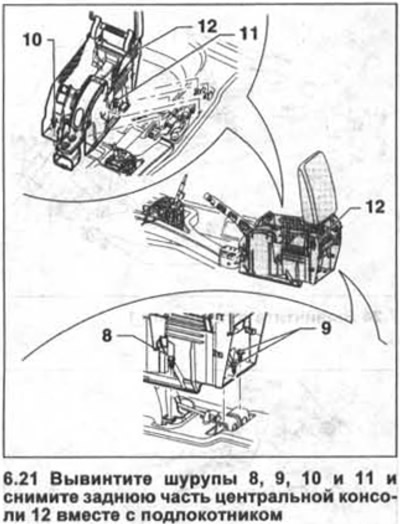
21. Unscrew screws 8, 9, 10 and 11 and remove the rear part of the center console 12 together with the armrest (see illustration).
Visitor comments