



Cars with manual transmission
Removal
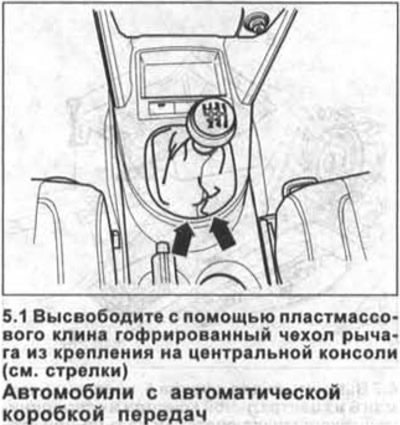
1. Using a plastic wedge, release the lever bellows from its mounting on the center console (see arrows in the illustration), lift it up and throw it over the lever.
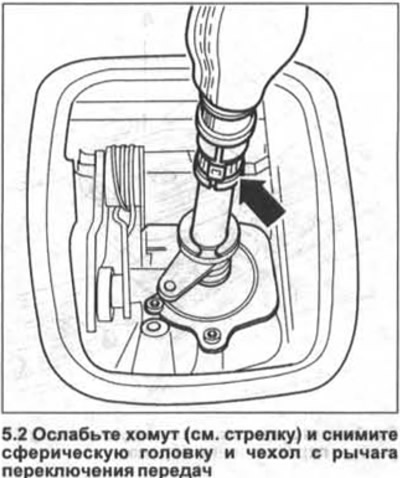
2. Loosen the clamp (see arrow in illustration) and remove the ball head and boot from the gear shift lever.
Installation
3. Place the ball head together with the boot on the gear shift lever so that it fits into the groove on the lever.
4. Install a new mounting clamp and secure the head to the lever.
5. Pull the cover over the lever and secure it to the center console.
Cars with automatic transmission
Removal
6. Use a plastic wedge to release the cover I of the gearbox control lever boot from the center console and place the boot on the lever head (see illustration).
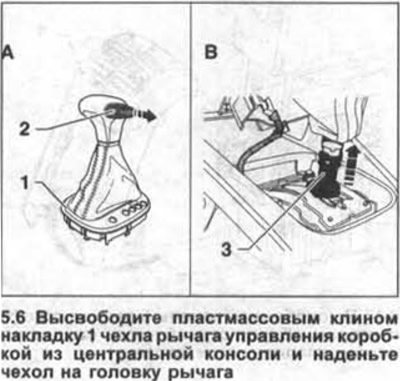
7. Pull the lever lock button 2 slightly out of its seat, overcoming the resistance to removal (see arrow in illustration 5.6 part A).
8. Tighten the harness clamp onto the lock button and use it to hold the button.
Caution! The lock button must not be completely removed from its seat in the ball head or pushed back completely.
9. Move the stopper 3 under the spherical head on the lever upwards and remove the head from the lever (see arrow in illustration 5.6 part B).
Installation
10. Place the spherical head on the lever so that the locking button is on the left side, towards the driver's seat.
11. Fix the head on the lever and press the stopper down.
Attention! The locking button must be extended and locked when installing the head on the lever.
12. Remove the clamp from the locking button and push it back into place into the ball head.
13. Lower the cover down and secure it to the center console with the cover.
Visitor comments