



a) Apply the handbrake. Raise the front of the car and support it on stands.
b) Remove the generator wire clamp and disconnect the exhaust pipe (1.1 and 1.3 l engines).
c) Drain the engine oil into a suitable container. Clean the drain plug and tighten it to the specified torque. The plug gasket must be replaced.
d) Unscrew the bolts and separate the oil filter from the cylinder block (photo 1.151). If the gasket is stuck, it can be cut with a knife or lifted with a screwdriver
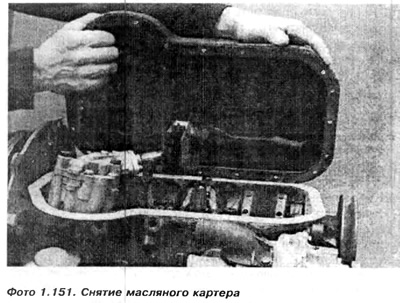
1. Slowly drive the screwdriver in at the height of the holes after the bolts that secure the crankcase, between the sealing surface of the crankcase and the gasket. This is important, because when you drive the screwdriver in and lift it, the crankcase will be slightly curved. We are interested in the possible deformation to occur in places where the crankcase is pressed most tightly against the gasket, and also to preserve the sealing surface of the engine body, which is an element much more valuable than the oil pan, which could even be replaced if necessary. There is no need to rush when separating a strongly stuck oil pan. After driving the screwdriver in, you need to lift the crankcase, gradually increasing the force. It turns out that even acting with a relatively small force for some time, we will get the same effect as when acting with a much greater force, but in a short period of time. We must remember that the less the force, the less the deformation of the oil pan. If one screwdriver is not enough, we drive another one at the height of the hole or look for another place where the crankcase is not held so tightly. Such a place may be a place where oil can leak from under the oil crankcase.
2. After tearing off, the crankcase must be cleaned of the gasket residue and immediately aligned. Check the alignment effect by placing the crankcase on a flat surface, for example, an engine housing cleaned of the gasket residue. The places that turned out to be concave are aligned outward with a hammer.
Installation of oil pan
3. Clean the sealing surfaces of the oil pan and cylinder block.
4. Wash the oil pan.
5. Install a new gasket. Then place the crankcase on the holes, insert the bolts and tighten them crosswise to evenly press the crankcase.
If necessary, you can replace the two oil pan bolts near the flywheel with socket head bolts. This will make it easier to disassemble the pan again if the engine is in the car.
6. Fill the engine with oil.
7. Secure the generator wire to the oil pan clamp and tighten the exhaust pipe (1.1 and 1.3 l engines).
8. Lower the vehicle from the stands.
Visitor comments