
Removing
Before removing the automatic transmission control unit J217, the identification data of the control units and the coding of the old control unit must first be requested.
NOTE: To avoid damage to the front lining under the front right seat, the lining retainers are shown in Figure 3.62.
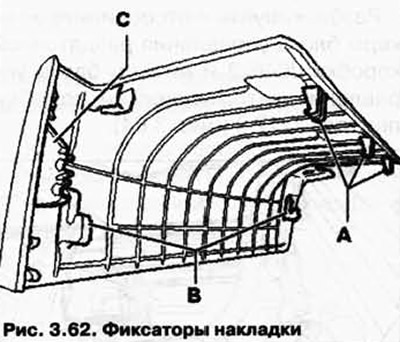
Clips A cling to the transverse brace under the seat. Lightly press the pad down and slide it back at the same time. Hold the trim in this position and, in the area of the clips A, pull it up to unlock it.
Clips B will fit into slots in the cross brace in front of the seat. You can also unlock them by pushing down and pulling forward.
Clips C are clipped into the side trim of the seat, by pulling them forward, the trim can be unclipped.
Place the seat in the rear, up position.
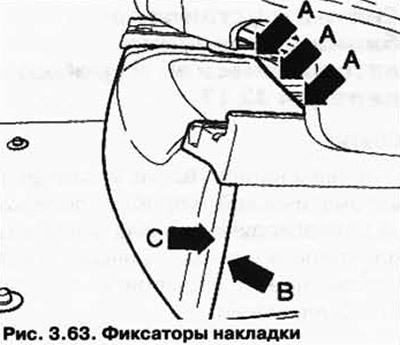
Unlock the latches «A» pressing down and simultaneously sliding back. In this position, pry off the trim in the area of the clamps «A».
Push the pad down and pull it forward at the same time. This unlocks the locks «IN» and «WITH» (pic. 3.63).
Place the seat in the forward, up position.
Be sure to follow the battery disconnection sequence.
Disconnect the ground terminal from the battery with the ignition off.
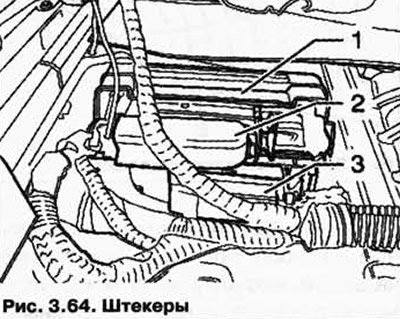
Housing 1 houses the automatic gearbox control unit J217 and the transfer case control unit J646.
Unlock and disconnect the connectors of the transfer box control unit J646 2 and the connector of the automatic gearbox control unit J217 3 (pic. 3.64).
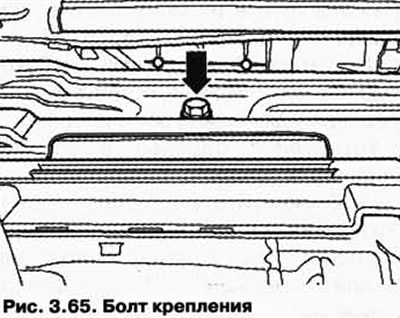
Unscrew bolt 1 and remove the housing with control units from the mount (pic. 3.65).
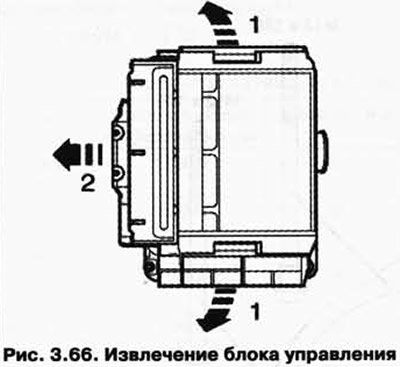
Pull the latches out 1 and remove the control unit from the housing 2 (pic. 3.66).
Installation
Installation is carried out in the reverse order. In doing so, the following must be taken into account.
Check the old coding and code the new control unit.
Install the seat upholstery.
Carry out work operations after connecting the battery.
Visitor comments